SSDs (solid-state drives) store data in small storage units called blocks. Each block typically contains 512 bytes to 4 kilobytes of data. A bad block refers to a storage block that has failed and can no longer reliably save data. Bad blocks can occur due to issues like program/erase failures, charge leakage, and read disturbances. If left unaddressed, bad blocks can lead to irretrievable data loss and SSD failure. It is critical to detect and manage bad blocks to maximize SSD longevity and data integrity. This article provides an overview of how to diagnose, fix, and prevent bad blocks on SSDs.
Diagnosing Bad Blocks
There are a few ways to check an SSD for bad blocks. On Windows, you can use a tool like Victoria to scan for bad sectors. Victoria is a free utility that will perform a full scan of your drive and identify any bad blocks. You can also use the built-in CHKDSK utility in Windows, though this is not as thorough as a dedicated tool like Victoria.
On Linux, the badblocks command can be used to test for bad blocks. Simply run ‘badblocks -v /dev/sda’ replacing sda with your drive name to start a full scan. The -v flag displays the progress. Badblocks will map out any bad blocks it finds.
Watch for symptoms like corrupted data or programs crashing unexpectedly – this can indicate bad blocks are causing problems. You may also see your drive slowing down during reads/writes as it tries to remap bad blocks. If you are seeing these types of issues, it’s a good idea to thoroughly test your SSD for bad blocks using Victoria or badblocks.
Understanding the Causes
Bad blocks or sectors on an SSD can occur for several reasons, including:
Manufacturing defects – Due to imperfections in the manufacturing process, some NAND flash memory cells or blocks may be defective right from the start. This can lead to bad blocks that are inaccessible or prone to failure.
Electrical issues – Power surges, power failures, or voltage spikes can damage NAND flash memory cells, corrupting data and introducing bad blocks. Faulty power supplies, cables, or connectors can also impact SSD components or firmware.
Firmware problems – Bugs or incompatibilities in an SSD’s firmware can prevent it from correctly mapping out and avoiding bad blocks on the drive. Firmware updates may address such issues.
Excessive writes – Repeated writes and erasures wear down NAND flash memory cells over time. Eventually, with enough program/erase cycles, a block can fail and be marked bad. This occurs faster in TLC and QLC SSDs than in MLC models.
Fixing Bad Blocks
There are several steps that can be taken to try to fix bad blocks on an SSD. First, you can try low-level formatting using the SSD manufacturer’s tool or a utility like hdparm. This erases all data and remaps all sectors, which can help remap out bad blocks to spare sectors. However, low-level formatting does not actually repair bad blocks and may ultimately have little effect.
Another option is to try reassigning bad blocks using a utility like Victoria for Windows or smartmontools for Linux. These tools can identify bad blocks and mark them to be remapped to spare sectors. This is similar to what the SSD’s firmware already does automatically, but may help force the remapping process. Again, this does not actually fix the bad blocks themselves.
Finally, updating the SSD’s firmware can sometimes help improve bad block handling and mapping. Newer firmware versions may have improved algorithms for managing bad blocks. Check the manufacturer’s website for the latest firmware available. Just make sure to back up your data first before updating firmware.
Ultimately, bad blocks on an SSD cannot be repaired. The drive relies on spare blocks and firmware management to map out any bad blocks. These steps may help improve the mapping process, but bad blocks themselves remain permanently damaged.
Preventing Bad Blocks
There are several best practices you can follow to help prevent bad blocks from occurring on an SSD:
Maintain a Good Power Supply
Having a clean, stable power supply can help prevent electrical spikes or dips that could potentially damage an SSD. Consider using an uninterruptible power supply (UPS) if you experience frequent power fluctuations.
Avoid Excessive Writes
Frequently rewriting data to the same SSD cells can wear them out over time. Try to avoid applications or workflows that constantly overwrite data if possible. Also, enable the TRIM command in your OS to help optimize write patterns.
Keep Firmware Updated
Updating to the latest SSD firmware from the manufacturer ensures compatibility fixes and performance enhancements to help avoid issues.
Monitor SSD Health
Use disk utility tools like CrystalDiskInfo to periodically check SSD health metrics like lifespan and bad sector counts. This allows you to identity potential problems early.
Data Recovery Options
If your SSD has developed bad blocks and you have critical data stored on it that you need to recover, you have a few options:
First, backup your data regularly to prevent data loss from bad blocks or other issues. Having a recent backup on another drive allows you to easily restore your data if needed.
Second, you can try using data recovery software like Disk Drill to scan the drive and extract recoverable data from it. Data recovery software can often read around bad blocks and recover data that would otherwise be inaccessible.
Finally, for critical business or personal data, you may need to send the SSD to a professional data recovery service. They have specialized tools to repair drives and manually recover data from them. This can be expensive but is sometimes the only option for irreplaceable data.
The key is to not overwrite the SSD once you discover bad blocks, as this can make data recovery impossible. Move quickly to recover or backup your data before attempting any repairs or replacement.
When to Replace an SSD
There are a few indications that it may be time to replace your SSD due to bad blocks:
If you are experiencing many recurring bad blocks, this typically means the drive is nearing the end of its lifespan and replacement should be considered. SSDs use wear leveling to distribute writes across all blocks, but once a large number of blocks go bad, the workload cannot be efficiently distributed anymore.
Experiencing a noticeable performance drop can also be a sign of too many bad blocks. As more blocks go bad, the SSD controller has to work harder to remap data and manage the bad areas, reducing speed.
Lastly, if the drive is out of warranty and has developed bad blocks, replacement is recommended since the manufacturer will not cover a failing drive. Replacing an SSD once it is out of warranty and has bad blocks can avoid further data loss before total failure.
Overall, if you are seeing the signs of significant bad blocks, performance issues, and an expired warranty, it’s time to replace an aging SSD rather than trying to repair bad sectors which is not possible.
Choosing a Replacement SSD
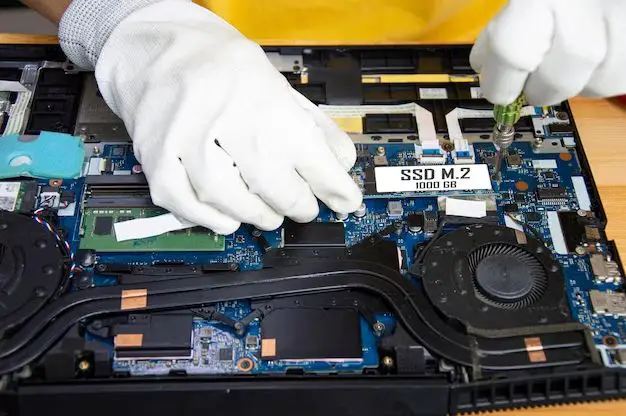
When replacing a bad SSD, it is crucial to choose a compatible replacement drive. The new SSD needs to match the physical size and interface of the original drive. Most laptops take 2.5″ SATA SSDs, while many desktops use the M.2 form factor and interface. Refer to your laptop or PC’s manual to identify the correct form factor and interface for the SSD slot.
You’ll also want to consider brand reputation and warranty when selecting a replacement SSD. Crucial (https://www.crucial.com/articles/about-ssd/how-to-find-an-ssd-for-your-laptop) and Samsung are well-known for quality drives with strong warranties. Compare specs like endurance ratings, which indicate the drive’s expected lifespan. An SSD with a high terabytes written (TBW) rating will typically last longer.
Finally, match or exceed the capacity of your original SSD. Go for at least 500GB to 1TB for most uses today. With an understanding of form factor, interface, specs, warranty, and capacity needs, you’ll be equipped to select the ideal SSD replacement.
Installing the Replacement SSD
Before installing a new SSD, it’s crucial to back up your data to prevent data loss. Use backup software or manually copy important files to an external hard drive or cloud storage.
Once your data is backed up, you can physically install the new SSD. Refer to your computer or laptop manual for steps to access the hard drive bay and swap out the old drive. In a desktop PC, you’ll need to open the case and connect the SSD to the motherboard using SATA cables. For a laptop, you’ll likely need to remove the bottom panel to access the drive bay.
With the new SSD installed, boot into the BIOS and enable AHCI mode if it’s available to allow the computer to detect the SSD. Then boot into Windows. Go to Disk Management and initialize the new SSD by right-clicking the disk and selecting Initialize. Create a new volume on the disk. Format it to NTFS for Windows or APFS for Mac.
Finally, you can migrate your applications and data to the new SSD. Use cloning software or reinstall applications manually. Transfer important files from your backups. Once fully migrated, format the old SSD or HDD if keeping it for external storage. The new SSD should now be functioning as the primary drive.
Conclusion
In summary, SSDs can occasionally develop bad blocks, which are sectors that can no longer reliably store data. This is most commonly caused by write/erase cycles, but other factors like overheating or physical damage can also contribute. While bad blocks cannot be repaired, their impact can be minimized by enabling TRIM, avoiding completely filling up the drive, updating firmware, and moving cache files to a RAM disk.
If the number of bad blocks exceeds the spare capacity of the SSD, data loss and performance problems can occur. At that point, replacing the SSD may be necessary. When replacing an SSD, choose a model with good endurance ratings from a reputable manufacturer. Be sure to clone the old drive or do a clean OS install on the new drive for optimal performance.
With proper care and maintenance, SSDs can deliver many years of reliable performance. Monitoring tools like S.M.A.R.T. data and SSD wear indicators can provide early warning about emerging issues. Overall, a small number of bad blocks is normal, but consistent monitoring and prevention steps will help maximize SSD lifespan.