What are Bad Blocks?
Bad blocks, also referred to as bad sectors, are areas on a hard disk drive (HDD) or solid state drive (SSD) that can no longer be read from or written to due to physical damage or corruption. They occur when the physical surface or magnetic substrate of the disk platter becomes damaged, preventing the drive from being able to access the data stored in those sectors (Bad block definition).
There are two main types of bad blocks:
- Physical bad blocks – Caused by physical damage to the disk surface, often from manufacturing defects or aging of the hardware.
- Logical bad blocks – Caused by software errors or corruption of the file system, without physical damage.
Bad blocks can impact performance as the drive may take longer to read or write data, since it has to work around the inaccessible areas. They can also lead to data loss if critical data is stored in a bad sector. The more bad blocks that accumulate, the higher likelihood the drive will eventually fail.
All storage drives come with some extra reserved space that can remap bad blocks transparently. However, if the number of bad blocks exceeds the spare capacity, it will become impossible to access portions of the drive, leading to file system and data corruption.
Identifying Bad Blocks with Chkdsk
Chkdsk is a built-in Windows command line tool that can scan a drive and identify bad blocks or sectors. It works by going through each sector on the drive and checking for errors or inconsistencies 1. If it detects a bad block, it will mark the sector as “bad” so the operating system knows not to use it. Chkdsk has the ability to detect two types of bad blocks:
Logical bad blocks – These are software errors that occur when the file system structures or metadata for a sector become corrupted. Chkdsk can identify and repair logical bad blocks.
Physical bad blocks – These are hardware errors that occur when the physical surface of the disk platter is damaged or defective. Chkdsk can detect physical bad blocks but cannot repair them.
When chkdsk scans the drive, it will output any bad blocks it finds to a log file. The log will identify the cluster number and sector locations of any bad blocks. This helps identify the location, severity and scope of bad blocks on the drive.
In summary, chkdsk provides a simple way to scan for two types of bad blocks – logical and physical. Its detection capabilities allow you to assess the health of a drive and determine if repairs or replacement may be necessary.
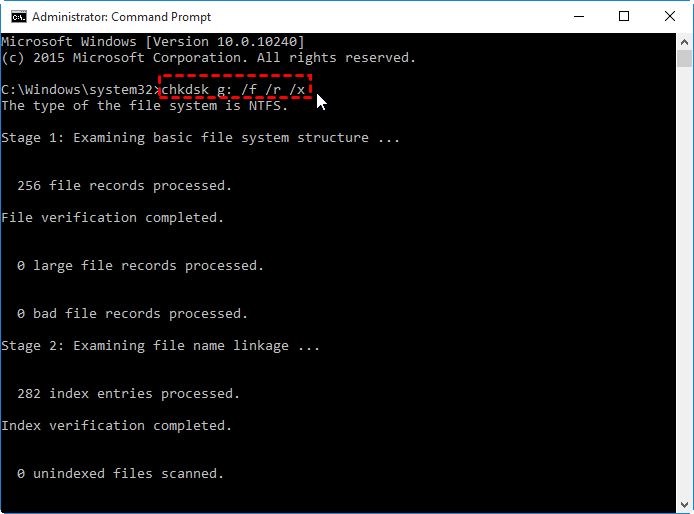
Running Chkdsk
Chkdsk is a built-in utility in Windows that scans your hard drive for errors and fixes logical file system errors. To run Chkdsk on Windows:
- Open the Start menu and type “cmd” to open the Command Prompt.
- Type “chkdsk C:” and press Enter to scan drive C. Replace C with the letter of the drive you want to scan.
- Chkdsk will provide a message asking if you want to schedule it to run on next reboot. Type “Y” for yes and press Enter.
- Restart your computer. Chkdsk will run before Windows starts up and scan the drive for errors.
On MacOS, there is no direct equivalent to Chkdsk. However, you can verify and repair disks using Disk Utility (located in Applications > Utilities). To run Disk Utility:
- Open Disk Utility and select the disk (not volume) from the left sidebar.
- Click the “First Aid” tab and click “Verify Disk” to scan for errors.
- If errors are found, click “Repair Disk” to fix them.
You can also verify disk integrity from the command line using diskutil verifyVolume or fsck (cite: https://discussions.apple.com/thread/2241666). But Disk Utility provides an easier GUI for most users.
Understanding Chkdsk Output
When chkdsk scans your drive, it generates a status report detailing any errors or issues discovered. Understanding how to interpret this report is key to identifying potential bad blocks.
Some key things to look for in the chkdsk output include:
- “X bad sectors” – This indicates the number of bad sectors or blocks detected on the disk.
- “X could not be read” – This means chkdsk attempted to read certain sectors but was unable to access the data.
- “X non-contiguous files” – This points to file fragmentation that could be impacted by bad blocks.
- “Incorrect cluster size” – Cluster mapping errors often stem from bad blocks.
Sections like “CHKDSK is verifying files (stage 1 of 5…)” show the chkdsk stages during which bad blocks can be found. If you see “bad block” explicitly called out in the report, those sectors require attention.
Follow up any potential bad block warnings by checking logs like Event Viewer for drive errors. Comparing chkdsk scans over time can also reveal growing bad block trends.[1]
Repairing Bad Blocks
Chkdsk can attempt to repair bad blocks on a hard drive using the /F parameter. This tells chkdsk to fix any errors found on the volume. Specifically, it will:
- Repair invalid file system entries
- Recover readable information from bad sectors
- Fix FAT and NTFS file system errors
Chkdsk will attempt to repair the bad blocks by remapping them to spare good blocks on the drive. This prevents the OS from writing to those bad sectors again. If no spare blocks are available, chkdsk will truncate the corrupted file associated with the bad block.
There are some limitations to chkdsk’s bad block repair abilities:
- It cannot repair physical damage to the disk surface that caused the bad blocks
- If too many bad blocks exist, chkdsk may not be able to remap them all
- Chkdsk cannot recover data from blocks where the damage is so severe the data is unreadable
So in summary, chkdsk /f can remap bad blocks to avoid using them and recover data where possible, but cannot fully repair or restore hard drive sectors that have been physically damaged. Replacing the disk may be required in cases of excessive bad blocks. For more info see [sources].
Recovering Data from Bad Blocks
When a hard drive develops bad blocks or bad sectors, the data stored in those areas can become inaccessible. However, there are tools and methods available to attempt recovering data from bad blocks.
One option is to use data recovery software like EaseUS Disk Copy or Recoverit by Wondershare. These programs are designed to scan drives and extract data from bad sectors. They work by skipping over the bad blocks and reconstructing files based on the readable data. The recovery process involves cloning the drive first to avoid further data loss.
Another approach is to boot into a Linux-based recovery OS like Ubuntu or Hiren’s BootCD. These provide tools like ddrescue and GNU ddrescue which can effectively read past bad sectors and image the drive. The image can then be mounted to copy off needed files and folders.
If the drive is still partially accessible, manual file copy methods may work for recovering data from areas unaffected by bad blocks. This involves connecting the drive to another working system and dragging and dropping folders and files off of it.
While recovering data from a drive with bad blocks is possible, results vary greatly based on the severity and location of the bad sectors. The more intact and sequential data is, the better the chances of recovery. It’s important to avoid further write operations on failing drives and image them as early as possible.
Preventing Bad Blocks
There are several things you can do to help prevent bad blocks from occurring on your hard drive:
Defragment Regularly
Defragmenting your hard drive can help prevent bad blocks by reducing file fragmentation and ensuring data is evenly distributed across the drive. Defragmenting optimizes file storage, which puts less strain on the mechanical components of the hard drive over time. It’s recommended to defrag your hard drive about once a month [1].
Perform Regular Backups
Having a solid backup routine is one of the best ways to protect yourself from potential data loss due to bad blocks. Backing up regularly (at least once a week) ensures you have copies of your important data on other devices. That way if bad blocks do occur, you can recover data from your backups rather than attempting recovery from the failing drive.
Consider an SSD
Because solid state drives have no moving parts, they are much less prone to bad blocks compared to traditional hard disk drives. The mechanical nature of HDDs causes them to eventually develop bad sectors, while SSDs are more resistant to physical damage over time. If your budget allows, an SSD can be a smart upgrade to help avoid bad blocks.
Replacing the Disk
If the number of bad blocks on your hard drive is extensive and unable to be repaired, it may be time to replace the disk entirely. Trying to repair a disk with significant bad block issues will likely be an exercise in frustration, as more bad sectors will inevitably emerge over time.
The general recommendation from data recovery experts is to replace a hard disk once it has developed more than 100 bad blocks/sectors that cannot be repaired. At that point, attempting further repairs is often not worth the effort and risk involved.
When replacing a disk due to bad blocks or sectors, it’s important to weigh the cost of a new hard drive against the value of the data stored on the existing drive. For an older disk with non-critical data, replacement may not make financial sense compared to purchasing a new, higher-capacity drive.
However, if the disk contains important or irreplaceable data, then replacement cost becomes more justifiable. In those cases, you essentially have to choose between data recovery services, which can cost $500 or more, versus spending $50-150 for a new consumer hard drive.
Overall, if your hard disk is consistently developing bad blocks that cannot be repaired through chkdsk or other utilities, replacement is likely the wisest and most cost-effective option.
Software Alternatives
In addition to using the built-in chkdsk utility, there are several third-party tools available for identifying and repairing bad blocks on a hard drive.
SeaTools by Seagate
SeaTools by Seagate (https://www.seagate.com/support/downloads/seatools/) is a comprehensive hard drive diagnostic tool that can test most HDDs regardless of the manufacturer. It has several tests available including a short drive self-test, long generic test, and bad sectors test. SeaTools is easy to use and available for free.
Disk Drill
Disk Drill (https://www.cleverfiles.com/) is a data recovery software that can also scan for and repair bad sectors. It has several advanced features but also a basic quick scan mode. The free version only allows scanning and previewing recoverable files. The Pro version must be purchased to actually recover data and utilize all features.
HDDScan
HDDScan (https://hddscan.com/) is a free HDD diagnostic utility for Windows that tests drive health and performance. It includes options for an express test, extended test with SMART attributes, and surface test. The surface test specifically analyzes sectors and logs any read/write errors.
TestDisk
TestDisk (https://www.cgsecurity.org/wiki/TestDisk) is an open source data recovery and partition repair tool. It allows scanning a drive for bad sectors and attempting to repair them. TestDisk can be complex for beginners but is a powerful tool for more advanced users.
When chkdsk is unable to properly repair bad sectors, third-party tools provide alternative options for scanning, identifying issues, and repairing blocks. However, no software solution can fully fix a drive once physical corruption has occurred.
Summary
Bad blocks are sections of a hard disk that have become inaccessible due to physical damage or corruption. They can lead to data loss and other problems. Chkdsk is a useful tool included in Windows that can help identify and repair bad blocks.
To summarize the key steps covered in this guide:
- Run chkdsk from the command prompt to scan your disk for errors. Use the /f and /r flags to fix any bad blocks it finds.
- Review the chkdsk log for information on bad blocks. The “Could not read” or “Reallocated sector” errors indicate bad blocks.
- If chkdsk is unable to repair the blocks, you may need data recovery software to retrieve data. Otherwise, reformatting can wipe the disk clean.
- Replace aging hardware if bad blocks continue appearing. SSDs and modern HDDs automatically remap bad blocks, but older drives may need replacement.
- Regularly backup your data and run chkdsk scans to find bad blocks before they cause problems.
Following these steps can help identify bad blocks on your hard drive using chkdsk and take action to repair or replace disks before experiencing data loss.
