Solid state drives (SSDs) are becoming increasingly popular for storage in computers due to their faster speeds and lower power consumption compared to traditional hard disk drives (HDDs). However, SSDs are still susceptible to bad sectors developing over time. Bad sectors are areas on the drive that can no longer reliably store data due to physical damage or component failure. While you can’t physically repair bad sectors, there are some steps you can take to fix bad sectors on an SSD.
What Causes Bad Sectors on an SSD?
There are a few potential causes of bad sectors on an SSD:
- Physical damage – Dropping or hitting the SSD can cause physical damage to the NAND flash memory chips or controller board. This can lead to bad sectors.
- Component failure – The NAND flash memory has a limited lifespan and will eventually fail after too many read/write cycles. SSD controllers or other components can also fail over time.
- Write amplification – Excessive writes to an SSD due to the drive’s internal optimization processes can wear out the NAND flash cells prematurely.
- Power loss – A sudden loss of power can interrupt writes to the SSD, causing data corruption and bad sectors.
- Firmware bugs – Issues with the SSD’s firmware can sometimes lead to bad sectors developing.
How Do I Know if My SSD Has Bad Sectors?
There are a few signs that may indicate your SSD has bad sectors:
- Degraded performance – Accessing files stored in bad sectors will be much slower.
- Hanging/freezing – Your system may freeze when trying to access bad sectors.
- Blue screen errors – Errors like UNEXPECTED_STORE_EXCEPTION can occur if the OS tries to access bad sectors.
- SSD detection issues – The drive may not be recognized properly if critical components have failed.
- Unusual noises – Clicking, grinding or buzzing emanating from the SSD may indicate hardware issues.
- Read/write errors – The system may report read or write errors when accessing bad sectors.
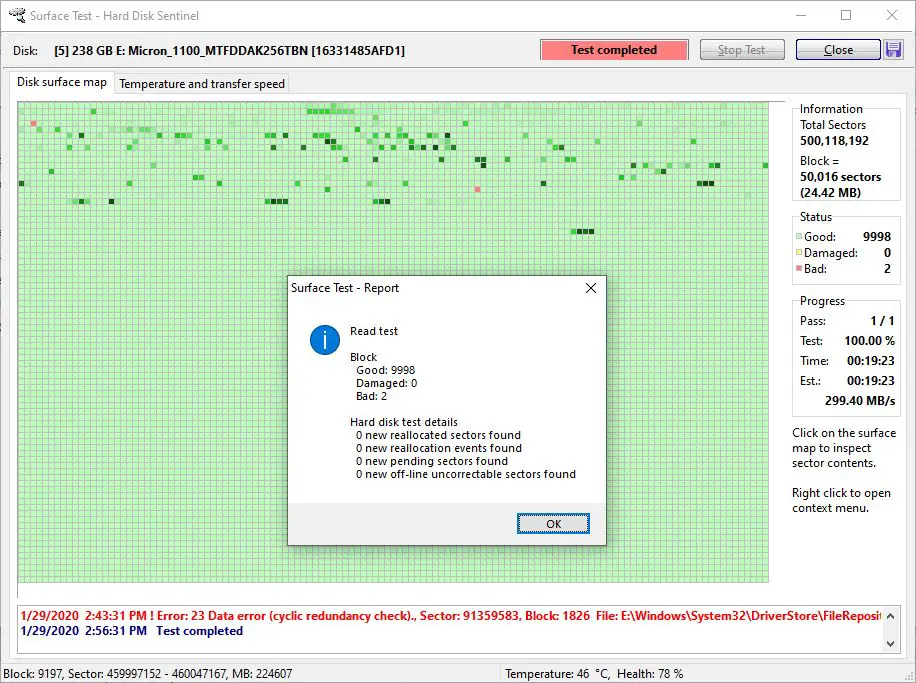
Running S.M.A.R.T. diagnostic software or disk utilities like CHKDSK can confirm if bad sectors are present on your SSD.
Can Bad Sectors on an SSD Be Repaired?
Unfortunately, you cannot truly repair bad sectors on an SSD. The NAND flash memory chips in SSDs cannot be repaired once they go bad. However, the SSD controller does have spare capacity set aside to remap data when bad sectors start to develop. The key is triggering the SSD to reallocate the data from bad sectors to unused spare capacity.
How to Fix/Remap Bad Sectors on an SSD
Here are the basic steps to attempt fixing bad sectors on an SSD by remapping them:
- Backup your data – As a precaution, backup all important data from the SSD to another storage device.
- Check for firmware updates – Install any available firmware updates for the SSD which may improve bad sector handling.
- Use the manufacturer’s SSD toolbox – Most SSD makers provide a toolbox utility that can detect bad sectors and force reallocation to spare capacity.
- Perform a secure erase – This resets all SSD cells to a clean state, letting the drive remap bad sectors upon reboot.
- Use HDD scanning software – Utilities like HDDScan can detect bad sectors on an SSD and remap them.
- Format the SSD – Completely formatting the drive may trigger a reallocation of bad sectors to spare cells.
The effectiveness of these steps can vary based on the extent of the bad sectors and the make/model of SSD. If the drive has exhausted its spare capacity, remapping will no longer work.
Step 1: Backup Important Data
Before attempting any bad sector fixes, it’s crucial to backup your important files and data from the SSD. This provides protection in case anything goes wrong or the SSD ultimately fails. Copy your files to another internal or external hard drive. Cloud backup services like iDrive or Acronis are also a good option.
Make sure your backup is complete before proceeding. Having your data replicated safely is essential when dealing with bad sector issues.
Step 2: Install Latest Firmware
One preliminary step is to install the latest firmware available for your SSD. Most manufacturers periodically release firmware updates which not only can enhance performance and compatibility of the drive, but may also improve how bad sectors are handled.
Some firmware updates specifically mention improved bad sector mapping or remapping in the release notes. Check your SSD manufacturer’s website support section to see if a newer firmware update is available. Then follow their instructions to safely flash the firmware on your drive.
Step 3: Run Manufacturer SSD Toolbox
Nearly all companies that make SSDs also provide a free toolbox utility designed for their drives. These toolbox apps can examine the SSD, report SMART status, update firmware, and attempt bad sector remapping.
Here are some links to download the major SSD manufacturers’ toolbox software:
Run the toolbox software for your SSD brand. It should give you information on your drive’s health and may have options to attempt remapping bad sectors. This is a good first step before using more advanced utilities.
Step 4: Secure Erase SSD Drive
One method to get an SSD to rebuild itself and remap any bad sectors in the process is performing a secure erase. This effectively resets all the NAND flash memory cells to a factory clean state.
With the SSD cells reset, when you reboot after a secure erase, the controller will remap any bad sectors to unused spare capacity as the OS starts writing new data to the drive.
You’ll need to use disk utilities built for SSDs to properly perform a secure erase, such as:
- Parted Magic – Has a Secure Erase option accessible in the disk management GUI.
- HDDErase – Bootable tool designed to securely erase SSDs and HDDs.
- gparted – Includes option to overwrite SSD with zeros for secure erasure.
Make sure you backup your data first before attempting a secure erase. This will wipe all data from the SSD.
Step 5: Scan with HDD Bad Sector Utilities
There are various utilities designed to scan HDDs for bad sectors that can also work on SSDs. These tools read every sector on the drive and attempt to reallocate any bad ones found.
Some examples to try on your SSD include:
- HDD Scan – Provides comprehensive scan features to detect and attempted remapping of bad sectors.
- HDAT2 – Designed to find and isolate bad sectors.
- Victoria HDD – Scans and remaps bad sectors of storage devices including SSDs.
- MHDD – Includes both a bad sector scan and remapping tool.
Run the scanner you select, being sure to backup data first, and allow it to complete a full read scan of the SSD. It should detect and remap any bad sectors it finds to spare capacity.
Step 6: Format SSD with Diskpart
Using the command line tool Diskpart in Windows to completely format the SSD may also force reallocation of bad sectors. Here is the general process:
- Open an admin Command Prompt
- Type diskpart and press Enter
- Type list disk to identify SSD disk number
- Type select disk X (replace X with your disk number)
- Type clean to wipe SSD
- Type create partition primary to create new partition
- Type format quick fs=ntfs to quick format SSD
- Type exit to close Diskpart
With the drive now cleanly formatted, rebooting should force the SSD controller to remap any bad areas to spare cells as needed.
Other Considerations with SSD Bad Sectors
Replace SSD if Issues Persist
If you continue experiencing performance issues or data errors after attempting the above bad sector fixes, the SSD may be failing. At that point replacement will be the best option if the drive is still under warranty.
SSD Fills Spare Capacity Over Time
Remember that SSDs set aside extra spare capacity specifically for remapping bad sectors. But this spare space is finite. Once filled up, the SSD can no longer remap bad areas.
At that point, serious performance issues arise and data loss becomes more likely. Again, replacing the SSD is recommended if its spare capacity reserve is exhausted.
TRIM Can Help Prolong Life
The TRIM command helps SSDs efficiently handle data deletion and garbage collection. Making sure TRIM is enabled on your system allows bad sectors to be flagged and remapped more efficiently.
TRIM is automatically enabled for most modern SSDs in recent versions of Windows, macOS and Linux. Checking your OS documentation can confirm if TRIM is active.
Limit Excessive Writes to SSD
Reducing unnecessary writes to the SSD throughout its lifespan is important. Excessive write amplification wear out the NAND flash cells faster. This can lead to premature bad sector issues.
Make sure your OS, programs and files aren’t constantly writing data out the SSD when not needed. For example, disable hibernation and sleep to prevent writes to a hibernation file. Move temp files and caches to another drive.
Conclusion
While bad sectors will inevitably develop on SSDs after heavy long term usage, there are ways to remap and potentially fix these issues temporarily. Just keep in mind the NAND flash memory itself can’t be repaired – data is just reallocated to spare capacity. If the bad sector problem persists after all fixes are attempted, replacing the SSD is the only definitive solution.
Maintaining backups, installing firmware updates, limiting unnecessary writes and leveraging SSD toolbox software can all help prevent or minimize bad sector occurrences. But SSDs have a limited lifespan so periodic replacement is required. Being prepared and quickly addressing any bad sector warnings can help you maximize an SSD’s useful life.