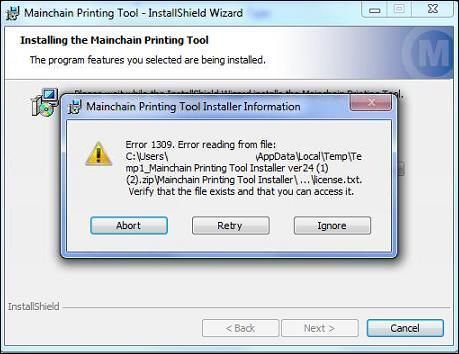
Error 1309 in Windows typically occurs during installation of applications or system updates and indicates there was a problem reading data from a file. The error message will specify the file it failed to read from.
This error is often caused by file size limitations of the FAT32 file system, corruption of system files, faulty hard drives, or issues with permissions, networking, antivirus software or the Windows Installer service. Understanding the causes can help troubleshoot and resolve error 1309.
Troubleshoot the Windows Installer service
Error 1309 occurs when a program tries to install, uninstall, or repair itself using the Windows Installer service but encounters a problem[1]. The error indicates that the Windows Installer service is unable to locate the required installation files. This is often caused by corruption or misconfiguration of the Windows Installer service itself.
To troubleshoot, first open the Services console (services.msc) and check the status of the Windows Installer service. If it is not running, set the Startup Type to Automatic and start the service. You may need to restart your PC as well.
Next, reset the Windows Installer service to restore it to default settings as described in the next section.
[1]https://kb.blackbaud.com/articles/Article/108447
Reset the Windows Installer service
A common solution for error 1309 is to reset the Windows Installer service to its default settings. This can be done by stopping and restarting the service in Windows Services. To do this:
- Open the Start menu and search for “Services”. Open the Services management console.
- Locate the “Windows Installer” service in the list. Right-click on it and select “Stop”.
- Once it is stopped, right-click on it again and select “Start” to restart the service.
- If the service was set to “Disabled”, be sure to set the Startup Type back to “Manual” before restarting.
This will reset the Windows Installer service and often resolve error 1309. If the issue persists, additional troubleshooting may be needed. See this Microsoft support article for more details on resetting the Windows Installer service.
Uninstall problematic Windows updates
Some Windows updates have been known to cause error 1309 when installing programs. Specifically, KB3194798 has caused issues for many users when trying to install software like AutoCAD and other MSIs
To check if you have KB3194798 or another problematic update installed:
- Open Settings > Update & Security > View Update History
- Look through the list of installed updates and make note of any that are known to cause error 1309.
- Uninstall those updates by clicking on them and then choosing Uninstall
After removing the problematic updates, try installing the program again to see if error 1309 has been resolved. Keep in mind you may need to reset the Windows Installer service after uninstalling updates.
Delete temporary installation files
Sometimes Error 1309 can occur due to corrupted files left over from previous installations. Windows stores temporary installation files in the TEMP folder located at C:\Users\
Over time, this folder can accumulate outdated, corrupted, or problematic files that interfere with new installations. Deleting the contents of the TEMP folder removes these temporary files and clears out any corrupted data that may be causing Error 1309.
To delete the TEMP folder contents on Windows 10:
- Open File Explorer and navigate to C:\Users\
\AppData\Local\Temp. - Select all files and folders and delete them.
- Restart your computer.
With the TEMP folder cleared out, you should be able to complete installations without Error 1309 occurring. This is a simple fix to try that may resolve the issue by removing problematic temporary files left over from previous failed installations.
Edit registry permissions
One potential cause of error 1309 is incorrect registry permissions preventing installations or updates from completing properly. The Windows registry stores configuration settings and options for the operating system, software, and hardware. If the registry permissions are too restrictive, the system may not be able to read, write, or modify registry keys as needed when installing programs or updates.
To check for registry permission issues, open the Registry Editor by typing “regedit” into the Windows search bar and selecting the Registry Editor app. Navigate to HKEY_LOCAL_MACHINE\SOFTWARE\Microsoft\Windows\CurrentVersion. Right click on this key and select Permissions. Make sure your user account has Full Control permissions. If not, you can add your account and grant it Full Control. This allows your account to modify registry permissions as needed.
Next, navigate to HKEY_CLASSES_ROOT and check its permissions as well. Grant your user account Full Control if needed. Other registry hives to check include HKEY_USERS and HKEY_CURRENT_USER. System files and the Windows directory (usually C:\Windows) should also be set to Full Control for your user account.
If adjusting registry permissions does not resolve error 1309, you may need to reset permissions on the registry hives back to defaults. This can be done using the Registry Editor or by running commands like “icacls HKEY_CLASSES_ROOT /reset” on an elevated Command Prompt. Restoring default permissions may allow installations to complete properly.
Additionally, specific registry keys related to the program or component throwing the 1309 error may need to have permissions edited. Locate any related registry keys and ensure your account has proper permissions. Consult the software vendor’s documentation if needed to identify relevant registry keys.
Run SFC and DISM scans
The System File Checker (SFC) and Deployment Image Servicing and Management (DISM) tools can help scan for and repair corrupted system files that may be causing Error 1309. To run these scans:
- Open an elevated Command Prompt window by searching for “Command Prompt”, right-clicking it, and selecting “Run as administrator”.
- Type the following command and press Enter:
sfc /scannow - This will scan all protected system files and replace any corrupt ones with a cached copy. Let the scan run to completion.
- After SFC finishes, run DISM with the following command:
DISM /Online /Cleanup-Image /RestoreHealth - DISM will scan the health of the Windows image and repair any corruption found. Allow it to complete.
SFC and DISM act as system file repair tools in Windows, restoring original versions of corrupted or faulty files. Running them can often resolve Error 1309 by replacing damaged system files the installer needs to function properly.
Check hard drive health
One potential cause of error 1309 is bad sectors on the hard drive that Windows is installed on. Bad sectors are areas of the hard drive that have become physically damaged and can no longer reliably store data. When the Windows Installer tries to access files located in bad sectors, it may receive corrupted data or find missing files which can lead to error 1309.
To check for bad sectors, you can run the built-in Error Checking tool in Windows. This will scan the hard drive and detect any bad sectors. To do this, open File Explorer, right-click on the hard drive that has Windows installed, choose Properties > Tools > Click on “Check”. Make sure both options are checked under “Check disk options” and then Start. If any bad sectors are found, Windows will attempt to repair them by moving the data to a healthy location on the drive.
If the hard drive has excessive bad sectors that cannot be repaired, it may need to be replaced. A failing hard drive can lead to frequent errors and instability. Replacing it with a new drive will often resolve error 1309 if bad sectors were the underlying problem.
Clean boot the system
Sometimes error 1309 can occur due to conflicts with startup programs or services. Clean booting the system will disable all non-essential startup programs and services, allowing you to isolate the potential source of the conflict.
To clean boot Windows 10:
- Open the Start menu and type “msconfig”. Select “System Configuration” from the results.
- On the Services tab of System Configuration, check the “Hide all Microsoft services” box and click “Disable all”.
- Next, go to the Startup tab and click “Open Task Manager”.
- In Task Manager, disable any startup items you don’t need by right-clicking each item and selecting “Disable”.
- Close Task Manager and click OK in System Configuration to save your changes.
- Restart your computer. It will now start up in clean boot mode.
With startup programs disabled, try installing the software that was failing with error 1309 again. If the installation now succeeds, you know a startup item was causing a conflict. You can then selectively re-enable startup items one by one until you identify the problematic program.[1]
Once done troubleshooting, be sure to open System Configuration again and select “Normal startup” to return Windows to its normal startup state.
Reinstall/update .NET Framework
The .NET Framework provides the environment needed for ASP.NET and other .NET applications to run. If these files become damaged or outdated, it can result in errors like 1309. To rule this out as the cause:
1. Open Control Panel and uninstall all versions of the .NET Framework. Restart your computer.
2. Download and install the latest version of the .NET Framework from Microsoft’s website source. This will replace any missing or corrupt files.
3. Try running your ASP.NET application again. If error 1309 persists, the .NET Framework is likely not the cause.
Reinstalling the .NET Framework replaces important system files, which can resolve the 1309 error if it was caused by file corruption. Be sure to get the latest version to ensure compatibility with your apps.