Error 4014 when restoring your iPhone, iPad or iPod Touch on iTunes can be frustrating. Thankfully, there are several potential solutions you can try to resolve this issue. In this comprehensive guide, we will walk through the most common causes of error 4014, as well as step-by-step instructions for how to fix it.
What Does Error 4014 Mean?
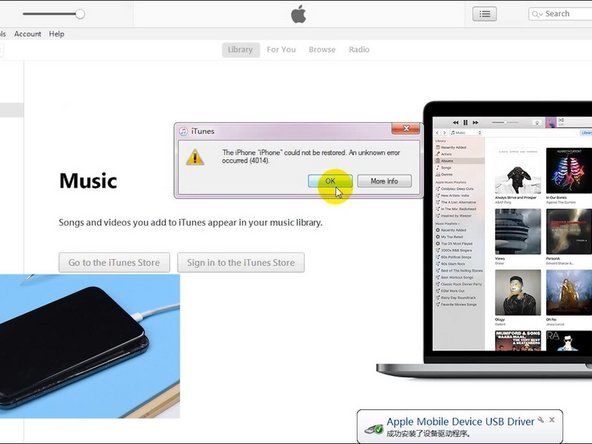
Error 4014 indicates that there was a problem verifying the iPhone, iPad or iPod Touch with Apple’s servers when attempting to restore or update the device. This error is most commonly seen when you are trying to restore a backup to your device via iTunes.
Some potential causes for error 4014 include:
- Outdated or corrupt iTunes version
- Outdated iOS software version on the device
- Corrupt backup file
- Incorrect date/time settings on computer or device
- Issues connecting device to computer over USB
- Expired or invalid Apple certificate on device
To properly diagnose and resolve error 4014, you will need to methodically troubleshoot the different potential issues outlined above. The solutions below will cover each of these in detail.
Step 1: Check iTunes and iOS Versions
The first thing to check is whether you have the latest versions of iTunes on your computer and iOS software on your device. Older versions can sometimes trigger error 4014 when attempting to restore.
On your Windows or Mac computer, open iTunes and click on the Help menu. Select “Check for Updates” and install any available iTunes updates. You want the most up-to-date version of iTunes installed.
Next, connect your iPhone, iPad or iPod Touch to the computer via USB cable. Click on the device icon in the upper left corner of the iTunes window. Now click on Summary and then Version to check which iOS version is currently installed. Go to www.apple.com/ios/download to download and install the latest iOS update for your device.
Updating to the newest versions of iTunes and iOS is often enough to resolve error 4014 during restore. Try the restore again after updating and see if that fixes the problem.
Step 2: Verify Date and Time Settings
If error 4014 persists, the next thing to check is the date and time configuration on your computer and iOS device. If the date/time settings are incorrect, it can interfere with communication between iTunes and Apple’s servers during a restore.
On your Windows or Mac computer, click on the System Preferences or Control Panel and then open up the Date & Time settings. Make sure that the date, time and time zone are all set correctly. Toggle the Set Automatically option to synchronize the time with Apple’s NTP server.
On your iOS device, open Settings -> General -> Date & Time. Again, confirm the settings are correct and enable Set Automatically if it is disabled. Having mismatched date and time values between your computer and device can trigger error 4014.
Step 3: Reinstall iTunes and Update Drivers
A corrupted installation of iTunes on your computer is another potential culprit for error 4014. The iTunes components that communicate with your device during a restore may have become damaged or invalid.
To rule this out, you will want to completely uninstall and reinstall the latest version of iTunes:
- Open Control Panel > Programs > Uninstall a Program
- Select iTunes and click Uninstall
- Restart your computer
- Go to www.apple.com/itunes/download to download and install the latest iTunes.
Additionally, make sure you have the latest drivers for your computer and operating system installed. On Windows, check for any driver updates available for your specific hardware. On Mac, install the latest macOS updates via System Preferences.
Reinstalling iTunes and updating drivers will refresh the connection between your computer and device, which often resolves error 4014.
Step 4: Try a Different USB Port or Cable
Connectivity issues between the device and computer over USB could also be responsible for error 4014 when restoring in iTunes. Try switching to another USB port on your computer and use a different Lightning or 30-pin cable if available.
Faulty USB ports/cables are a common source of connection problems. Test with different USB configurations to isolate any hardware related issues.
If your iOS device is still having trouble connecting to iTunes, you can also try a hard reset by pressing and holding the Home and Power buttons together for at least 10 seconds until you see the Apple logo. This will reset the device and refresh the USB connection.
Step 5: Restore Device Using Recovery Mode
If you still get error 4014 when trying to restore your iPhone, iPad or iPod Touch normally via iTunes, the next troubleshooting step is to put the device into Recovery Mode and then restore.
Recovery Mode forces the device into a special state that gives iTunes full control over it. This allows you to completely wipe and reinstall iOS as a “clean” restore. Here’s how to restore your device in iTunes using Recovery Mode:
- Connect device to computer via USB and open iTunes
- Turn off the device by holding Power button for 5 seconds (slide to power off)
- Press and hold Home button while reconnecting USB cable
- Keep holding Home button until you see the Recovery Mode screen
- In iTunes, click Restore and follow on-screen prompts
This will wipe the device and reinstall a fresh copy of iOS, eliminating any software bugs causing error 4014. When the restore finishes, set up the device as new rather than restoring a backup.
Step 6: Restore Using DFU Mode
DFU (Device Firmware Update) Mode is an even lower-level recovery state than standard Recovery Mode. It will force the device into a complete restore and reinstallation of iOS.
If you continue getting error 4014 even when restoring in Recovery Mode, use DFU Mode as a last resort:
- Connect device to computer via USB and open iTunes
- Turn off device completely
- Hold Power button for 3 seconds
- Now hold Home + Power buttons for 10 seconds
- Release Power but keep holding Home until iTunes shows DFU Mode
- Click Restore to wipe device and reinstall iOS
Restore from DFU Mode deletes absolutely everything from the device and installs a fresh iOS, providing a guaranteed fix for error 4014.
Step 7: Try Restoring Backup on a Different Computer
In some cases, error 4014 may be caused by a corrupted backup file that you are trying to restore from. Even if you erase the device, restoring that same problematic backup can retrigger the 4014 error.
To test if this is the case, try restoring from your backup on completely different computer. This will determine if the issue stems from the iOS device itself or the backup file.
Connect your iPhone, iPad or iPod Touch to another trusted computer and use iTunes to restore from your latest backup. If error 4014 does not occur on the other computer, you know the backup itself is the source of the problem.
Step 8: Delete and Recreate Backup
If you determined in Step 7 that your backup is corrupted and causing error 4014, you will need to delete your current backup and create a brand new one.
In iTunes on your primary computer, go to iTunes > Preferences > Devices and right click on your device backup > Delete Backup. This removes the problematic backup file entirely.
Now connect your device back to this computer via USB and use iTunes to set it up as new. Do not restore any backups yet. Go through the initial iOS setup process clean.
Once you have your device set up properly with no error 4014, you can create a new backup by right clicking on the device icon and selecting Back Up. Use this new backup going forward to avoid restore issues.
Step 9: Update Computer and Device to Non-Beta Software
If you are running beta software on either your computer (beta macOS or Windows Insider build) or your iOS device (beta firmware), this can also lead to problems like error 4014 when trying to communicate between systems for restoring.
Check what software versions you are currently running. If either your computer OS or iOS/iPadOS is still on pre-release beta builds, update both systems to the latest public stable versions.
Beta software often has compatibility issues and bugs that cause restore errors like 4014. Updating to official non-beta builds will most likely resolve the problem.
Step 10: Contact Apple Support
If you have tried all other troubleshooting steps with no success fixing error 4014, you will need to contact Apple Support directly about the issue.
Apple has additional tools and resources for diagnosing and repairing restore errors that cannot be resolved through consumer-level troubleshooting.
Some things Apple Support can help with include:
- Advanced diagnostic testing on your iOS device
- Special iTunes restore procedures not available to consumers
- Potential warranty service if hardware defect detected
- Further advanced troubleshooting steps specific to your case
Schedule a call, chat or in-store Genius Bar appointment with Apple Support. Be prepared to provide details on all troubleshooting steps you have tried already. The more information you can provide up front, the better they can directly target a solution for error 4014.
Conclusion
Error 4014 during an iTunes restore can certainly be annoying, but is almost always fixable through proper troubleshooting. In most cases, you can resolve this issue on your own by working through potential solutions like updating software, checking date/time settings, reinstalling iTunes, using Recovery Mode, and deleting the backup.
But for difficult cases where error 4014 persists, get help directly from Apple Support to identify and correct whatever is causing the restore problem. With the right troubleshooting approach and help from Apple if needed, you can get past error 4014 and restore your iPhone, iPad or iPod Touch successfully.