Quick Answers
Here are some quick answers to common questions about fixing a laptop after a soda spill:
What should I do immediately after the spill?
Immediately unplug the laptop and remove the battery to prevent short circuits. Flip the laptop over to drain out as much liquid as possible.
How do I clean the laptop after a soda spill?
Use isopropyl alcohol and cotton swabs to gently clean connectors, ports, keyboard, and other areas. Avoid getting moisture in openings. Let dry for at least 24-48 hours.
Is it safe to turn on the laptop after cleaning?
Do not turn on the laptop until completely dry. Residual moisture can short circuit and permanently damage components when power is applied.
What are signs of liquid damage in a laptop?
Symptoms include no power, no display, keyboard malfunction, port damage, short circuit, corrosion, and fried components. The extent depends on amount and location of the spill.
How can I prevent damage after a spill?
Immediately power off the device and disconnect power. Clean with isopropyl alcohol as soon as possible. Ensure the laptop is completely dry before powering back on to limit damage.
Assessing the Damage From a Soda Spill
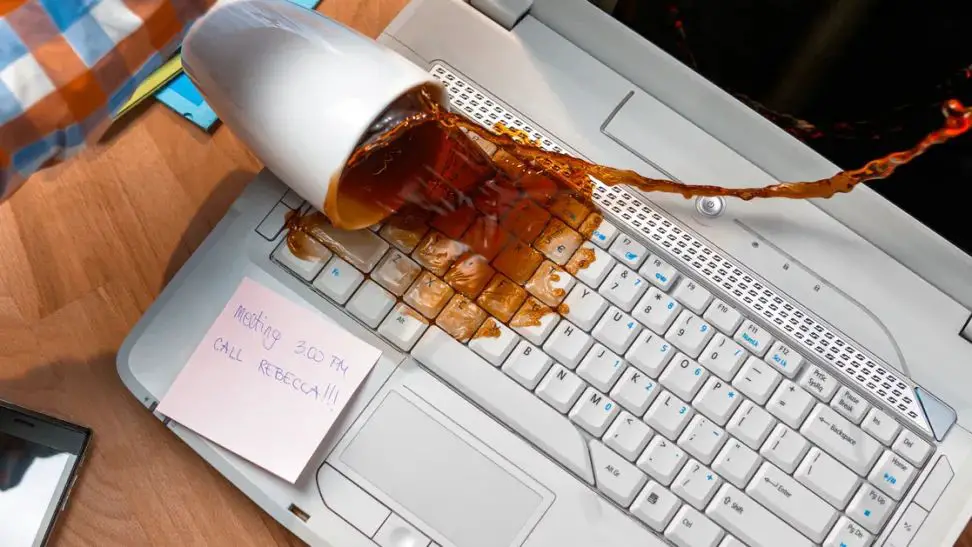
Spilling a soda or other sugary drink into your laptop can be a catastrophic accident that causes thousands of dollars in damage if not addressed quickly and properly. Sticky soda can short circuit the motherboard and components, leading to complete failure of the device. However, the extent of the damage depends on the amount spilled and where it ended up inside the laptop.
Amount of Soda Spilled
The more soda that was spilled, the greater the risk of permanent damage. A few drops may cause minimal issues if cleaned up fast, while spilling an entire can of soda or glass of iced tea could render major components unusable. The sugary drink can quickly seep under keys and into crevices to reach the sensitive electronics inside the laptop case.
Location of the Spill
Where the soda ended up inside the laptop also affects the severity. The worst spots are directly on the motherboard, keyboard, ports, speakers, ventilation intakes, or other openings. Spills directly on components almost always cause shorts and corrosion. Splashes on the case exterior or between keys may only require cleaning the surfaces.
Speed of Response
How quickly you can power off, disassemble, and clean up a soda spill also impacts the end result. The longer sugary liquid sits and dries on circuit boards and connectors, the more difficult it is to properly clean and avoid stickiness or corrosion later on. A fast response within seconds or minutes gives you the best chance of saving the laptop.
Immediate First Steps After a Soda Spill
Your initial reaction in the first seconds and minutes after spilling soda on your laptop are crucial for limiting the damage. Follow these steps immediately:
- Power off the laptop if it is still running. Press and hold the power button to force a shutdown.
- Unplug the AC adapter from the wall and laptop.
- Remove any connected cables, devices, or accessories.
- Remove the battery from the laptop if possible.
- Turn the laptop upside down to drain out as much liquid as possible from openings.
- Open the case or covers if you are comfortable doing so.
- Absorb spilled drops or puddles with a dry towel or cloth.
- Gently shake out any excess moisture from crevices and vents.
These initial actions can potentially prevent short circuits and direct damage to components. The next step is to carefully disassemble the laptop for cleaning.
Disassembling a Laptop After Liquid Spill
To fully clean up a sugary soda spill and check for damage, you will need to take apart the laptop at least partially. The extent depends on where the liquid ended up and how comfortable you are working with computer hardware and small parts.
What You Need
- Phillips and/or Torx screwdrivers
- Anti-static wrist strap
- Clean work surface
- Organizer trays for screws and parts
Main Components to Access
- Bottom case
- Battery
- Hard drive
- RAM
- Cooling fan
- Motherboard
- Keyboard
Disassembly Tips
- Follow manufacturer guides for your specific model when available
- Organize and label screws and connectors
- Gently pry apart plastic clips
- Avoid forcing or bending the motherboard
- Check for visible corrosion or sticky residue
Taking the laptop partially apart provides access to all sides of components for cleaning. Be slow and gentle to avoid further damage inside.
Cleaning a Laptop After a Soda Spill
Once you have disassembled the laptop, it’s time to carefully clean off any soda residue left behind. Avoiding moisture inside the laptop is key here. Follow these guidelines:
Supplies Needed
- Isopropyl alcohol, 90% or higher concentration
- Distilled water
- Cotton swabs and soft cloths
- Toothbrush or paintbrush for scrubbing
- Syringe or pipette for flushing
Cleaning Tips
- Unplug the CMOS battery before cleaning the motherboard
- Scrub sticky spots gently with a toothbrush and alcohol
- Use pipette to flush out crevices; blot up excess moisture
- Let components fully dry for 24-48 hours before reassembly
- Inspect for corrosion and residual stickiness
Areas to Clean
- Motherboard
- Keyboard underside
- Connector pins
- USB and other ports
- Fan intakes and vents
- Speakers and audio jacks
- Button interfaces
- Expansion slots
Be thorough and patient when cleaning to give your laptop the best chance of working again after drying out.
Drying Out a Laptop After Liquid Damage
Once cleaning is complete, drying out your laptop fully is the most important step before reassembly. Any lingering moisture can still cause major damage when power is applied.
Methods for Drying
- Let air dry for 24-48 hours minimum
- Use a fan to circulate air
- Absorb moisture with dry rice (1-3 days)
- Use a dehumidifier near the laptop
Signs It Is Safe to Reassemble
- No visible moisture on components
- No damp smell from laptop interior
- Cotton swab comes out clean and dry
- Electronics tester shows no conductivity
Do Not
- Use external heat sources
- Reconnect power before completely dry
- Reassemble too early
Rushing the drying stage risks permanent short circuit damage when power is restored. Take your time and test thoroughly before turning your laptop back on after liquid damage.
Reassembling Your Laptop
Once satisfied your laptop is 100% dry internally, it’s safe to reassemble the components in reverse order:
Steps for Reassembly
- Inspect for any remaining moisture or stickiness
- Replace CMOS battery reinsert RAM modules
- Attach cables and connectors
- Secure motherboard, cooling fan, ports
- Snap keyboard back into top case
- Replace bottom case cover
- Reconnect battery pack
Post-Reassembly Testing
- Power on laptop without battery installed
- Check for power lights, fan spin, screen activity
- Reinstall battery, power on system fully
- Test keyboard, touchpad, speakers
- Verify ports and card readers function
- Check for any sparks, smoke, or burning smells
If any issues arise, power back down immediately and recheck components. Fully drying out the laptop before reassembly is critical.
Summary of Fixing a Laptop after Soda Spill
Here is a quick summary of the key steps covered in this guide for salvaging a laptop after a sugary drink spill:
Response
- Power off immediately
- Disconnect battery and power
- Drain out excess liquid
Cleaning
- Disassemble laptop carefully
- Use isopropyl alcohol and cotton swabs
- Gently clean accessible components
- Flush out crevices with pipette
Drying
- Let air dry for 24-48 hours minimum
- Use fans, rice, or dehumidifier
- Check for residual moisture before reassembly
Reassembly
- Reverse disassembly steps
- Inspect for stickiness or corrosion
- Test power on without battery
- Fully test all components
With quick action, thorough cleaning, extended drying times, and careful reassembly, it is often possible to successfully resurrect a laptop from a near-fatal sugary spill. Follow these steps to give yourself the best chance.
Potential Long-Term Damage from Liquid Spills
While you may be able to rescue a laptop from a soda or drink spill by following the steps outlined above, it is important to be aware of potential long-term damage that can manifest over time. Here are some issues to keep an eye out for:
Corrosion
– Sugary soda residues can gradually corrode metal components, traces, and solder points on the motherboard and elsewhere. This can cause intermittent glitches or total failure.
Short Circuits
– Any moisture trapped under chips or other components can eventually migrate and create short circuit paths. This may not be immediately evident.
Erosion
– Acidic drinks like colas can slowly erode copper traces and solder points on circuit boards, leading to connectivity issues.
Residue Buildup
– Over time, dried soda residue or re-crystallized sugars inside the laptop can accumulate on parts, causing them to stick or fail.
Component Rusting
– Small amounts of liquid trapped under ICs, connectors, screws and other metallic parts can lead to rusting over time. This can expand and break solder joints.
Fried Circuits
– Any residual moisture that made direct contact with powered components may eventually oxidize and “fry” circuits. Damage may not manifest until later.
If your laptop functions normally immediately after cleaning up a spill, continue to monitor it closely in the coming days and weeks for signs of these types of long-term liquid damage effects.
When to Seek Professional Repair
While the DIY cleaning steps outlined in this guide may be sufficient for minor spills, it is best to enlist professional repair services for major soda spills or if you experience any of the following:
- Laptop won’t power on at all after liquid damage
- Evidence of shorts or burned components
- Corrosion visible on circuit boards
- Sticky residue remains after cleaning efforts
- Damage to ports, connectors or expansion slots
- You lack experience dissassembling laptops
Professional computer repair services have specialized tools and expertise to fully dry out, clean, assess damage to, and replace any faulty components in your laptop after severe liquid spills that are beyond DIY abilities. This gives you the best shot at either fixing your existing laptop or recovering your data.
Data Recovery Options
In cases where a laptop is completely non-functional after liquid damage, professional data recovery services may be able to salvage your files and information from the hard drive or SSD:
- Logical recovery – Repair technicians can create a digital image of the drive and run software to reconstruct files and folders when possible.
- Mechanical repair – The drive hardware itself is repaired to regain access to read data off the platters.
- Chip-off – The memory chips are physically removed from the drive circuit board and read using specialized tools.
- Clean room recovery – The drive is opened in a highly sterile cleanroom and the platters are read with specialized equipment.
The best method depends on the extent of the liquid damage to the hard drive or SSD. A professional analysis can determine the proper approach.
Preventing Future Spill Damage
Here are some tips to help prevent liquid spills from damaging your laptop in the future:
- Never eat or drink near your computer.
- Keep drinks in sealable containers with lids.
- Set laptop on tables rather than on your lap or bed.
- Avoid placing drinks close to or on top of your laptop.
- Keep young children and pets away from laptops.
- Close the laptop when transporting it between locations.
- Carry laptop in a protective case or bag when traveling.
- Keep liquids away from all computers, phones, and electronics.
Being mindful of beverage locations and setting down precautions can help you avoid costly laptop damage from accidental spills.
Conclusion
Spilling soda or other sugary drinks into a laptop can certainly create big problems due to sticky residues shorting out electronics. However, with a proper response, thorough cleaning, extended drying time, careful reassembly, and testing, it is often possible to resurrect a laptop from even a major spill. Seek professional repair help for any complexity beyond your skills. And be sure to take precautions to avoid these damaging situations in the future!