What Does the Error Mean?
The “there is no disk in the drive” error message indicates that your computer is unable to detect a disk in the drive when trying to access it. This typically occurs when attempting to open or access a drive or partition, such as your hard drive, USB drive, CD/DVD drive, etc. The computer is expecting to find a disk it can read data from, but for some reason cannot detect one.
Some common examples of when you may see this error include trying to access a CD/DVD drive with no disc inserted, a USB flash drive that is not being properly detected, or a hard drive that has disconnected or failed in some way. The error suggests a communication breakdown between the hardware drive and the operating system.
While the error is quite generic, the underlying causes can vary. But essentially it means your computer is having trouble detecting the expected disk in the specified drive for unknown reasons. Tracking down the specific cause requires further troubleshooting of hardware, connections, drivers, or the disk itself.
Common Causes
There are a few common causes behind the “no disk in drive” error message:
-
No disk is actually in the drive. Make sure there is a disk inserted properly in the drive. If there is, try removing it and reinserting it to get a proper connection.
-
The disk is damaged or unreadable. If the disk itself is corrupted or scratched, the computer will not be able to recognize it. Try the disk in another computer to see if you can access it.
-
Loose or damaged cables. Faulty connections between the drive and computer can prevent disk recognition. Reconnect cables firmly and try a different cable if possible.
-
Drive hardware failure. If the drive has experienced a mechanical failure, the computer will not detect a disk is present. You may need to replace the drive if it is not being recognized at all.
Checking these common factors can help diagnose and resolve a “no disk in drive” error.
Check the Drive
One of the most common reasons for the “no disk in drive” error is that there is simply no disk in the drive. To check this:
Open the disk tray and make sure there is a disk inserted. Many drives have an eject button or lever to open the tray. If not, you can eject the tray from within your operating system.
Inspect the disk for any visible damage or dirt. Dust, fingerprints, and scratches could prevent the drive from reading the disk. Try cleaning the disk with a soft cloth.
Try inserting a different disk if you have one available. This will help determine if the issue is with the specific disk or with the drive itself.1
Check Connections
One of the most common reasons for the “no disk in drive” error is loose or faulty cable connections between the drive and the motherboard. Check that the data and power cables are fully inserted into the drive and motherboard ports. Wiggling cables or reseating them can help make a better connection.
Try swapping the cable connections with a known working cable if available. SATA and power cables can become damaged over time, resulting in intermittent or lost connections. Replacing old cables with new ones can often resolve connection issues leading to the “no disk” error message.
For external drives, check that the USB or Thunderbolt cable is fully inserted into both the drive enclosure and PC port. Damaged or faulty cables are a common cause of external drive connection problems. Try connecting the drive to another USB port or swapping the cable if the “no disk” error persists.
Update Drivers
One potential cause of the “no disk” error is outdated or corrupt drivers for the disk drive. To fix this, you’ll want to update the drivers from the manufacturer’s website. Here are the steps:
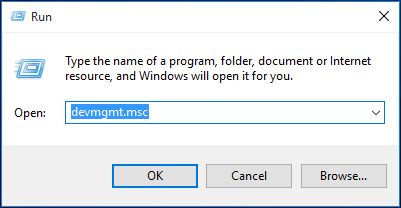
- Identify the make and model of your disk drive. You can find this information in Device Manager.
- Go to the support or downloads page for your drive manufacturer.
- Search for the latest driver available for your specific drive model.
- Download and install the driver.
- Restart your computer and see if the error persists.
Updating to the latest official driver from the manufacturer can often resolve quirky “no disk” errors by replacing any corrupted files. Make sure to get the driver directly from the manufacturer, not third-party sites, for best results. For more detailed guidance, refer to Microsoft’s instructions on updating drivers.
Enable Drive in BIOS
One potential reason your computer is displaying the “no disk in drive” error is because the SATA port for the drive is disabled in the BIOS. To fix this:
- Restart your computer and press the key to enter BIOS during boot, often Delete, F1, F2 or F12 depending on your system.
- Once in the BIOS, go to the “Advanced” or “Advanced Chipset Features” section and locate the SATA or onboard storage configuration.
- Make sure the SATA port for the non-detected drive is enabled. Sometimes the ports are labeled individually, like SATA0 or SATA1.
- If the SATA port is set to disabled, change it to enabled and save changes.
- Exit BIOS and see if the drive is now detected in Windows.
If the SATA port was disabled, enabling it in BIOS should allow detection of the drive. This is a common reason for new drives not being recognized. Refer to your motherboard manual for details on accessing BIOS and configuring SATA ports if needed.
Sources:
ATA/SATA Hard Drive Not Detected or Recognized in BIOS
Run Disk Repair Tool
One option to try fixing the error is to use your operating system’s built-in disk repair utility. On Mac computers, this is called Disk Utility. Disk Utility can be used to verify and repair errors on the disk.
To run Disk Utility:
- Open Disk Utility (located in Applications > Utilities)
- Select the disk, volume, or drive showing the error
- Click “First Aid” and then click “Run”
Disk Utility will check for errors and attempt to repair them. This may take some time. If successful, Disk Utility should report that the volume appears to be OK or has been repaired. If the error persists, Disk Utility may be unable to repair it.
On Windows, a similar disk checking utility called CHKDSK can be used. To run CHKDSK, open the Command Prompt as administrator and enter “chkdsk X: /f” where X is the letter of the drive to check and repair.
Using these built-in disk repair tools is a good first step in troubleshooting the “no disk” error before trying more advanced disk repair tools or recovery software.
Format the Drive
Formatting the drive can often resolve the “no disk in drive” error by fixing any software issues or file system corruption on the drive. Before formatting, it’s critical to backup any important data on the drive, as formatting will erase everything on the disk.
To format the drive on Windows, open File Explorer, right-click on the drive and select “Format”. Make sure to select “Quick Format” to avoid a lengthy full format. Choose the file system (usually NTFS or exFAT) and start the formatting process. Once completed, the drive should show up again in File Explorer.
Formatting removes any problematic files or errors on a disk and recreates a fresh file system, often resolving the “no disk” error. Just remember to backup data first, as formatting erases all content on the drive.[1]
Replace the Drive
If none of the previous troubleshooting steps resolve the issue, the error likely indicates a hardware failure or malfunction with the disk drive itself. Replacing the problematic disk drive will resolve the “no disk in drive” error in this case. Before replacing the drive, try removing and reseating it to ensure a proper connection. If the issue persists, you will need to replace the disk drive. When replacing a hard disk drive (HDD), you often need to reinstall the operating system and restore data from a backup. Solid state drives (SSDs) can typically be swapped seamlessly in comparison. If the disk is integrated into a laptop, you may need professional assistance to replace an internal drive. For external USB drives, you can easily substitute the malfunctioning drive. Replacing the disk drive involves some effort but will permanently fix the root cause of the “no disk in drive” error.
Sources:
Recover Data Before Replacing Drive
If the disk errors are severe enough that you need to replace the hard drive, you will want to recover your files first. Replacing the drive will make data recovery much more difficult or impossible if you have not backed up your files elsewhere.
Use data recovery software like Disk Drill to scan the drive and recover data before replacing the hard drive. Disk Drill can recover from corrupted, damaged, or inaccessible hard drives by scanning the drive sectors and reconstructing files. Follow these steps:
- Download and install Disk Drill data recovery software.
- Connect the problematic hard drive to your computer.
- Launch Disk Drill and select the drive you need to recover files from.
- Click “Recover” and wait for Disk Drill to scan the drive.
- Preview found files and select those you want to recover.
- Choose a safe storage location and start the recovery process.
With the right software, you can recover lost files even from a damaged or failing hard drive before it is replaced. This protects valuable photos, documents, and other data. See this guide for more details on recovering data from a crashed hard drive.