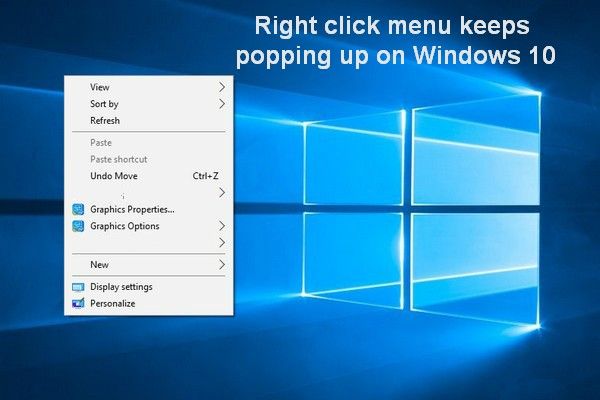
The right-click context menu is an essential part of navigating and managing files and applications in Windows. It provides quick access to common commands like copy, paste, delete, properties, and more. However, at times the right-click menu may stop working properly or fail to open at all.
Common issues include the menu not opening, opening and immediately closing, missing options, or opening the wrong menu. This can significantly hinder productivity.
This guide will walk through various troubleshooting steps to diagnose and fix a broken right-click context menu in Windows 10. We’ll examine software issues, system settings, file associations, system file integrity, and reinstallation as potential solutions.
Check for Basic Software Issues
Before diving deep into troubleshooting, first check for some basic software issues that could be causing problems with your right-click menu.
Restart Your Computer
Restarting your computer resets programs and processes and can often resolve simple software glitches. Shut down your computer completely and restart it to see if the right-click menu works properly afterwards.
Check for Updates
Make sure your version of Windows is up to date by going to Settings > Update & Security > Windows Update and installing any available updates. Updates frequently include bug fixes that could resolve your right-click issues.
Scan for Malware
Malware like viruses and spyware can sometimes disrupt your right-click menu. Scan your computer for malware using Windows Security or third-party antivirus software to see if that’s the culprit. Removing any infections may fix your right-click problems.
Troubleshoot Specific Components
One of the most common causes of right-click issues is a problem with the specific mouse, touchpad, or display drivers on your system. Here are some things to try:
Update or reinstall your mouse or touchpad drivers. Outdated drivers can cause the right-click function to stop working properly. Go to Device Manager, find your mouse/touchpad device, right-click it, and select Update Driver. Or uninstall the device and reboot to reinstall the drivers automatically. See this guide for detailed steps.
Test right-click functionality with an external mouse. Plug in a wired USB mouse and see if right-click works. If the external mouse right-click works fine, then the issue is with your laptop’s touchpad drivers.
Update or reset your display drivers. Faulty display drivers can also manifest as right-click problems. Go to Device Manager, find your display adapter, right-click and update the drivers. Or you can uninstall and reinstall the adapter to completely reset the display drivers.
If updating the drivers does not resolve the problem, you may need to restore an earlier version of the drivers that was working properly. Contact your device manufacturer for help obtaining older driver versions.
Examine Context Menu Settings
The context menu settings are controlled via the Windows registry. You can manually navigate to the relevant keys to check for any issues or reset the menus to default if needed.
To edit the registry:
- Type “regedit” into the Start menu to open the Registry Editor
- Navigate to HKEY_CLASSES_ROOT\Items\shell to find the right-click menu entries
- Carefully examine each key and value to identify any abnormalities or missing entries
- You can right-click and delete any faulty keys/values, then restart to reset them
- Alternatively, you can export the keys to file, repair Windows, and re-import to restore defaults
Editing the registry incorrectly can cause serious issues, so backup before making changes. If in doubt, resetting the whole context menu with a simple registry tweak may be safest.
Resetting the shell keys often resolves quirky right-click behavior. Just be aware it will revert customizations too.
Try System Restore
System Restore is a built-in Windows feature that can help resolve issues with your right-click menu by reverting your system files and settings to an earlier point in time, called a restore point. When System Restore is enabled, Windows automatically creates restore points before major system events like installing an app or driver. You can also create restore points manually.
To run System Restore:
- Open the Start menu and search for “Create a restore point.” Choose it from the list of results.
- In the System Protection dialog box, click System Restore.
- On the next screen, click Next. Select a restore point that was created before you started having issues with the right-click menu, then click Next.
- Confirm your choice to begin the system restore process. Windows will restart your computer to complete the restore.
After your computer restarts, test to see if the right-click menu works properly again. If the issues persist, you may need to revert to an earlier restore point.
System Restore is generally safe to use and can resolve many software-related issues, but isn’t guaranteed to fix problems in all cases [1]. It’s a good first troubleshooting step before trying more complex solutions.
Reset File Associations
One way to fix issues with the right-click menu is resetting file associations in Windows. This resets files to open with the default Windows programs. To do this:
Open the Default Programs menu by going to Settings > Apps > Default Apps. Under “Set defaults by app,” scroll down and select the file type you want to reset associations for, such as “.pdf” files. Click the application it’s currently set to open with, then select “Reset to default” from the menu.
This will change the association back to the default Windows application for that file type. For example, “.pdf” files will go back to opening with Microsoft Edge. You can repeat this process for other file types as needed.
Resetting associations this way can fix conflicts where files aren’t opening properly. Just keep in mind it will change your preferences for those file types. However, you can always go back and re-assign custom applications later if needed.
Run SFC and DISM
SFC (System File Checker) is a tool in Windows that scans system files for corruption and replaces damaged or missing files from a known good cache. To run SFC, open an elevated Command Prompt and type “sfc /scannow”. This will scan all protected system files and replace corrupted files from the cache.
DISM (Deployment Image Servicing and Management) is another tool that repairs the Windows image. It can fix issues that SFC cannot. To run DISM, open an elevated Command Prompt and type “DISM /Online /Cleanup-Image /RestoreHealth”. This will scan and repair corruptions in the Windows image.
According to this Microsoft forum post, running SFC and DISM scans can fix many random Windows issues caused by file corruption. However, some Reddit users report SFC rarely resolves problems for them.
Running SFC and DISM is unlikely to cause additional problems and generally safe as a troubleshooting step. The scans can take 30 minutes or more to fully complete. While no guarantee, running SFC and DISM scans is one of the easiest ways to check for and repair system file errors that may be causing right-click menu problems in Windows 10.
Back Up and Reinstall Windows
Reinstalling Windows 10 should be considered a last resort when troubleshooting right-click menu issues, as it will erase all of your files and settings. However, it may be necessary if all other options have failed.
Before reinstalling Windows 10, it’s crucial to back up your files and settings. This will allow you to restore your data after reinstalling the OS. Once your files are backed up, you can proceed with a clean installation of Windows 10.
To do a clean install, first create Windows 10 installation media on a USB drive or DVD. Then boot your PC from the installation media, select your language and keyboard options, and accept the license terms. Choose “Custom: Install Windows Only” when prompted to keep nothing or upgrade. Lastly, follow the on-screen instructions to finish installing Windows 10.
After reinstalling Windows 10, you can restore your files and settings from the backup you created. While tedious, this process should reset any system files or configurations that may be causing right-click menu problems.
Third-Party Tools
There are some third-party utility software programs that may help troubleshoot and resolve issues with the right-click context menu in Windows 10.
One popular program is CCleaner, which can help optimize, clean, and repair problems with Windows. CCleaner has a “Tools” section that lets you manage startup programs, uninstall software, update drivers, and fix issues with the registry. Running the various optimization tools in CCleaner may identify and resolve corrupt registry keys or other problems affecting the context menu.
However, use caution with registry cleaners like CCleaner. Indiscriminately cleaning the registry can sometimes cause more harm than good and make your PC unstable. Only use the registry cleaner if you are comfortable tweaking the registry and can restore from a backup if needed.
Other third-party utilities like IObit Advanced SystemCare or Glary Utilities also offer similar system optimization and cleaning features. But again, use discretion when running registry cleaners or uninstallers, as they may do more harm than good if not used properly.
In general, third-party optimization tools should be used selectively and with caution. They can automate and speed up some troubleshooting steps, but improper use may lead to a less stable system. Manual troubleshooting is still recommended as a first step before trying potentially risky automated tools.
When to Seek Professional Help
If you have diligently tried all of the troubleshooting steps outlined in this guide but are still experiencing issues with your right-click menu in Windows 10, it may be time to seek help from a professional computer repair service.
Persistent right-click menu problems that prevent you from efficiently using your computer likely indicate an underlying software issue that may require advanced technical expertise to properly diagnose and repair.
When looking for professional computer repair, seek out services with certifications from manufacturers like Microsoft, CompTIA, or Dell. Technicians with certifications like MCSA: Windows 10 have proven expertise in diagnosing Windows-specific problems. Also look for services with degrees in computer science or engineering for the best results.
Ask any prospective computer repair company about their experience with right-click menu issues in Windows 10. Prior experience with this specific problem indicates they have the technical knowledge to effectively troubleshoot it.
Reputable services should provide you with a written estimate for the cost of repairs before starting work. Costs will vary based on the complexity of diagnosing and fixing your right-click issues. Expect to pay anywhere from $80-$200+ for professional repair of a stubborn right-click menu problem.
With proper expertise, a professional computer repair service can get your right-click menu working again when DIY efforts are unsuccessful. Seek them out if the issue persists after exhaustively trying fixes on your own.
