Dealing with the “no bootable device” error in Windows 10 can be frustrating, but there are several troubleshooting steps you can take to get your PC booting properly again. In this comprehensive guide, we’ll walk through all the potential causes of and fixes for the no bootable device error in Windows 10.
What Causes the Windows 10 No Bootable Device Error?
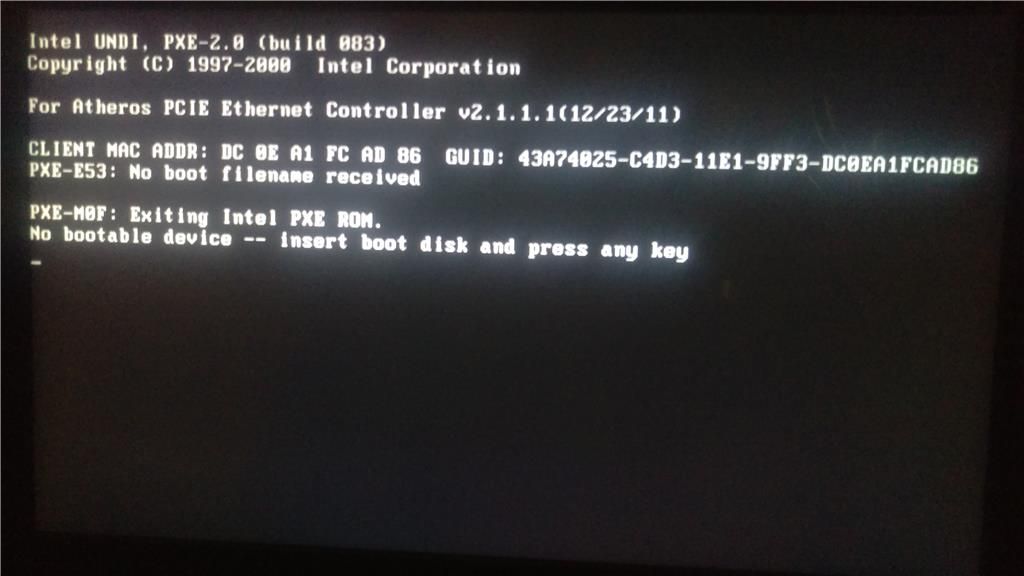
The “no bootable device” error typically appears because your PC is not able to find a bootable partition or hard drive from which to start up the operating system. Here are some of the most common causes of this error:
- Corrupted boot configuration data (BCD)
- Missing or corrupted bootloader files
- Failed hard drive
- Disconnected hard drive
- Inaccessible hard drive or SSD
- Outdated BIOS/firmware
- Secure Boot conflicts
- Fast Startup issues
Let’s look at each of these common culprits in more detail:
Corrupted Boot Configuration Data (BCD)
The BCD store contains important boot configuration parameters that Windows needs to start up properly. If this file gets corrupted or modified incorrectly, you may see the no bootable device error.
Missing or Corrupted Bootloader Files
Critical Windows boot files like bootmgr or winload.exe could become corrupted or accidentally deleted, resulting in the no bootable device message.
Failed Hard Drive
If your hard drive has failed completely or has logical errors that prevent files from being read properly, Windows will not be able to boot from the drive.
Disconnected Hard Drive
If your hard drive becomes disconnected from the motherboard or its power cable works loose, Windows will not detect a bootable drive at startup.
Inaccessible Hard Drive or SSD
Your hard drive may also not be accessible if it has bad sectors, if critical partitions become corrupted or deleted, or if you have a RAID failure.
Outdated BIOS/Firmware
An outdated system BIOS or firmware can sometimes lead to boot issues with storage devices.
Secure Boot Conflicts
In rare cases, having Secure Boot enabled in your BIOS can cause detection issues with some storage devices that prevent booting.
Fast Startup Issues
The Fast Startup feature in Windows 10 relies on a system hibernation file to resume quickly. If this file gets corrupted, it can stop your system from booting properly.
How to Run Startup Repair for the No Bootable Device Error
One of the first things you should try if you see the no bootable device error is running the Startup Repair tool in Windows Recovery Environment (WinRE). Here are the steps to run Startup Repair:
- Insert your Windows 10 installation media or recovery drive and boot your PC from it.
- Choose your language settings, then click Next.
- Click Repair your computer on the System Recovery Options screen.
- Select Troubleshoot => Advanced options => Startup Repair.
- Startup Repair will scan your system and attempt to automatically fix boot issues.
- After completing, it will reboot your PC and attempt to boot normally.
Startup Repair may be able to automatically resolve issues like BCD corruption, bootloader problems, or Fast Startup errors. If it is still unable to boot after running Startup Repair, you’ll need to troubleshoot further.
How to Use System Restore to Fix the No Bootable Device Error
If you believe your no bootable device error began after installing an update or new software, using System Restore to roll back to a previous restore point may resolve it. Here are the steps to try System Restore:
- Follow steps 1-4 above to boot to WinRE.
- Choose Troubleshoot => Advanced options => System Restore.
- Select your Windows installation drive as the location.
- Choose a restore point that occurred before you began having issues.
- Allow System Restore to complete and your PC will reboot.
This can be an effective solution if you think specific software changes led to the no bootable device error arising.
Check for Hardware Issues Causing the Error
Hardware problems like a failed drive, disconnected drive, or RAID failure can certainly prevent Windows from detecting a bootable location. Here are some steps to check for hardware-related causes:
- Check cabling – Make sure all hard drive data/power cables are properly connected.
- Switch SATA ports – Try moving the hard drive to different SATA ports/channels on the motherboard.
- Check BIOS settings – Confirm the boot order and hard drive priorities are properly set.
- Update drivers – Update storage controller and drive drivers in case of conflicts.
- Update firmware – Check for motherboard, hard drive, and SSD firmware updates.
- Test another drive – Attempt booting from another drive or external USB drive.
Pay close attention to ensure cabling is secure, boot order is correct, and the BIOS recognizes the drive. Swap cables and SATA ports to rule out defects. Updated firmware and drivers may resolve compatibility issues. If another drive boots properly, your main drive likely has failed or is undetectable.
Run chkdsk to Check Drive Errors
Scanning your drive for errors using chkdsk may reveal underlying file system or drive corruption issues preventing Windows from booting properly:
- Boot to the WinRE command prompt as outlined above.
- Run chkdsk C: /f (replace C: with your Windows drive letter if different).
- Allow chkdsk to fully complete – this can take a while if there are many errors.
- Type exit to reboot your PC.
Chkdsk will attempt to repair file system corruption, bad sectors, and directory errors that could be impacting the bootable state of your drive.
Use Bootrec to Repair Boot Files
You can utilize the Bootrec tool from within the WinRE command prompt to automatically repair the following boot-related issues:
- Master Boot Record (MBR)
- Boot Sector
- BCD Store
- Boot Files
To use Bootrec, follow these steps:
- Boot to WinRE Command Prompt.
- Run bootrec /fixmbr – Repairs MBR.
- Run bootrec /fixboot – Writes new boot sector.
- Run bootrec /scanos – Scans OS and finds Windows installations.
- Run bootrec /rebuildbcd – Rebuilds BCD store.
- Type exit and reboot PC.
This automated process can help recreate critical boot files and data needed for Windows to start up properly again.
Rebuild BCD Manually Using Bcdedit
In some cases, you may need to manually rebuild the BCD store using bcdedit if automatic methods fail. Here is the process:
- Boot to WinRE Command Prompt.
- Type bcdedit to view current BCD entries.
- Note the identifier for the Windows bootloader (usually {default}).
- Run bcdedit /export C:\bcdbackup to export the BCD (optional).
- Use bcdedit /delete {default} to remove the existing bootloader.
- Run bcdedit /import C:\bcdbackup to import the backup (optional).
- Type bcdedit /set {default} device partition=C: to reset bootloader.
- Run bcdedit /set {default} osdevice partition=C: to set system partition.
- Reboot PC.
Manually rebuilding the BCD mappings via bcdedit provides granular control to fix booting issues.
Use Bootsect to Rebuild Master Boot Record
Rebuilding the Master Boot Record (MBR) via the bootsect tool may help if it has become damaged:
- Boot to WinRE Command Prompt.
- Run bootsect /nt60 C: /mbr (replace C: with Windows drive letter).
- This writes a fresh MBR.
- Type exit and reboot.
The bootsect command is an alternative method to fixmbr for repairing the MBR required to boot Windows.
Perform a Startup Repair Using Install Media
If the built-in Startup Repair tool fails, you can also re-run it manually using your Windows install media:
- Boot from your Windows 10 USB or DVD.
- Go to Repair => Troubleshoot => Advanced Options => Startup Repair.
- Select your Windows drive and let Startup Repair re-scan and diagnose the issues.
- Wait for reboot and see if this second deeper repair resolved the problem.
This method may more thoroughly repair boot issues than the integrated Startup Repair.
Perform a Clean Reinstall of Windows
If all else fails, perform a clean reinstallation of Windows 10:
- Backup any data you need from the drive.
- Boot from your install media.
- Choose your language and click Next.
- Select Install Windows.
- Enter your product key if prompted.
- Agree to the license terms, then click Custom Install.
- Delete all existing partitions to cleanly reformat the drive.
- Follow the on-screen directions to finish installing Windows.
This will completely erase your drive and do a fresh install, which should resolve any underlying problems causing the no bootable device error.
Replace the Hard Drive if Hardware Failure is Suspected
If you’ve exhausted all other troubleshooting, complete drive failure may be to blame. In that event, replacement of the storage device is required:
- Backup data from the faulty drive if possible.
- Physically install the new hard drive or SSD.
- Boot from your Windows install media.
- Follow the clean install steps above to freshly install Windows on your new drive.
- Restore your data and files after completion.
While not ideal, outright drive replacement is necessary if all indications point to a total hardware failure.
Conclusion
Troubleshooting the Windows 10 no bootable device error generally involves checking for drive issues, repairing the MBR, rebuilding the BCD store, and restoring boot files. Startup Repair and System Restore can address many software-related causes. Hardware problems may require replacing cables/ports, firmware updates, driver fixes, or ultimately drive replacement. As a last resort, perform a clean reinstallation of Windows 10 to eliminate any remnants of underlying software or filesystem corruption issues.
Following the comprehensive set of troubleshooting steps outlined in this guide should help get your PC successfully booting again after seeing the dreaded no bootable device error screen.