If your Windows 10 PC is not detecting your hard drive, there are a few troubleshooting steps you can take to try and fix the issue.
Quick Fixes
Here are some quick things to try first:
- Restart your PC – Shut down your computer completely, wait a few seconds, and then power it back on. Sometimes a simple restart can fix minor issues like Windows not detecting hardware.
- Check connections – Make sure both ends of the SATA data and power cables are plugged in securely between the hard drive and motherboard. Also check that power cables are not loose.
- Update drivers – Go to Device Manager, expand Disk drives, right-click your hard drive, and select Update driver. Try updating to the latest driver for your hard drive.
- Change SATA port – Try connecting your hard drive to a different SATA port on your motherboard.
- Remove and reconnect – Physically remove the hard drive and reseat it. Disconnect both SATA data and power cables, wait a few seconds, then reconnect everything.
If none of those quick fixes work, follow the steps below for additional troubleshooting.
Check in Disk Management
First, see if your disk shows up in Disk Management:
- Open the Start menu and type “disk management.”
- Click on Create and format hard disk partitions.
- Look for your disk in the list. It may show up but without a drive letter assigned. Or it may not show up at all.
If you see the disk listed but it says “Not Initialized” or “Offline,” you may just need to initialize it or assign a drive letter. Right-click on the disk and choose those options. Initialize will overwrite any existing data though, so only do that if the disk is brand new or you don’t need what’s on it.
If the disk doesn’t show up at all in Disk Management, move on to the steps below.
Check Physical Connections
Make sure all the physical connections are secure between your hard drive and the computer. Follow these steps:
- Power off your computer and unplug it from power.
- Open the PC case and locate the hard drive.
- Check that both ends of the SATA data cable are plugged in securely, to the motherboard and hard drive.
- Check that the SATA power cable is also firmly connected to the hard drive.
- If you have a desktop PC, your hard drive will also need a power cable from the PSU.
- Reseat each cable connection by unplugging and plugging it back in. This can fix loose connections.
- Close up the PC, plug it back in, and power it on to check if the issue is resolved.
Be sure you are not accidentally unplugging the primary hard drive with your operating system on it. Check cable colors or labels to identify each one.
Check in BIOS
If the hard drive still isn’t showing up in Windows, next try looking for it in BIOS:
- Restart your PC and press the BIOS key, usually Delete, F1, F2, or F10.
- Navigate to where the hard drive information is displayed, often called “Advanced” or “Storage Configuration.”
- See if your hard drive is listed here. If not, it may be disabled for some reason.
- If it is listed, enable it if applicable. Make sure the storage type is set to Auto or SATA if this option exists.
- Save changes and exit BIOS to see if this fixes the issue.
If the hard drive now shows up in BIOS but still not in Windows, move on to further troubleshooting.
Try Another SATA Cable
Bad SATA cables can cause issues like drives not being detected. Follow these steps to swap cables:
- Shut down your PC, switch off the power supply, and unplug power.
- Open up the PC case and locate the SATA data cable connected to your hard drive.
- Unplug the SATA cable from the hard drive and motherboard.
- Replace it with a known good SATA cable.
- Reconnect everything, close up the PC, and turn it back on.
If the hard drive is now detected, the original SATA cable was faulty. Replace it with a new high quality cable.
Try a SATA to USB Adapter
Using an external USB hard drive dock or enclosure is a good way to test if the drive itself is still functioning. Follow these steps:
- Get an external hard drive dock or USB enclosure compatible with your drive’s form factor.
- Extract the hard drive from your PC and insert it into the dock/enclosure.
- Connect the USB cable to your computer.
- See if the drive appears in Windows File Explorer. If it does, the drive itself is likely healthy.
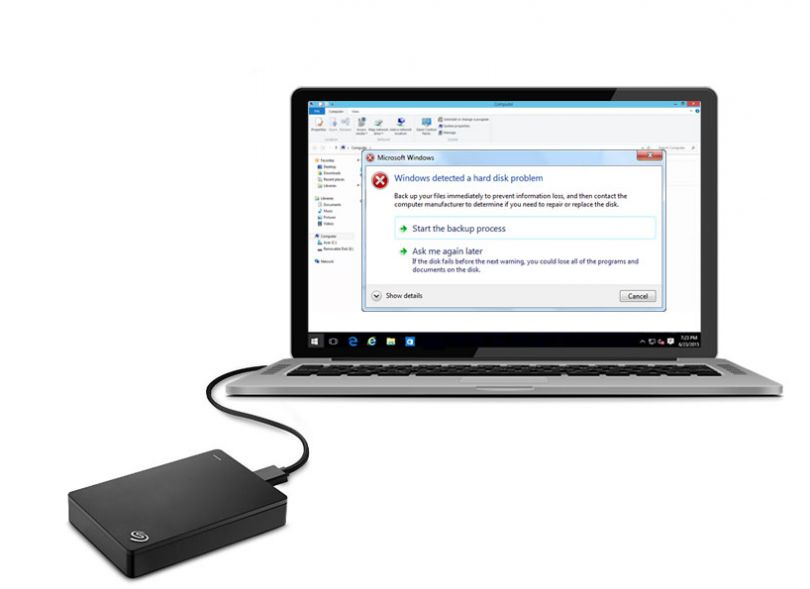
If the drive does not appear externally either, it is probably failed or degraded. You will need to replace it if important data cannot be recovered.
Check in Safe Mode
Booting into Safe Mode loads only the essential drivers and services. This can help determine if third-party software or a driver conflict is causing issues detecting the drive. Here’s how to boot to Safe Mode:
- Restart your PC.
- As it boots, hold down the Shift key. This brings up the Advanced Boot Options menu.
- Select Troubleshoot > Advanced options > Startup Settings > Restart.
- After your PC restarts, select Safe Mode with Networking on the startup screen.
Now check in Disk Management and Device Manager to see if your disk is detected. If it now shows up, a conflict with other software or drivers may be occurring.
Update Drivers
An outdated storage controller driver can prevent drives from being detected properly. Follow these steps to update drivers:
- Open Device Manager.
- Expand the Storage controllers section.
- Right-click on any storage controller/SATA controller device and select Update driver.
- Select Search automatically for updated driver software.
- Restart your PC and check if the hard drive is now detected.
You can also visit your motherboard or system manufacturer’s website and download the latest SATA drivers for your model. Install those drivers and restart.
Check Power Supply
Insufficient power from a failing PSU can cause drives not to spin up properly. Follow these steps:
- Shut down your PC, switch off the PSU, and unplug power.
- Open up the case and check that the SATA power connectors are plugged into the drive securely.
- Check for any issues like damaged cables or loose connectors.
- Turn on the PSU switch and plug power back in.
- Power your PC back on and see if the drive is detected now.
If the issue persists, use a multimeter to test the voltage of the SATA power connector while the PC is on. It should be around 12v. If it’s abnormal, your PSU may be defective.
Check Data Cable
Damaged SATA data cables can prevent drives from communicating properly with the motherboard. Try these steps:
- Shut down your PC, switch off power, and unplug power cable.
- Disconnect the SATA data cable from the hard drive and motherboard.
- Inspect both ends of the cable for bent or broken pins.
- Check the cable wire for any damaged insulation.
- Replace the SATA cable if it’s damaged.
- Reconnect the new cable securely on both ends.
- Restart your PC to see if the hard drive is detected now.
If detection issues persist, the motherboard SATA ports may be damaged. Try connecting the drive to a SATA expansion card instead.
Update BIOS
An outdated system BIOS can sometimes cause compatibility issues with drives. Here’s how to update your BIOS:
- Go to your motherboard manufacturer’s website and find BIOS updates for your specific model.
- Download the latest BIOS version and extract the files.
- Read through the instructions carefully before proceeding.
- Restart your PC, access the BIOS, and use the update utility provided.
- Once the BIOS flash completes, restart your PC.
Now check if Windows detects your hard drive. Take precautions before updating BIOS and only do so if necessary.
Replace Hard Drive
If you’ve tried all other troubleshooting steps and the drive still isn’t detected, the drive itself has likely failed. Here’s how to replace it:
- Back up any important data from the drive that you can access.
- Buy a new replacement hard drive compatible with your PC.
- Shut down your computer, switch off the PSU, and unplug power.
- Open up the PC case and remove existing hard drive cables.
- Unscrew the drive from the HDD cage or bracket.
- Install the new drive in the same orientation and screw it into place.
- Attach the SATA data and power cables to the new drive.
- Close up the case, plug in power, and turn on the PC.
- Partition and format the new drive in Disk Management.
Your Windows PC should now detect the new replacement drive. You may need to reinstall your OS or restore backups.
Conclusion
Troubleshooting why your Windows 10 PC is not detecting a hard drive can take some time and effort, but using the steps outlined above should help you identify and resolve the issue. Start with simpler solutions like checking connections and trying a new SATA cable. If the drive still isn’t recognized, removing it and testing externally can verify if the drive itself has failed. Replacing a failed or damaged hard drive and reinstalling your operating system will ultimately get your PC detecting the drive again.