Dealing with Windows 7 boot failures can be frustrating, but the good news is that there are several potential solutions you can try to get your system back up and running again. In this comprehensive guide, we’ll walk through the most common causes of Windows 7 boot problems and provide step-by-step instructions to help you troubleshoot and resolve the issue.
Quick Overview: Common Causes of Windows 7 Boot Failures
Before we dig into the details, here is a quick overview of some of the most common reasons why Windows 7 may fail to boot properly:
- Corrupted system files – Important Windows 7 system files can become damaged or corrupted, preventing Windows from starting up correctly.
- Faulty hard drive – Hard drive errors or failures can prevent Windows from loading.
- Outdated drivers – Incompatible, corrupt or missing drivers can sometimes cause boot issues.
- Incorrect boot order – If your BIOS boot order is set incorrectly, Windows may fail to initialize at boot.
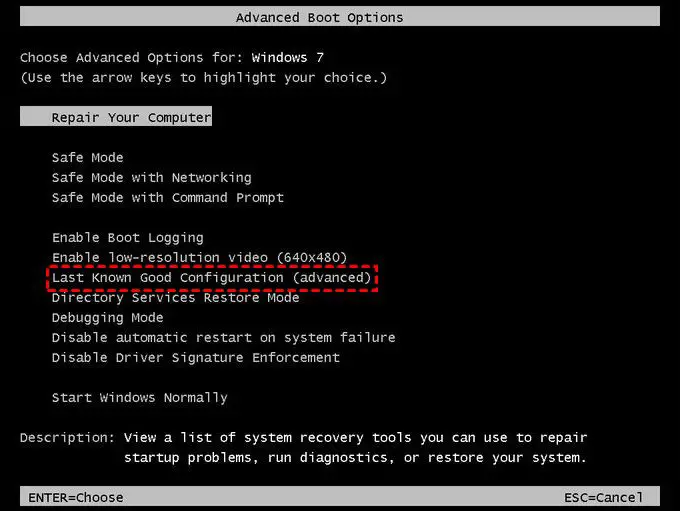
- Advanced boot options changed – Altering advanced boot settings like Safe Mode can sometimes cause boot problems.
- Outdated BIOS – An outdated system BIOS may be incompatible with your Windows 7 installation.
- Hardware issues – Faulty or failing hardware components like RAM or the hard drive can cause boot failures.
- Boot sector viruses – Malware or viruses targeting the boot sector can prevent Windows from starting properly.
So in summary, the core problems typically involve either system file errors, hard drive issues, driver conflicts, or damaged boot sectors. With the right troubleshooting steps, you can identify and resolve the specific problem preventing your Windows 7 system from booting.
Step 1: Run Startup Repair
The first thing you’ll want to try is using Windows 7’s built-in Startup Repair tool. Startup Repair can automatically diagnose and fix certain boot issues by replacing corrupted system files, fixing the boot sector, or correcting other key problems.
To run Startup Repair:
- Insert the Windows 7 installation disc or USB drive and boot your PC from it.
- On the Install Windows screen, click on Repair your computer in the lower left corner.
- Select your Windows installation and click Next.
- Click Startup Repair. This will begin scanning your system.
- Allow Startup Repair to run through its automated repair process which may take several minutes.
- Once complete, remove the installation media and reboot your computer normally.
With any luck, Startup Repair will have automatically fixed the boot issue and Windows 7 will now start as normal. If the problem still persists, move on to the other troubleshooting steps below.
Step 2: Boot into Safe Mode
If Startup Repair doesn’t resolve the problem, the next thing to try is booting into Windows 7’s Safe Mode. Safe Mode loads a minimal version of Windows with just core drivers and services. This can allow you to boot into Windows even if there is a driver conflict or other problem where normal boot is failing.
To boot into Safe Mode:
- Reboot the computer and press F8 as the system is first loading to access the Windows Boot Manager.
- Select Safe Mode and hit Enter.
- Log into your account once Windows finishes loading in Safe Mode.
Now you’ll want to try resolving the problem while in Safe Mode. Some common steps include:
- Uninstalling recently added hardware, software or drivers.
- Using System Restore to roll back to a previous restore point before the boot issue occurred.
- Running SFC (System File Checker) to check for and replace corrupted system files. To do this, open an admin Command Prompt and type sfc /scannow.
After taking these or other steps to fix the problem in Safe Mode, try rebooting normally again to see if Windows 7 now boots correctly.
Step 3: Run a Virus Scan
Sometimes boot problems are caused by viruses or malware that have infected the boot sector or critical system files. Running a thorough antivirus scan can help uncover and remove any infections that may be impacting the boot process.
To scan for and remove infections:
- Boot into Safe Mode with Networking by selecting this option in the Windows Boot Manager.
- Run a full system antivirus scan. Make sure virus definitions are fully updated first.
- Quarantine or delete any infections or malware that are found.
- Reboot and see if the boot issue is resolved.
Virus scans in Safe Mode provide the most thorough cleaning, ensuring all malicious files or processes are stopped so they can be properly removed.
Step 4: Use System Restore
Returning your system back to an earlier restore point can be an effective way to undo recent system changes or software installations that may be causing boot problems in Windows 7.
To use System Restore:
- Boot into Safe Mode with Command Prompt.
- At the command prompt, type rstrui.exe and hit Enter.
- When the System Restore window opens, select a restore point from before you began having boot issues and click Next.
- Confirm the restoration and allow System Restore to complete.
- Restart your computer normally and see if the boot issue is fixed.
This will roll Windows 7 back to a previous state, which can resolve many boot problems caused by recently changed settings, drivers, or software updates.
Step 5: Start Windows in Clean Boot State
Entering into a Clean Boot state is useful for troubleshooting issues caused by third party drivers or startup programs. This prevents any non-essential software from loading at boot so you can determine if a conflict exists.
To start up in a Clean Boot state:
- Open the System Configuration utility by typing msconfig in the Start Menu search bar and selecting the program.
- Under the General tab, select “Selective startup”.
- Under the Services tab, check the box to “Hide all Microsoft services” then disable all remaining services.
- On the Startup tab, click Open Task Manager then disable all startup programs.
- Close System Configuration and restart your computer.
Windows will now start up in a Clean Boot state. Test to see if the boot issue is now resolved. If the problem persists, it is not related to third party services or software. You can reverse these Clean Boot steps by returning to System Configuration and re-enabling normal services and startup items.
Step 6: Run CHKDSK
CHRDSK is a utility that checks your hard drive for file system errors or bad sectors. Running it may uncover and fix underlying disk problems that are causing Windows 7 boot issues.
To run CHKDSK:
- Access the Command Prompt in Safe Mode.
- Type chkdsk /f and hit Enter
- Allow CHKDSK to fully complete checking and repairing any disk problems.
- Restart your PC and see if Windows 7 now boots properly.
CHKDSK helps identify and resolve any file system corruption or physical hard drive defects that could be impacting the boot process.
Step 7: Check for Outdated Drivers
Device driver conflicts or errors can sometimes prevent Windows 7 from booting correctly. Checking for outdated or incompatible drivers and updating them may resolve the boot failure.
To fix driver issues:
- While in Safe Mode, open Device Manager by right-clicking Computer and selecting Manage.
- In Device Manager, expand each device category and look for any warning symbols indicating problematic drivers.
- Update any outdated drivers by visiting the device manufacturer’s website and downloading the latest drivers.
- You can also right-click devices in Device Manager and select Update Driver Software.
- Restart your system normally and check if the driver updates fixed the boot issue.
Keeping your motherboard, storage, graphics and other device drivers fully up-to-date will prevent them from causing conflicts that lead to boot problems.
Step 8: Examine BIOS Settings
Incorrect BIOS settings can sometimes prevent Windows 7 from booting properly. Check for BIOS issues like:
- Outdated BIOS version
- Boot order set incorrectly
- BIOS configured for legacy boot instead of UEFI
To investigate and potentially update BIOS settings:
- Enter your system’s BIOS setup menu on boot, usually by pressing a key like F2 or Delete.
- Check the boot order and confirm the Windows bootloader or drive with your Windows 7 install is set first.
- Update to the newest BIOS version if greatly out of date.
- Make sure UEFI vs legacy boot settings match what Windows was configured for.
- Save changes and exit BIOS to reboot.
With your BIOS properly configured, Windows 7 should boot normally again.
Step 9: Refresh or Reset Windows 7
If all else fails, performing a full refresh or reset of Windows 7 essentially reinstalls Windows while preserving your personal files and data. This can fix even very stubborn boot issues caused by deep system file corruption.
To refresh or reset Windows 7:
- Boot into the Windows 7 installation media.
- Go to the Recovery Options menu.
- Choose either the Refresh or Reset option.
- Follow the prompts to reinstall Windows 7 while keeping your data intact.
Once the recovery process completes, Windows 7 should be restored to a clean, functional state that correctly boots up again.
Conclusion
Following the step-by-step troubleshooting guide above will help you diagnose the vast majority of Windows 7 boot issues. Start with simpler steps like Startup Repair before moving on to more complex options like refreshing Windows 7 if necessary. With persistence, you should be able to get Windows 7 booting normally again.
Some final tips include:
- Take notes on any error messages during boot as they can hint at the cause.
- Google any specific error codes for additional troubleshooting advice.
- Use boot logging or boot debugging tools to monitor the boot process in detail.
- Back up personal data before making significant system changes or resets.
- Check for BIOS updates, hard drive firmware updates, and other hardware-related updates.
While frustrating, most Windows 7 boot problems can be repaired with a systematic troubleshooting approach and the right tools. Follow the steps outlined here to get your system booting reliably again.