Sometimes you may need to force delete a file in Windows that cannot be removed through normal methods. This is usually because the file is being used by another application or process. Force deleting allows you to override any restrictions and delete the file anyway. There are a few reasons you may need to force delete a file:
- The file is corrupted or damaged and cannot be opened or deleted normally.
- An application has crashed while using the file and still has it locked.
- You want to completely remove sensitive files to prevent recovery.
- The file has incorrect or missing permissions preventing deletion.
- It is more convenient than closing other programs using the file.
Force deleting files bypasses the usual safeguards. So it should only be done when absolutely necessary. This guide will walk through how to force delete files from the Windows command prompt.
When Force Deleting is Needed
Sometimes you may need to force delete a file in Windows 10 that cannot be removed through normal means. Common scenarios where force deleting a file becomes necessary include:
File is locked or in use – If a file is currently open in an application or process, Windows will not allow it to be deleted until the file is closed. Trying to delete in-use files through the GUI will produce an “Access is denied” error. Force deleting from the command line can override this protection.
File is read-only – Read-only files cannot be deleted through the standard delete operation. Setting the read-only attribute to false or using the “del” command with admin rights allows forcefully overriding the read-only status.
Insufficient permissions – Standard users may not have Delete permissions for certain protected folders like Windows, Program Files etc. The command line delete run as admin bypasses permission checks.
Stuck files – Sometimes file handles may become stuck open even after an application crashes, preventing file deletion. The command line provides a brute force way to remove stuck files.
Bypassing Recycle Bin – The Recycle Bin can occasionally refuse to permanently delete files. The command line delete completely bypasses the Recycle Bin.
In these cases, switching to the command line provides more options for forcefully removing stubborn files that cannot be easily deleted through the regular GUI delete operation.
Access the Command Prompt
The easiest way to open the command prompt on Windows 10 is to use the Start menu search bar. Here are the steps:
- Click on the Windows Start menu in the bottom left corner of your screen.
- Type “cmd” in the search bar.
- Click on the “Command Prompt” app icon that appears at the top of the search results.
This will open up a command prompt window ready for you to enter commands (Source). An alternative is to right-click on the Start menu and select “Command Prompt” from the app list.
Opening the command prompt this way provides quick access without having to browse folders. Once open, you can then navigate to the specific file location if needed.
Navigate to File Location
To navigate to the location of the file you want to delete in the command prompt, use the cd (change directory) command. Here are the steps:
- Open the command prompt by typing ‘cmd’ in the Windows search bar and hitting enter.
- Type ‘cd \’ to navigate to the root directory of your C drive. For example:
cd \ - To move down into a folder, type ‘cd’ followed by the name of the folder. For example, to enter the Windows folder:
cd Windows - Keep using the cd command to go into subsequent folders until you reach the folder containing the file. For example:
cd System32 - Use ‘cd ..’ to go up a level in the folder hierarchy. For example, to go up from System32 to the Windows folder:
cd ..
Using the cd command allows you to navigate the folder structure until you are in the same location as the file you want to delete (Source 1). Once you’re in the correct folder, you can proceed with deleting the file.
Verify the File Exists
Before deleting a file, it’s important to verify that it actually exists in the directory. You can use the dir command in Command Prompt to list the contents of a directory and confirm the file is there.
For example, if you wanted to delete a file called mydoc.docx located in the C:\Users\Name\Documents directory, you would first navigate there in Command Prompt. Then run:
dir
This will display a list of all files and directories within that folder. Scan the output to ensure mydoc.docx is listed. If it’s there, you can proceed with deleting it. If not, double check you are in the correct directory.
The dir command is useful for verifying a file’s existence before taking actions like deletion. It helps avoid errors from trying to delete files that aren’t actually present (Source).
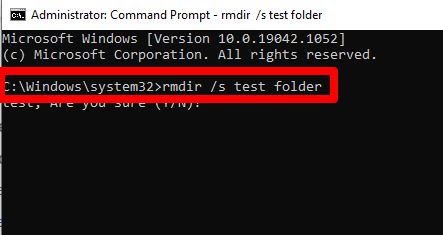
Delete the File
To delete the file, use the del command in the command prompt followed by the /f and /s switches. The /f switch forces the deletion of the file while the /s switch deletes the file from all subdirectories.
The basic syntax is:
del /f /s path\filename
For example, to force delete a file named test.txt from all directories, you would type:
del /f /s c:\users\test.txt
The /f switch overrides any permissions or sharing restrictions to ensure the file gets deleted. The /s switch searches all folders and subfolders to find and remove the file.
This will permanently delete the file, bypassing the Recycle Bin. So only use the del command when you absolutely need to force delete a file that cannot be removed through normal methods.
Confirm Deletion
After deleting the file, it’s important to confirm that the file was actually removed. You can do this by listing the directory contents again to verify that the file no longer appears.
Type the “dir” command again to show a list of all files and folders in the current directory:
dir
Scan the output to confirm that the file you just deleted no longer appears in the directory listing. If you still see the file, then the deletion did not complete successfully. You may need to try deleting it again or troubleshoot why the file was not able to be deleted.
Once you’ve confirmed that the file no longer appears when listing directory contents, you can be assured that the file has been permanently deleted via the command line.
Delete Read-Only Files
If the file you want to delete is marked as read-only, you may need to remove the read-only attribute first before you can delete it. The read-only attribute prevents files from being modified or deleted.
To remove the read-only attribute, you can use the attrib command in Command Prompt. For example:
attrib -r C:\folder\file.txt
This will remove the read-only attribute from file.txt. To do this recursively for all files in a folder, you can use:
attrib -r C:\folder\*.* /S
Once the read-only attribute is removed, you can then delete the file as usual with the del command.
For more details on removing the read-only attribute, see this SuperUser post: How to remove read-only attribute recursively on Windows
Alternative Methods
While the command prompt is the most direct way to force delete files in Windows 10, there are other utilities you can use as well. One popular option is Unlocker, a free tool that can delete locked files.
To use Unlocker to delete a locked file or folder (cite: How to Delete Locked Files and Folders in Windows 11/10):
- Download and install Unlocker.
- Right click on the locked file or folder and select Unlocker from the context menu.
- Unlocker will analyze the file and show you any processes that have locks on it.
- Select the Unlock All option to remove the locks.
- Now you can delete the previously locked file as normal.
Utilities like Unlocker provide a graphical way to delete locked files without having to use the command line. However, the command prompt method is more direct if you just need to quickly delete a file.
Recovering Deleted Files
When using the force delete command, it’s important to understand that recovery becomes much more difficult, if not impossible in some cases. The files are not sent to the Recycle Bin, so you lose that easy restoration option. There are third party tools that may be able to recover a force deleted file if the sectors where it resided have not been overwritten, but success is not guaranteed [1].
Therefore, it’s best to avoid force deleting files unless absolutely necessary. Try sending the file to the Recycle Bin first and only permanently deleting it if you’re sure you no longer need it. You can also move files to an external drive or cloud storage instead of deleting if you think you may need the file again later. Overall, force delete is a powerful command but one that should be used sparingly and with caution.
