Having issues getting your computer to detect an external hard drive can be frustrating. However, there are several troubleshooting steps you can take to force your computer to recognize the external drive.
Quick Fixes
Here are some quick things to try first:
- Restart your computer – Completely power down and restart your computer. This will reset any components that may be preventing the external drive from being detected.
- Try a different USB port – Plug the external drive into another USB port on your computer. Use a rear port directly connected to the motherboard if possible.
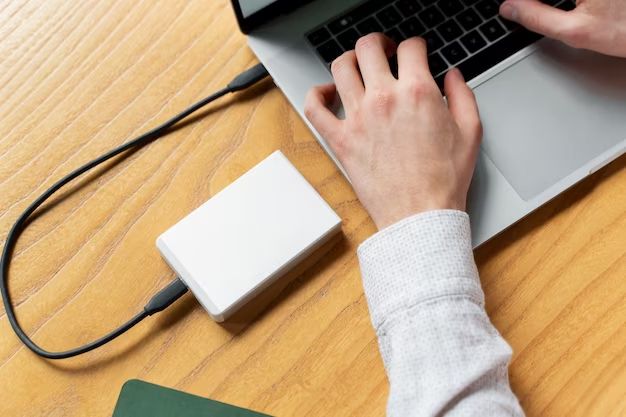
- Check USB cable connections – Unplug the USB cable from both the external drive and computer, then firmly reconnect it at both ends. Ensure the cable is not damaged or loose.
- Update drivers – Install the latest drivers for your external drive, USB ports, and external hard drive controller. Keeping drivers updated can resolve detection issues.
Enable USB in BIOS
If your external hard drive still isn’t being recognized, the issue may be that USB ports are disabled in the BIOS. Here’s how to check and enable USB ports:
- Restart your computer and enter the BIOS setup utility. The key to press varies by manufacturer, but common ones include F1, F2, Del, or Esc.
- Navigate to where USB configuration is listed – this may be under an Advanced, Chipset, or Peripherals tab in the BIOS.
- Ensure the USB ports are enabled. There may be options for different port types like USB 2.0 or USB 3.0 – make sure they are set to Enabled.
- Save changes and exit the BIOS. Allow your computer to restart.
After enabling USB ports in the BIOS, connect your external drive again and see if it is now detected. If not, move on to further troubleshooting.
Assign a Drive Letter
It’s possible the external hard drive doesn’t have a drive letter assigned to it in Windows. Here’s how to assign a drive letter:
- Open up Disk Management in Windows. You can access this by right-clicking the Start menu and selecting Disk Management.
- Look for your external drive in the list. It may show up as an unknown device without a drive letter.
- Right-click on the disk entry and choose Change Drive Letter and Paths.
- Click Add to assign a drive letter to the disk. Choose a letter that isn’t already in use.
- Click OK. The external disk should now show up with your assigned drive letter.
Assigning a drive letter should make your external hard drive accessible in Windows File Explorer. Try accessing files on the external drive now to see if it’s being recognized.
Check for Errors
Detection issues with your external drive may be caused by file system errors or a dead drive. Try scanning for errors using these steps:
- Open Command Prompt as administrator.
- Type “chkdsk X: /f” where X is the letter of your external drive. Press Enter.
- Allow the scan to complete. This can take some time if the drive is large.
- Type “chkdsk X: /r” and press Enter to attempt to repair any bad sectors.
If chkdsk reports unfixable problems with your drive, unfortunately it may be failing. You can try scanning with a third party tool like HDD Regenerator to repair bad sectors, but it’s likely time to replace the drive if errors persist.
Initialize the Disk
A brand new external drive may need to be initialized before use. Initializing the disk will format it and prepare the drive to store files. Here’s how to initialize an external disk in Windows:
- Open Disk Management and find your connected but unrecognized external drive.
- Right click the disk entry and select Initialize Disk.
- Agree to the warning, then select a partition table format – GPT or MBR. GPT is best for drives over 2TB.
- Right click the volume and choose New Simple Volume. Go through the wizard to format and assign a drive letter.
After initializing the disk it should show up as a usable drive with free space. You can now use it to store files, music, photos, and other data.
Update Disk Drivers
Outdated or corrupted drivers for your external drive can prevent proper detection in Windows. To update them, follow these tips:
- Open Device Manager, expand the Disk drives section, and right click on your external hard drive model.
- Select Update driver. Choose to automatically search for updated driver software.
- Follow the on-screen prompts to install updated drivers from the internet or disk.
- Restart your PC after updating disk drivers.
Updating disk drivers will install the latest software to interface with your external drive hardware. This can resolve issues caused by buggy, out-of-date drivers.
Change or Remove External Drive Letter
If your external drive already has a drive letter but isn’t showing up, the letter may be incorrectly assigned or mapped to another device. Here’s how to change or remove the drive letter:
- Open Disk Management and locate your external hard disk.
- Right-click and choose Change Drive Letter and Paths.
- Click Change to assign a different drive letter, or Remove to remove the letter assignment.
- Click OK and restart your PC for changes to take effect.
Changing or removing the drive letter forces Windows to re-detect the disk on boot and may resolve detection issues.
Connect to Another Computer
To rule out hardware issues with your computer’s USB ports, try connecting the external hard drive to another computer. If it works fine on the second PC, the issues are with your original computer. Some things to try:
- Test different USB cables and ports on the original computer.
- Inspect USB ports for damage, dust, or debris. Clean out ports with compressed air.
- Check Device Manager again for USB driver problems on the problem computer.
- Consider a USB hub to expand connectivity if ports are under-powered.
Isolating the detection problem to one PC helps determine if the external drive itself is malfunctioning or whether there is an issue with that computer’s USB connectivity.
Confirm External Power Supply
Larger high-capacity external hard drives often require supplemental power from an AC outlet. If your drive lacks sufficient power, it may not be detected properly. To rule out a power issue:
- Check the USB cable – does it have two connectors, one for data and one for extra power?
- Connect the external power adapter to both the drive and wall outlet.
- Try a different outlet in case the original outlet is providing insufficient power.
- Test the drive on a computer with high-power USB 3.0 ports.
Ensuring stable and sufficient power can resolve detection issues caused by underpowered or inconsistent power delivery over the USB cable.
Replace Interface Cable
Sometimes the USB interface cable that connects your external drive to the computer can fail or degrade over time. Replacing a damaged interface cable can fix detection problems:
- Inspect the existing USB cable for damage like frayed wires or bent plugs.
- Try connecting the drive with a different high-quality USB 3.0 cable.
- Check driver updates for your USB controller hardware.
- As a last resort, purchase a replacement USB interface cable online or from your drive manufacturer.
A new, undamaged USB cable ensures stable connectivity between your external drive and the computer.
Upgrade Drivers and Firmware
Outdated firmware or device drivers can break compatibility between your external hard drive and computer. Regularly updating them helps maintain proper detection and functionality:
- Check your external hard drive manufacturer’s website for firmware update files. Follow their instructions to update the drive firmware.
- Update your USB, chipset, SATA, and other hardware drivers through Windows update or your computer manufacturer.
- Keep your operating system up to date with the latest patches and fixes.
Updating both your computer and external hard drive software prevents device conflicts and recognition issues over time.
Remove Drive in Device Manager
As a last resort, you can try forcing Windows to redetect the external hard drive by removing it in Device Manager:
- Open Device Manager, expand Disk Drives, and locate your external hard drive.
- Right click on the drive and select Uninstall device.
- In the prompt, check “Delete the driver software for this device”, then click Uninstall.
- Unplug the USB cable and restart your computer.
- After rebooting, reconnect your external hard drive and let Windows automatically reinstall drivers.
This will delete existing drivers and force Windows to freshly install the software when recongnizing the attached external drive.
Factory Reset External Drive
If all else fails, resetting your external hard drive to factory default settings may help with persistent detection issues:
- Refer to your drive manufacturer’s website for specific reset instructions.
- Typically this involves pressing a pinhole reset button or key combination at startup.
- Follow on-screen prompts to confirm the drive reset process.
- After resetting, reconnect the drive and let Windows install fresh drivers.
Factory reset erases all user data on the external drive. So be sure to backup your data first. A clean reset can fix firmware problems preventing drive detection.
Conclusion
Troubleshooting external hard drive detection issues requires patience, but is worth trying before replacing the drive. Start with simpler steps like using a new USB cable, then work up to advanced steps like updating firmware and drivers or resetting the device. An external hard drive not being recognized is one of the most common issues, but it can almost always be resolved with one of these steps.