Resetting a MacBook erases all data and restores the computer to its original factory settings. This is useful when selling or giving away a MacBook, to resolve software issues, or if the computer is exhibiting strange behavior. A forced reset may be necessary if the normal restart process is not working.
Resetting deletes all files, user accounts, apps, settings, and macOS itself. This wipes the computer clean and allows you to start fresh with a clean install of the operating system. The steps involve restarting in Recovery Mode, erasing the disk, and reinstalling macOS. It’s important to fully back up data first.
A forced reset should only be done as a last resort when normal restarting is ineffective. It takes time but can resolve problems like crashes, bugs, malware, performance issues, or preparing a MacBook for sale. With the proper steps, users can completely reset a MacBook to factory conditions.
Back Up Your Data
Before resetting your MacBook to factory settings, it’s crucial to back up all your important files, documents, photos, music, and any other data you want to keep. A factory reset will completely wipe your MacBook’s hard drive, deleting everything on it. So you’ll want to make sure anything you care about preserving is safely backed up.
The easiest way to backup a MacBook is by using Apple’s Time Machine software. Time Machine comes pre-installed on macOS and allows you to backup your entire Mac system to an external hard drive or wireless AirPort Time Capsule (Apple Support). To setup Time Machine:
- Connect an external hard drive with enough storage space to hold your Mac’s data.
- Open System Preferences and go to the Time Machine section.
- Click Select Backup Disk and choose your external hard drive.
- Turn on Time Machine and it will automatically backup your entire system.
You can also manually backup specific files and folders by dragging them onto your external hard drive in the Finder. iCloud can additionally be used to backup your photos, documents, contacts, calendars, and other data.
Be sure to backup everything important before resetting your Mac, as the factory reset will permanently erase all data. Once your files are safely backed up, you’ll be ready to proceed with the reset.
Close All Open Apps and Windows
Before resetting your MacBook, it’s important to close any open apps and windows to avoid potential issues. If apps or windows are left open during the reset process, they may not restart properly or data may become corrupted. According to Apple Support, when you open apps after rebooting, macOS tries to restore the app to its previous state. To prevent this, you need to close everything so the system has a clean slate.
To fully close all open apps and windows on your MacBook:
- Click the Apple menu in the top left and choose “Force Quit…” to open the Force Quit Applications window.
- Select any open apps shown and click the “Force Quit” button to fully quit them.
- Close all open Finder windows.
- Check the Dock to make sure no apps show there.
- Log out of your user account to close all user sessions.
Following these steps ensures no traces of open apps or windows remain as you reset your MacBook. This prevents any instability or data issues from occurring mid-reset.
Restart in Recovery Mode
To restart your MacBook in Recovery Mode, follow these step-by-step instructions:
1. Shut down your MacBook completely.
2. Press and hold the Command (⌘) – R keys immediately after you see the Apple logo appear when starting up your Mac. Keep holding the keys down until you see the macOS Utilities window.[1]
3. In the macOS Utilities window, select Disk Utility and click Continue.
4. Select your startup disk from the left side of the Disk Utility window and click the Erase button. This will erase your disk and start the recovery process.
5. After erasing, quit Disk Utility and your MacBook will restart into Recovery Mode where you can reinstall macOS.
Erase the Disk
Once you enter Recovery Mode, you will see the macOS Utilities window. Here you can access Disk Utility to erase or format the hard drive, eliminating all data and restoring it to a clean state.
To erase the disk, select Disk Utility from the Utilities window and click Continue. Select the disk name from the left side list of volumes and drives. Then click the Erase button at the top of the Disk Utility window.
You will be asked to give the disk a name and select a format. Name it whatever you would like, and it is best to use the default macOS Extended (Journaled) format. You can also choose to secure erase the disk by selecting Security Options, which overwrites the deleted data to prevent recovery.
Once you confirm the settings, click Erase to wipe the disk completely. This process may take some time depending on your Mac’s disk size. When finished, you will have a fresh, blank disk prepared for reinstalling macOS.
For step-by-step guidance, refer to Apple’s support article: Erase and reformat a storage device.
Reinstall macOS
Once the disk has been erased, the next step is to reinstall the Mac operating system. To do this, you will need to restart your MacBook in Recovery Mode:
- Shut down your MacBook if it is on
- Press and hold the Command (⌘) + R keys immediately after you see the Apple logo appear
- Let go when you see the macOS Utilities window
This will boot your Mac into Recovery Mode which contains utilities for reinstalling the operating system and running diagnostics.
In the macOS Utilities window:
- Select “Reinstall macOS” and click Continue
- Follow the onscreen instructions to reinstall the desired version of macOS and any firmware updates
- If you erased your entire disk, you will be prompted to select the disk you want to install the OS on
- The installation process will take some time to fully complete
After the installation is finished, your MacBook will be freshly reset with the latest version of macOS installed. You can then migrate any data back from your backup.1
Restore from Backup
After erasing your MacBook and reinstalling macOS, you can restore your files, settings, and apps from a previous backup. This will help get your MacBook back up and running with your data intact.
If you use Time Machine for backups, you can restore directly when prompted during setup after reinstalling macOS. Or you can restore afterwards by opening Migration Assistant (located in /Applications/Utilities). Migration Assistant will detect available Time Machine backups and allow you to selectively restore files, applications, app settings, and system settings.
Here are the steps to restore from Time Machine after reinstalling macOS:
- When prompted during setup, select “Restore from Time Machine backup” and follow the onscreen prompts to restore.
- Or, open Migration Assistant and click “From a Mac, Time Machine backup, or startup disk” and select your Time Machine backup
- Select which apps, files, settings, and users you want to restore.
- Click Continue and follow the prompts to restore to your freshly reinstalled Mac.
This will reinstall your applications, restore your files from backup, and migrate your user accounts and settings. Using your Time Machine backup helps get your MacBook back to its former state after erasing the disk and reinstalling the OS. For more details, refer to Apple’s support document on restoring from Time Machine.
Alternate Reset Options
If the standard recovery mode resets are not working, there are some alternate reset options you can try. One option is to boot into Internet Recovery Mode by holding down Command + Option + R when turning on your Mac. This will start up your Mac from Apple’s internet servers and give you access to Disk Utility and the ability to reinstall macOS (Apple Support).
Internet Recovery Mode can be useful if your Mac’s built-in Recovery HD partition is corrupted or has been erased. However, it requires an internet connection to work. If you are having issues getting Internet Recovery Mode to work, you can try restarting your router, connecting your Mac directly to the router via Ethernet, or using a different network (Apple Discussions).
Another option is to create a bootable macOS installer on an external drive. This allows you to boot from the external drive and reinstall macOS without using the built-in recovery features. Instructions for creating a bootable installer can be found on Apple’s support site.
Reset a Frozen MacBook
If your MacBook becomes completely unresponsive and frozen, there are a few methods you can try to force restart it:
Press and hold the power button for 10 seconds to force your MacBook to power off. After it powers off, press the power button again to restart your MacBook (source).
Press and hold both the Command (⌘) and Control keys along with the power button for 10 seconds to force a restart (source).
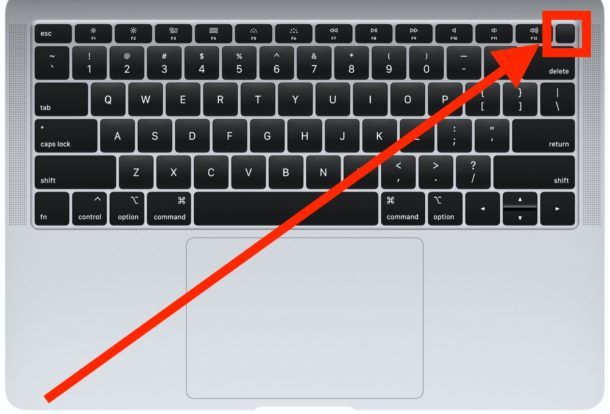
If the touchpad doesn’t work, press and hold the Touch ID (power button) and volume down button together for 10 seconds.
Unplug your MacBook, remove the battery if possible, hold down the power button for 5 seconds, put the battery back in, and then restart your MacBook.
As a last resort, hold down the power button for over 15 seconds. This will force your MacBook to power off. Then press the power button again to restart it.
Following these steps should force your unresponsive, frozen MacBook to power off so you can restart it normally. Be sure to save your work frequently to avoid freezing issues.
Summary
In summary, here are the key steps to forcing a hard reset of your MacBook:
First, back up your important data. Be sure to save files to an external hard drive or cloud storage. This ensures you don’t lose anything important during the reset process.
Next, close all open apps and windows and restart your MacBook in Recovery Mode. You can do this by holding down Command+R while restarting.
From the Recovery screen, go to Disk Utility and erase the disk. This will delete all data and restore the disk to factory settings.
After erasing, you can reinstall the macOS operating system, either the latest version or the version that came with your MacBook.
Finally, restore your files and data from the backup you made. Now your MacBook is reset with a fresh copy of the operating system.
Resetting your MacBook this way is an intensive but effective troubleshooting step if you’re experiencing major software issues or want to wipe your computer before selling it. Be sure to fully back up first and set aside ample time for reinstalling macOS and apps.