Quick Summary
Here are the key steps to format a Sandisk microSD card for Nintendo Switch:
- Insert the microSD card into your computer or laptop using a card reader
- Open Disk Utility if you’re on Mac or Disk Management if you’re on Windows
- Locate the microSD card and check if it needs to be formatted
- If yes, select the microSD card and click “Erase” on Mac or “Format” on Windows
- Choose “exFAT” as the format
- Name the microSD card and start the formatting process
- After formatting is complete, safely eject the microSD card
- Insert the microSD card into your Nintendo Switch
- The Nintendo Switch will prompt you to format the card, choose “Format” to complete the process
Checking if Your microSD Card Needs to be Formatted
The first step is to insert your SanDisk microSD card into your computer or laptop’s card reader. Once inserted, you’ll need to check if your microSD card needs to be formatted or if it’s ready to be used right away.
On Windows, open up Disk Management. You can access this by pressing Windows Key + R and typing “diskmgmt.msc” and hitting enter. This will open the Disk Management utility.
On Mac, launch Disk Utility. You can find this via Spotlight or by opening Finder > Applications > Utilities > Disk Utility.
Once Disk Management or Disk Utility is open, you should see a list of all the connected drives to your computer. Locate the listing for your SanDisk microSD card and check the information.
If the microSD does not have a format like “exFAT”, “FAT32”, etc. listed, it will need to be formatted before being used in your Nintendo Switch.
If it already shows a format like “exFAT”, you may be able to simply insert the microSD into your Switch without reformatting. However, it’s still recommended to reformat the card specifically for the Switch just to be safe.
Formatting on Windows
If your SanDisk microSD card needs to be formatted, here are the steps to do so on Windows:
- In Disk Management, right-click on your SanDisk microSD card and choose “Format…”
- In the new window that opens, under File System choose “exFAT”
- Give your microSD card a name like “Switch SD Card”
- Make sure Quick Format is checked
- Click “Start” to begin the formatting process
- This should only take a minute or two
- Once finished, your microSD will be formatted as exFAT for Nintendo Switch
The key things to note when formatting on Windows:
- Choose exFAT as the file system
- Name the drive for easy identification
- Use Quick Format to save time
And that’s it! With those steps completed, your microSD card will now be properly formatted and ready to use with your Nintendo Switch.
Formatting on Mac
Here are the steps to format a SanDisk microSD card for Nintendo Switch using a Mac:
- In Disk Utility, locate your connected SanDisk microSD card in the sidebar
- Click on the microSD card listing to select it
- Click “Erase” along the top menu bar
- For the Format, choose “exFAT”
- Give your microSD card a name like “Switch SD Card”
- Click “Erase” to begin formatting the card
- The formatting process should only take a minute or two
- Once done, the microSD card will be ready for your Switch as exFAT
The key things to note when formatting on Mac:
- Choose exFAT format
- Name the microSD card
- Click Erase to begin formatting
And that’s all there is to it! With Disk Utility, formatting a microSD card for Nintendo Switch on Mac is quick and easy.
Why use exFAT format?
You may be wondering why it’s recommended to format your SanDisk microSD card to exFAT for the Nintendo Switch rather than a more common format like FAT32.
The reason is that the exFAT file system has a few advantages over FAT32 when it comes to using it with the Nintendo Switch and games.
Here are some of the key benefits of using exFAT:
- Supports files over 4GB – Many Switch games are larger than 4GB, which is the limit for FAT32 cards.
- Faster read/write speeds – exFAT tends to provide better performance than FAT32 in many tests.
- No filesize limit – FAT32 has a 4GB per-file limit while exFAT supports much larger files.
By formatting your microSD card to exFAT, you ensure compatibility with large game file sizes and get the best performance out of your card. The Nintendo Switch can read and write exFAT-formatted cards without any issues.
While FAT32 is a more universal format, exFAT is really the optimal choice for making the most of your SanDisk microSD card with the Nintendo Switch.
Inserting the microSD Card into Your Nintendo Switch
Once you have formatted your SanDisk microSD card to exFAT using the steps above for either Windows or Mac, it is ready to be inserted into your Nintendo Switch!
To insert the microSD card:
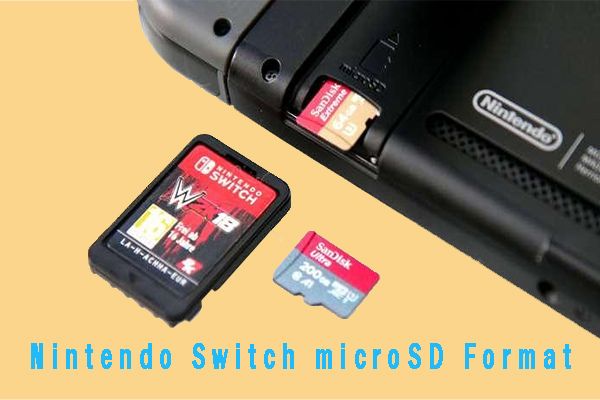
- Locate the microSD card slot on the top of the Nintendo Switch behind the kickstand.
- Gently pull up on the microSD slot cover to open it.
- Insert your microSD card with the label facing up and the contacts facing towards the Switch.
- You should hear a click when the card is fully inserted. Gently close the cover.
Once inserted, power on your Nintendo Switch or wake it from sleep mode if already on.
You should see a message pop up indicating a microSD card has been detected. The Switch will then prompt you to format the microSD – this is normal.
To complete the formatting process on your Switch:
- When prompted, choose “Format” to format the new microSD card.
- This process only takes a few moments.
- Once done, your microSD card will be fully formatted and set up for use.
And that’s all there is to it! Your SanDisk microSD card is now formatted properly and ready to use with your Nintendo Switch.
Transferring Data to Your microSD Card
Now that your microSD card is formatted for your Switch, you can begin transferring games, software, updates, and downloadable content over to it.
To transfer data over to your microSD card:
- Go to System Settings on your Switch.
- Select “Data Management”.
- Choose “Move Data Between System / microSD Card”.
- Here you can choose what game data and software to move over to your new microSD card.
Moving games to your microSD card will allow you to free up the internal 32GB of storage on your Nintendo Switch for other downloads and captures.
Some tips for managing data:
- Keep smaller games and software internal and move large games to the microSD.
- Store your game captures and screenshots on the microSD.
- Transfer downloaded game updates and patches to the microSD.
- Move downloaded software like Nintendo Switch Online and DLC to the card.
Getting in the habit of regularly transferring data over to your new microSD card will ensure you never run out of storage space on your Nintendo Switch!
Tips for Using a microSD Card with Nintendo Switch
Here are some helpful tips to keep in mind when using a microSD card with your Nintendo Switch:
- Get a major brand microSD card like SanDisk to ensure proper performance
- Make sure you insert the card correctly and close the slot cover to prevent damage
- Don’t remove the card when the Switch is on to avoid corrupting data
- Back up your microSD card data regularly in case of damage or corruption
- Periodically check for corrupt data by going to System Settings > Data Management
- Store your Switch carefully to avoid bumps and drops that could affect the microSD slot
- Transfer new downloads to your microSD card quickly to free up internal storage
- Follow proper microSD removal steps before taking a card out of your Switch
Following these tips will help make sure you get the most out of your microSD card with your Nintendo Switch!
Troubleshooting Issues
Hopefully you do not run into any issues when formatting your microSD card for Nintendo Switch or using it, but here are some troubleshooting tips for common problems:
Switch Not Detecting microSD Card
- Make sure the microSD card is inserted properly in the slot. It should click into place.
- Inspect the contacts on your card for dirt, dust, or damage. Gently clean with a microfiber cloth if needed.
- Try reinserting the card and restarting your Switch.
- Your card may be corrupted – reformat it on your computer then try again.
microSD Card Errors
- If you get errors related to your microSD card, first try reinserting it and restarting Switch.
- Reformat the card using the steps above for your computer OS.
- As a last resort, you may need to replace your microSD card.
Switch Won’t Format microSD Card
- Double check you formatted the card as exFAT on your computer first.
- Try reformatting the card with your computer and re-inserting.
- If issues persist, your microSD card may be damaged and need replacing.
Conclusion
Formatting and setting up a microSD card for your Nintendo Switch doesn’t have to be difficult if you follow the proper steps outlined above.
The key things to remember are:
- Use exFAT format
- Format the card using your computer first before Switch
- Give the microSD a name for easy identification
- Transfer games and data over to your card to free up space
- Properly insert and remove your microSD to avoid issues
With a high quality microSD card formatted properly, you can greatly expand the storage capabilities of your Nintendo Switch for more game downloads and captures.
So pick up a SanDisk microSD, get it formatted as exFAT, move your data over, and you’re all set for an enhanced Switch experience!