Formatting a USB flash drive to NTFS allows you to use the drive across different operating systems, take advantage of the improved security features of NTFS, and remove any partitions or data from the drive before use. It’s a relatively simple process that can be done using the built-in disk management tools in Windows.
What is NTFS?
NTFS (NT File System) is a proprietary file system developed by Microsoft. It was first introduced with Windows NT operating system in 1993, and is now the standard file system for Microsoft Windows operating systems.
Some key features of NTFS include:
- Improved support for large hard drives – supports volumes up to 256 terabytes.
- Better security features like file/folder permissions, encryption, compression, auditing etc.
- Higher reliability of disk storage.
- Faster file operations and disk read/write speeds.
The major advantages of using NTFS for USB drives are:
- Works across different Windows operating systems – Windows NT, 2000, XP, Vista, 7 etc. Older operating systems like Windows 98 and 95 can read NTFS drives but cannot write to them.
- Improved security features like file permissions and encryption which are not available with the older FAT32 file system.
- Support for larger partition sizes beyond the 4GB limit of FAT32.
- Faster read/write times compared to FAT32.
- Allows storage of files and folders with metadata like permissions, timestamps etc. FAT32 does not store metadata.
So in most cases, especially if you want to use the USB drive across different newer versions of Windows, formatting it to NTFS is recommended.
Requirements for Formatting USB to NTFS
Here are some requirements and notes to check before formatting the USB drive to NTFS:
- You can format USB drives that are 2GB or more in capacity. Smaller drives should be left as FAT32.
- The process will erase all data on the USB drive. So backup any data you want to keep before formatting.
- You need administrator access on a Windows PC to format drives using Disk Management.
- Make sure you select the correct USB drive before formatting so that you don’t accidentally erase your hard drive.
- The NTFS format option is not natively available on some older versions of Windows like 98 or 95. Consider using a third party formatting tool.
- If you need to use the USB drive on non-Windows devices like Mac, Linux, game consoles, you may want to format as FAT32 instead for maximum compatibility.
As long as these factors are kept in mind, any typical USB flash drive can be quickly formatted to NTFS.
Step 1 – Backup Data from USB Drive
Before formatting, copy any files or folders you need from the USB drive to a location on your computer or another external device.
Formatting will permanently erase everything on the drive, so you want to avoid losing any important data.
To backup the contents of the drive:
- Insert the USB drive into your computer.
- Open File Explorer or My Computer and locate the USB drive.
- Select and copy all files and folders you need to keep.
- Paste the copied data to a folder on your hard drive or another drive.
- As an extra precaution, transfer the backed up files to an online storage platform like Google Drive or Dropbox.
Once your data is fully backed up, you can safely proceed with formatting the USB drive.
Step 2 – Launch Disk Management
Disk Management is a built-in Windows tool that allows you to view and configure hard drives and removable media like USB drives. We will use it to format the USB drive to NTFS.
To open Disk Management:
- Open the Start menu and type “disk management”. Select Create and format hard disk partitions.
- This will open the Disk Management console. You can also access it by right-clicking the Start menu or Windows icon and selecting Disk Management.
Disk Management will display a list of all connected drives on your computer, including internal hard drives and external devices like your USB drive.
Step 3 – Select USB Drive and Format
With Disk Management open, you will now select the USB drive you want to format:
- Locate the USB drive in the disk list. It should be listed as Removable with the storage capacity, manufacturer name and may show up as unallocated space.
- Right-click on the colored bar representing the USB drive and select Format…
This opens the format dialog box:
- Under File System, select NTFS.
- Check the Quick Format box.
- Click OK to confirm formatting.
The Quick Format option will format the drive much faster but won’t scan it for bad sectors. You can uncheck it for a full scan and format which takes longer.
Step 4 – Assign Drive Letter
Once the formatting is complete, you may need to assign a drive letter to access the USB drive in File Explorer:
- Right-click on the formatted volume and select Change Drive Letter and Paths…
- Click Add and assign a drive letter from the available letters.
- Click OK to apply the drive letter.
The USB drive will now appear with its new drive letter in File Explorer.
You can now use the USB drive normally to copy files, access data, install programs etc. The formatted drive will have the improved performance and security of the NTFS file system.
Alternative Method – Using Windows File Explorer
Aside from Disk Management, you can also format the USB drive to NTFS directly within File Explorer:
- Connect the USB drive to your computer.
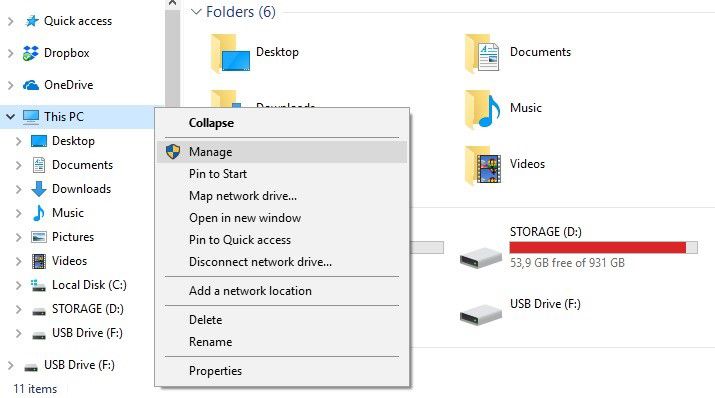
- Open File Explorer and navigate to This PC or My Computer.
- Right-click on the USB drive.
- Select Format from the menu.
- Under File System, choose NTFS and check Quick Format.
- Click Start to begin formatting.
This provides a simpler method without having to use Disk Management. The steps are otherwise similar – select the USB drive, choose NTFS file system, Quick Format, and click Format to convert the drive.
Formatting Using Command Prompt
The format command can also be used to format drives from an elevated Command Prompt window:
- Open the Start menu, search for cmd, right-click on Command Prompt and select Run as Administrator.
- Type the following command to list all connected drives:
list disk - Note the Disk number of your USB drive from the list.
- Use the following command to format, replacing X with your disk number:
format X: /fs:ntfs /q - This will format the selected disk to NTFS with a quick format.
This method uses simple command line options to format the USB drive. The steps are faster compared to the GUI options, for experienced users.
Formatting Considerations
Here are some additional factors to keep in mind when formatting your USB drive to NTFS:
- You can revert the format back to FAT32 if required, without losing data. But formatting from FAT32 to NTFS will erase data.
- NTFS has built-in compression which saves disk space for larger files. FAT32 does not have compression capability.
- For drives using UEFI boot method, NTFS may need to be reformatted to FAT32 for the USB to be bootable.
- File and folder permissions can be configured only on NTFS formatted drives. FAT32 does not support permissions.
- NTFS is natively read-only on Mac OSX. A third party driver is needed for write support.
So weigh your usage requirements before deciding between NTFS and FAT32 formatting. In most Windows-based scenarios, NTFS is the optimal choice.
Troubleshooting Guide
Some common issues faced during formatting along with their solutions:
| Problem | Cause | Fix |
| Error message “The format did not complete successfully” | Bad sectors on USB drive | Scan drive for errors. Consider replacing drive if it has physical defects |
| USB already formatted as NTFS but slow performance | Drive fragmented over time | Defragment the USB drive for faster operations |
| USB drive showing 0 bytes capacity after formatting | Drive letter not assigned | Open Disk Management and assign a drive letter |
| Access denied error when copying files | Insufficient user permissions | Run file manager as administrator to modify protected folders |
These are some of the common issues you may encounter. Apart from physical damage, most errors can be easily fixed with the right troubleshooting steps.
Conclusion
Formatting USB drives to NTFS is a quick and simple process using the built-in disk management utilities in Windows. It offers advantages like improved performance, security, and support for larger drives. With the data backed up safely, the format can be done in a few clicks either using Disk Management or File Explorer. The USB drive then gets enhanced functionality and performance benefits of the advanced NTFS file system.