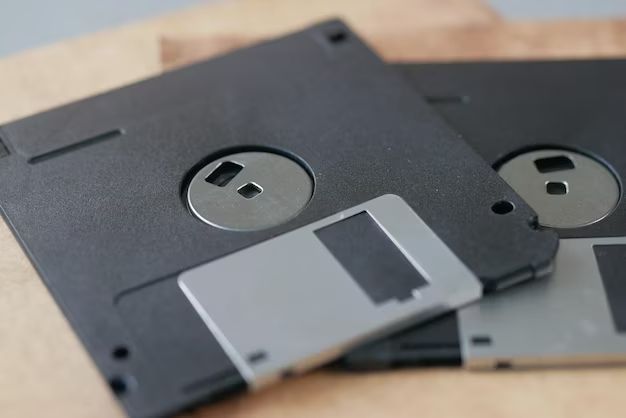
Floppy disks were a popular portable storage medium for personal computers from the 1970s through the 1990s. They store data magnetically on thin, flexible disks made of coated plastic encased in a rigid plastic shell. Common sizes included 8-inch disks in the 1970s, 5.25-inch disks in the late 70s through 80s, and 3.5-inch disks in the 80s and 90s. Floppy disks could store between 70KB and 1.44MB of data, allowing users to transfer files between computers or back up data.
With the rise of other storage media like USB drives, CDs, and cloud storage, floppy disks fell out of favor in the late 90s/early 2000s. However, people may still have old floppy disks lying around containing files they want to access. The disks may contain important personal files, vintage programs, or other data the user doesn’t want to lose. This guide will explain how to get those old files off floppy disks using modern equipment.
Determine If The Floppy Disk Still Works
Before trying to access the files on an old floppy disk, it’s important to check that the disk and drive are still functional. There are a few simple steps you can take to test them:
First, visually inspect the floppy disk. Look for any signs of damage like cracks, pieces missing from the case, or exposed magnetic disk. Damaged disks are unlikely to work properly. Gently try inserting the disk into the floppy drive. It should slide in smoothly without forcing it.
Next, check that the drive can read disks by inserting a known good floppy, if you have one available. Try viewing the contents or copying a file from the known good disk. If that fails, the drive itself may be damaged and unable to read any disks.
Finally, use the native formatting tools for your operating system to attempt formatting the disk you want to recover files from. As explained on the Vintage Computer Federation Forums, this will help identify any bad sectors on the disk. If formatting fails, the disk is likely too damaged to retrieve the files.
Taking the time to properly test both the floppy disk and drive will help avoid frustration later when trying to access old files from potentially degraded media.
Get An External Floppy Disk Drive
If your old computer no longer has a working floppy drive, you’ll need to get an external USB floppy drive to access the files on the disk. These drives plug into your computer’s USB port and allow you to read floppy disks even on modern machines that don’t have floppy drives built in.
You can purchase an external USB floppy drive online or at most electronics retailers. Some top options to consider include:
- Sabrent External USB 1.44 MB 2x Floppy Disk Drive (Available from Amazon)
- RAAYOO USB Floppy Disk Reader Drive (Available from Best Buy)
- Excelvan USB External Floppy Disk Drive (Available from Amazon)
Look for an external drive that is compatible with your computer’s operating system and has positive reviews from other buyers. Prices typically range from $15-$25 USD.
Connect The Floppy Drive
Connecting an external floppy disk drive to your modern computer is simple. Here are the steps:
- Make sure the computer is powered off before connecting the floppy drive.
- Locate an available USB port on your computer. USB ports are typically found on the front or back of desktop computers and on the sides of laptops.
- Plug the USB cable from the floppy disk drive into the USB port on your computer. The connector only fits one way, so don’t force it.
- Secure the connection by tightening the screws on the cable if available.
- Plug the power cable from the floppy drive into a power outlet or surge protector.
- Turn on the external floppy drive if it has a separate power button.
- Boot up your computer and allow it to detect the newly connected hardware.
The external floppy disk drive should now be properly connected via USB and detected by your computer. Be sure to safely eject the floppy disk before disconnecting the drive.
Accessing The Files
Once the external floppy disk drive is connected to your computer, you will need to access the files stored on the floppy disk. The way to do this depends on whether you are using a Windows PC or a Mac.
On a Windows PC, open File Explorer and look for the floppy disk drive letter, likely A: or B:. Double click on the floppy disk drive to open it and view the files and folders stored on the disk. You can browse through the contents just like you would with any other drive or folder in File Explorer.
On a Mac, open the Finder and look for the floppy disk icon in the left sidebar under Devices. Click on the floppy disk icon to open it and view the files and folders stored on the disk. You can browse through the contents like any other folder in Finder.
Once you have accessed the floppy disk, you should be able to view all of the stored files. You may need to navigate folder structures on the disk to find specific files. The contents will depend on what was saved to the floppy disk previously.
If you have issues accessing the floppy disk, make sure the external drive is properly connected via USB and powered on. You may need to reboot the computer after connecting the floppy drive to get the operating system to recognize it. If the disk still isn’t showing up, the disk itself may be damaged or unreadable.
Sources:
https://www.quora.com/How-do-you-access-files-on-an-old-floppy-disk
Copying The Files
Once the floppy disk drive is connected to your computer and you have accessed the files, you will need to copy them from the floppy disk to your computer’s hard drive. Here are the steps for copying the files in Windows:
- Open File Explorer and navigate to the floppy disk drive.
- Select the files and folders you want to copy by holding down CTRL and clicking on each one.
- Right click on the selected items and choose “Copy” from the menu.
- Navigate to the location on your hard drive where you want to copy the files, like the Documents or Desktop folder.
- Right click in the destination location and choose “Paste” to copy the files there.
The files will now be copied from the floppy disk to your computer’s hard drive. Be sure to verify that the files copied correctly by opening them from the hard drive location.
On a Mac, the process is similar. Open the floppy disk icon, select the files/folders, press Command + C to copy, navigate to the destination folder, and press Command + V to paste the files there. You can also just drag and drop files from the floppy disk window directly into the destination folder.
Copying the files preserves them so you can access them directly from your computer’s hard drive and frees you from having to use the floppy disk each time.
File Conversion
If the files on the old floppy disk are in an outdated or obscure file format, you may need to convert them to a more modern format to make them usable. Here are some tips for converting uncommon file formats:
For text documents, you can often simply change the file extension to .txt or .doc to convert them to a plaintext or Word document format. For example, renaming file.wri to file.txt may convert it to a plaintext file.
Spreadsheets and presentations can usually be converted by changing the file extension to .xls or .ppt. So renaming file.wk1 to file.xls may convert it to an Excel spreadsheet.
For more complex conversions, you can use free online file conversion tools like Zamzar or CloudConvert. These tools support converting outdated formats like .wks (Lotus 1-2-3) to .xls, .wp to .doc, and many others.
As a last resort, try opening the old files in their associated legacy software, like Lotus 1-2-3 or WordPerfect, and then save them in a modern format like .xls or .doc. You can find old software versions from abandonware sites if you no longer have them.
Converting the files to modern formats ensures you’ll be able to open and edit the files on your current computer and operating system.
Organizing The Files
Once you have successfully copied the files from the floppy disk to your computer, it is important to organize them so they are easy to find and access in the future. Here are some tips for effectively organizing the files:
Rename the files to something descriptive and consistent so you can easily identify what they contain just by the file name. Avoid vague names like “document1” or names with random numbers and letters. Include keywords in the file name that summarize what it contains.
Sort the files into folders or categories that make sense. For example, you may want a folder for word processing documents, another for spreadsheets, one for graphics and photos, etc. Organizing by file type, project, date, or content can help keep things tidy.
Store related files together in the same folder or category. Even if files were saved across multiple floppy disks, keeping similar and relevant content together in one place will make searching easier. Subfolders can help organize large categories.
Back up the files in multiple places like an external hard drive or cloud storage. Floppies degrade over time, so even your fresh copies won’t last forever without another backup.
Consider using file management software or apps to help tag, find, and sort content. Features like search, metadata, and automation can optimize organization.
Go through and delete any unnecessary duplicate files from the floppy disks to avoid clutter. If organizing by hand, create a spreadsheet or list to track where everything ended up.
Allow time to set up an intuitive folder structure and file naming system. Organizing as soon as possible after transferring will make it easier to find files compared to sorting through a huge unorganized folder later.
Long-Term Preservation
Once you have accessed and organized the files from the floppy disk, you will want to preserve them for the long-term. Here are some suggestions for long-term preservation of the files:
- Store the files in cloud storage such as Google Drive, Dropbox, or Amazon S3. Cloud storage provides redundancy across multiple servers so files are protected in case of hardware failure.
- Copy the files to an external hard drive or SSD. Make sure to store the drive in a cool, dry place and handle it carefully. For added redundancy, make a second backup copy and store it in a different location.
- Convert files to widely supported formats like PDF/A or TIFF for long-term compatibility. Proprietary formats may become obsolete over time. Standard archival formats help guarantee readability.1
- Migrate files to new storage media every 5-10 years. This helps avoid data loss as storage technology changes.
- Document important contextual and technical metadata. Information about how the files were created and used provides value for long-term preservation.
With careful planning and these digital preservation best practices, the files from the floppy disk can remain accessible for future generations.
Conclusion
Recovering files from old floppy disks can seem daunting, but with some simple steps it is very doable. The key things to remember are:
- Test the floppy disk first to see if it is still readable and functional
- Get an external USB floppy disk drive to connect the disk to your computer
- Once connected, you can access and copy the files directly off the floppy
- You may need to use file conversion software for certain old formats
- Organize and back up the files once recovered
Being able to rescue old files from floppy disks allows you to preserve important memories, photos, and documents. With digital data so ephemeral, it is worthwhile to take the time and effort to save this piece of your past. Whether it is for nostalgia, legal records, or just backup purposes, floppy disk data recovery enables you to hold on to data that otherwise might have been lost forever.