Transferring photos from an SD card to your Mac is a common task for photographers and casual photo takers alike. The process is simple and straightforward, though there are a few different methods you can use. In this comprehensive guide, we’ll walk through the steps for transferring photos via USB cable, SD card reader, and wireless file transfer.
What You’ll Need
To transfer photos from an SD card to your Mac, you’ll need the following:
- SD card – this is the removable storage device that contains your photos
- Mac computer
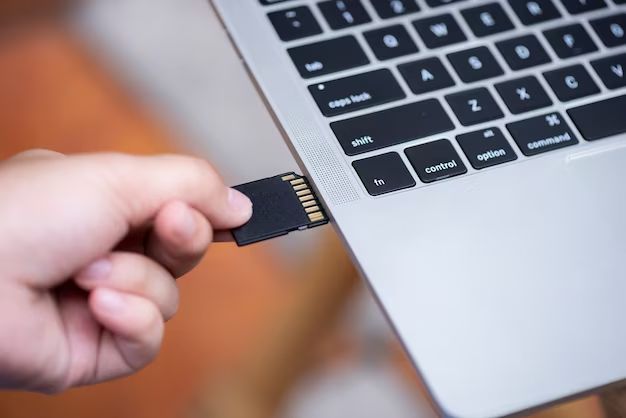
- SD card reader or camera connection cable
If your Mac has an SD card slot built in, you don’t need a separate card reader. Most modern Macs don’t have built-in SD slots, though, so you’ll likely need an external USB card reader, a Thunderbolt reader, or a camera connection cable that has a USB plug on one end and camera connector on the other.
Method 1: Transfer Photos with USB Cable
If you have a DSLR or mirrorless camera, you can use a USB cable to transfer photos directly from the camera to your Mac.
Steps
- Connect your camera to your Mac using a USB cable. Turn on your camera if it’s not already on.
- Open the Photos app on your Mac. It’s located in the Applications folder.
- In Photos, click Import in the menu bar at the top of the screen.
- Select the photos you want to import. You can import all new photos by clicking Import All New Photos.
- Click Import Selected to start transferring the photos to your Mac.
The Photos app will save the transferred photos to the Pictures folder on your Mac, organized by date.
Tips
- If your camera isn’t recognized by your Mac, you may need to install software from the camera manufacturer to transfer files.
- For best results, use the USB cable that came with your camera.
- You can set the Photos app to open automatically when a camera is connected via USB.
Method 2: Transfer Photos with SD Card Reader
If you have an SD card that you’ve used to take photos on a non-camera device, like a drone or mobile phone, you’ll need an SD card reader. Here’s how to transfer photos using an SD card reader:
Steps
- Insert your SD card into the card reader and plug the reader into your Mac.
- Open Images in Finder to view the contents of the SD card.
- Select the photos you want to transfer.
- Drag the photos to copy them to a folder on your Mac, such as your Pictures folder.
Tips
- If your SD card doesn’t appear in Finder, try rebooting your Mac.
- You can batch transfer all photos by selecting one image, then do Command-A to select all.
- Use Copy and Paste to add photos to Photos instead of dragging.
Method 3: Transfer Wirelessly
If your camera has built-in Wi-Fi, you may be able to transfer photos wirelessly between the camera and your Mac:
Steps
- On your camera, enable Wi-Fi transfer mode in your camera’s settings menu.
- On your Mac, open System Preferences > Network.
- Join the Wi-Fi network that your camera created.
- Open the Photos app and select Import > Import from [camera name].
- Select photos to import and click Import.
Tips
- Refer to your camera manual for instructions on enabling Wi-Fi transfers.
- Stay close to your camera during wireless transfer for best results.
- You may need to install a companion app on your Mac for wireless transfers.
Where Do Imported Photos Go on a Mac?
Photos imported into the Photos app are saved in the Pictures folder in Finder. You’ll find them organized into dated folders like this:
Pictures > [year] > [month] > [date]
From within the Photos app, you can access and organize all your imported photos and videos. The Photos library includes:
- All Photos: View all photos organized by date.
- Albums: Create custom albums to organize selected photos.
- Memories: Automatically generated albums of related photos.
- Photo stream: Synced photos shared across devices.
How to Import Photos on Mac as JPEG or RAW
When transferring photos to your Mac, you have the option to import them in their original format or convert copies to JPEG:
- Original (RAW): Imports photos in original RAW format or as JPEG files if that’s how they were captured. This retains the most image data.
- JPEG: Converts RAW files to JPEG. You’ll get smaller files ideal for sharing.
To choose file format on import:
- Open Photos and click Import.
- Go to Import To dropdown menu.
- Select New Album.
- Name the album.
- Below the name field, choose file format under Photo Kind.
- Click Import.
Raw photos retain more editing flexibility, while JPEGs take up less storage space. Choose based on how you intend to use the photos.
How to View RAW Photos on a Mac
RAW photo files contain uncompressed image data straight from your camera’s sensor. While you can import RAW files to your Mac, you may not be able to view them as thumbnails right away as you can with JPEGs.
Here are some tips for working with RAW photos:
- Imported RAW photos will appear greyed out in the Photos app.
- Double-click a RAW file to open it in the Photos viewer to preview.
- Open RAW photos in image editing apps to convert, view, or edit.
- Use the Image Capture app to view RAW thumbnails if Photos won’t generate them.
Overall, RAW photo workflow requires some additional steps compared to JPEGs, but RAW provides much more flexibility for editing and adjustments.
How to Back Up Photos After Importing to Mac
After transferring your photos to your Mac, it’s critical to implement a backup system in case of file corruption or drive failure.
Here are some ways to back up your photo library:
- Time Machine – Apple’s built-in backup software will automatically backup all your photos.
- External drive – Manually copy your Photos Library to an external hard drive.
- Cloud storage – Sync photos to iCloud or storage services like Google Photos.
- NAS (Network Attached Storage) – Stores photos on a dedicated storage device on your home network.
Ideally, maintain both a local backup like Time Machine or external drive, and an offsite cloud backup.
How to Manually Backup Photos Library
To manually backup your Photos library:
- Quit Photos app if open.
- In Finder, go to Pictures folder.
- Locate Photos Library file and copy it.
- Go to external drive or other safe storage location.
- Paste copied Photos Library to backup location.
Store backup copies of your library in multiple places for redundancy.
How to Optimize Storage for Photos on Mac
High resolution photos and videos can quickly consume storage space on your Mac. Here are some tips to optimize storage:
- Set Photos to optimize storage. This stores full-resolution originals on iCloud and smaller versions on your Mac.
- Manually delete unwanted photos and videos within Photos app.
- Use external storage like SD cards or drives to store original files.
- Import files directly into cloud storage like Dropbox or Google Photos.
You can set Photos to optimize Mac storage in Preferences. Enabling this will keep a maximum of 40GB locally and store the rest in iCloud.
With optimize storage enabled, you can still view and access all your full resolution photos as needed. Your Mac will download the original if you try to edit, export or share to print a photo.
Troubleshooting Photo Import Issues
In some cases, you may encounter issues when transferring photos to your Mac. Here are some troubleshooting tips:
SD Card Not Showing Up
- Check card reader connections and cables.
- Try different USB port if using built-in SD reader.
- Eject and reinsert SD card.
- Try different SD card.
- Inspect card for damage or dirt in slot.
Photos Not Importing
- Allow Photos access if prompted in Mac security settings.
- Check Import To destination in Photos.
- Copy from SD card directly instead of importing.
- Try renaming bad files preventing import.
Imported Photos Not Showing Up
- Check Photos view settings to show all photos.
- Scroll down to bottom of Photos to locate.
- Search Photos app for file name.
- Spotlight search Mac for files.
If issues persist, restart your Mac and retry importing. Contact Apple support if needed.
Conclusion
Transferring photos from an SD card to your Mac is quick and easy. Whether you use a USB cable, card reader or wireless transfer, the Photos app makes importing and organizing your pictures seamless. Just remember to back up your photos, and optimize your storage to keep things running smoothly. Follow our tips in this guide and you’ll be importing photos like a pro.
