What is the Macintosh HD Library?
The Macintosh HD Library is a folder on your Mac’s hard drive that contains supporting files and resources used by macOS and installed applications (https://cleanmymac.com/blog/macos-library-folder). It serves as a central repository for various configuration files, caches, plugins, and other data that many programs rely on to function properly.
The Library folder itself is usually invisible in Finder, as it contains sensitive files that could cause problems if modified incorrectly. However, it’s an important component of the Mac file system. Some of the key items stored in the Library include:
- Application support files
- User preferences and settings
- Fonts
- Cached and temporary files
- Keyboard layouts
- Plug-ins
Having a centralized Library folder allows applications to neatly organize all their behind-the-scenes files in one place, without cluttering your user account or other parts of the system. It helps keep your Mac running smoothly. The Library folder should generally not be tampered with unless you’re troubleshooting a specific problem.
Navigating to Macintosh HD in Finder
To navigate to the Macintosh HD library in Finder on your Mac, the first step is to open Finder. This can be done by clicking the Finder icon in your Dock or by going to Applications > Finder in the Apple menu.
Once Finder is open, you will see a sidebar on the left side of the window. This sidebar contains quick access shortcuts to frequently used folders and locations on your Mac. One of these shortcuts is for your Macintosh HD drive. Simply click on “Macintosh HD” in the Finder sidebar and it will take you directly to the root level of your main hard drive.
From here, you can access the Library folder for your Macintosh HD by clicking through the following path: Macintosh HD > Users > [Your User Name] > Library
The Library folder contains important system files and settings for apps installed on your Mac. However, this folder is hidden by default, so you may need to make hidden files and folders visible before you can navigate to it.
Using the Finder Menu
The easiest way to access the Macintosh HD Library is through the Finder app’s Go menu. Here are the steps:
- Open Finder on your Mac.
- At the top of the screen, click Go in the menu bar.
- While holding down the Option key on your keyboard, Library will appear in the Go menu.
- Click Library while still holding the Option key to open the Macintosh HD Library folder.
The Library folder in Macintosh HD contains important system files and settings, but is hidden from the Finder by default. Holding the Option key while using the Go menu temporarily unhides the Library folder so you can access it (Source).
Once opened, you can browse and access the various folders and files within the Macintosh HD Library as needed.
Using the Go to Folder Tool
The Go to Folder tool allows you to easily navigate to specific folders on your Mac by typing the folder path. This is the quickest way to get to the Library folder.
To use the Go to Folder tool to open the Library:
- Open Finder on your Mac.
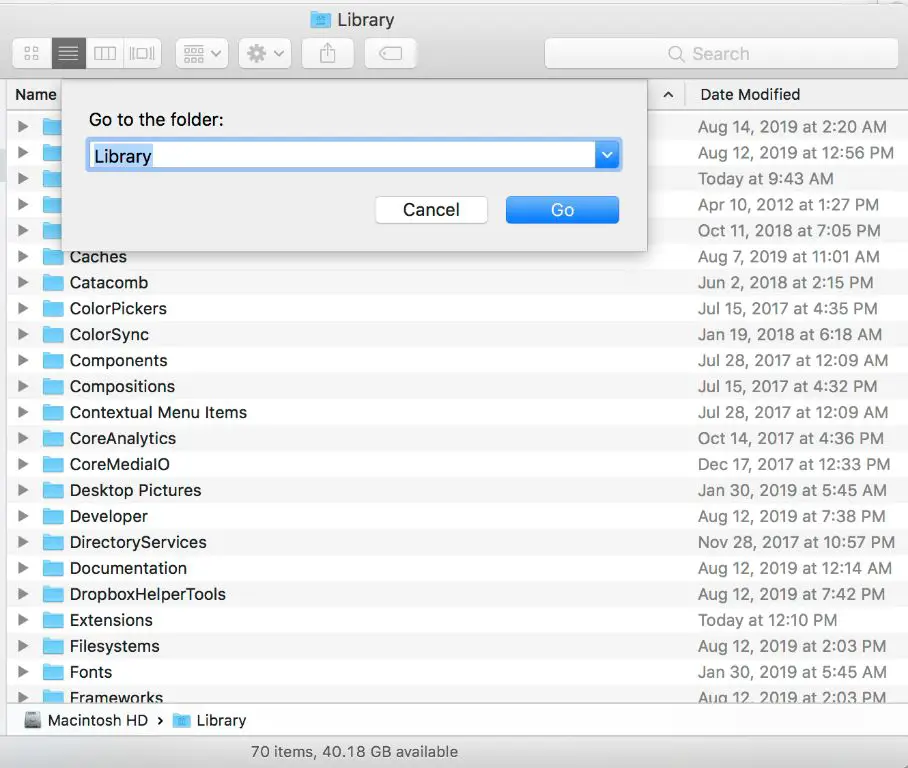
- Select Go > Go to Folder from the top menu bar (or use the keyboard shortcut Command+Shift+G).
- Type
~/Libraryinto the text field that appears and press enter or click Go.
This will instantly open the hidden Library folder in a Finder window, allowing you to access all of its contents. The tilde (~) represents your user account’s home folder.
The Go to Folder tool is invaluable for directly accessing system folders like Library that are hidden in macOS. It saves you the steps of having to manually navigate there or show hidden files.
Keyboard Shortcuts
One of the quickest ways to open the Macintosh HD library is by using the Go to Folder keyboard shortcut. This allows you to instantly open any folder location by typing the path.
To use this shortcut:
- Press Command+Shift+G on your keyboard. This will open a text input field at the top of the Finder window.
- Type
~/Libraryand press enter. This will instantly open your user Library folder.
The ~/ at the beginning represents your user folder. So ~/Library translates to /Users/yourusername/Library, which is the path to your personal user Library folder. This keyboard shortcut method provides the fastest way to get there directly.
For more details, see this Apple support article: https://support.apple.com/guide/mac-help/go-to-the-folder-where-a-file-is-stored-mh15057/mac
Showing Hidden Files and Folders
By default, macOS hides certain system files and folders from view in the Finder, including the Library folder. To enable viewing of hidden files and folders:
1. Open Finder and click on the Finder menu.
2. Select “Preferences”.
3. In the Finder Preferences window, click on the “Advanced” tab.
4. Check the box next to “Show all filename extensions” and “Show hidden files”.
5. Close the window. Hidden files and folders like Library will now be visible in Finder.
You can also press Command+Shift+Dot (.) to toggle viewing hidden files on and off (Source). This keyboard shortcut provides a quick way to access hidden files when needed.
Differences Between User and System Libraries
On a Mac, there are two main Library folders: the User Library and the System Library. The key differences between them are:
The User Library (~/Library) contains user-specific settings, preferences, caches, and application support files. This Library folder is located in each user’s home folder and contains data that only applies to that specific user account on the Mac. For example, your Safari bookmarks, Mail accounts, and app preferences are stored here.
The System Library (/Library) contains files used by the core operating system and applications installed for all users on the Mac. This includes things like fonts, plugins, keyboards, and other assets that any user account can access. The System Library does not contain any user-specific data. It is located at the root level of the main Macintosh HD drive.
In summary, the User Library is personalized for each user while the System Library contains shared files for the whole system. Understanding this difference allows you to identify where to find user-specific vs system-wide files on a Mac.
Source: https://nektony.com/reviews/difference-between-library-folders-on-mac
Important Folders in the Library
The Macintosh HD Library contains several important folders that store settings, caches, and supporting files for apps and system services. Three key folders to be aware of are Preferences, Application Support, and Caches.
The Preferences folder https://nektony.com/reviews/difference-between-library-folders-on-mac contains configuration files and settings that customize how apps work and look on your Mac. This includes things like window sizes, default fonts, and other adjustable settings. Many apps store their preferences in this centralized location.
The Application Support folder contains additional files that apps may need to function properly, beyond just the app code itself. This can include things like help files, default templates, dictionaries, and more. For example, a word processing app might store custom templates in Application Support that are available to users.https://cleanmymac.com/blog/macos-library-folder
The Caches folder contains temporary files used by apps to speed up performance. This includes things like website icons, images, and other reusable data that can be quickly accessed instead of re-downloading. Cached files can often be safely deleted to free up disk space when needed.
Backing Up and Restoring the Library
It’s important to regularly back up the Macintosh HD library folder to avoid losing your data. The easiest way to do this is by using Time Machine. Time Machine comes built-in to macOS and will automatically back up the entire contents of your Mac, including the library folder, to an external hard drive or Time Capsule [1]. To set up Time Machine, just plug in an external hard drive and the Time Machine dialogue box will appear asking if you want to use the drive as your backup disk. Once setup, Time Machine will run hourly backups in the background so your data stays protected.
You can also manually back up the library folder by copying it to an external hard drive or cloud storage. The default location of the library folder is /Users/your_username/Library. Just copy this folder to your backup destination to create a manual backup. Be sure to backup the library regularly, such as weekly or monthly, to have a recent copy of your data.
If anything happens to your Mac and you need to restore your data, you can retrieve files from your Time Machine or manual backups. With Time Machine, you can go into the Time Machine interface and browse backups from different time periods to find deleted or lost files. For a manual backup, simply copy the library folder back to your Mac from the external drive or cloud storage. This will restore the library to its state from when you made the backup copy.
[1] https://support.apple.com/guide/photos/back-up-the-photos-library-pht6d60d10f/mac
Troubleshooting Library Issues
If you are having trouble accessing or modifying files in the Library, there are a few troubleshooting steps you can try:
Fix permissions – Sometimes permission issues can prevent you from accessing certain folders or files in the Library. To fix this, open Disk Utility and click “Repair Disk Permissions.” This will reset any incorrect permissions.
Clear caches – Application caches can accumulate over time and cause performance issues or prevent apps from accessing the Library properly. Use a tool like OnyX to clear out caches and logs.
Reindex – Indexing issues may prevent Spotlight or Finder from locating files in the Library. To reindex, open Terminal and run: sudo mdutil -E /
If these basic troubleshooting steps do not resolve the issue, you may need to dig deeper or consult an Apple support resource like this guide.
