Apple Music and iTunes are both music services from Apple, but they have some key differences. Apple Music is a streaming music service that gives you access to over 90 million songs, playlists curated by music experts, and more. iTunes is a media library that allows you to purchase, download, and organize your own music library on your computer. Both services integrate with each other and your Apple devices.
You may wish to transfer playlists between Apple Music and iTunes for a variety of reasons. For example, you may have playlists created in Apple Music that you want available in iTunes for offline listening. Or you may have playlists in iTunes that you want to access on other devices through your Apple Music account. Transferring playlists allows you to get the most out of both music services.
Why Transfer Playlists?
There are a few key reasons someone may want to transfer their Apple Music playlists over to iTunes:
Switching platforms – If you decide to cancel your Apple Music subscription and go back to just using iTunes, you’ll want to transfer your playlists over so you don’t lose them.
Consolidating libraries – If you have playlists in both Apple Music and iTunes, transferring them to one platform consolidates everything in one place for easier management.
New computer – When getting a new computer, transferring your playlists from Apple Music to iTunes on the new machine brings over your musical organization.
Backup – Keeping playlists in iTunes even if you use Apple Music gives you a backup if something ever happens to your Apple Music library.
Preference – Some people simply prefer the iTunes interface and management options compared to Apple Music.
Pre-Requisites
Before transferring playlists from Apple Music to iTunes, you’ll need to make sure you have the following:
- The latest version of macOS or Windows installed on your computer. Older operating systems may not be fully compatible with the newest versions of Apple apps and services. See Apple’s system requirements for the minimum versions needed.
- An active Apple Music subscription, which starts at $9.99/month for Individual and $14.99/month for Family. Apple Music membership gives you access to stream over 90 million songs and download them for offline playback. Without a subscription, you cannot access full Apple Music libraries and playlists. Learn more about Apple Music subscriptions.
- The latest version of iTunes installed on your computer. Importing playlists requires iTunes 12.8 or later for Mac and PC. Make sure you have updated to the most recent iTunes release before transferring playlists. iTunes can be downloaded for free from the App Store (Mac) or Apple website (Windows).
With those requirements met, you will have everything needed on the system-side to transfer Apple Music playlists over to iTunes.
Export Playlist from Apple Music
To export a playlist from Apple Music as an XML file, follow these steps:
1. Open the Music app on your Mac and navigate to the playlist you want to export.
2. Click File > Library > Export Playlist from the menu bar. This will open the export playlist dialog.
3. Choose the playlist you want to export from the dropdown menu.
4. Click the XML button at the bottom to export your playlist as an XML file.
5. Choose a save location and file name for the exported XML file and click Save.
The selected Apple Music playlist will now be exported and saved as an XML file to your chosen location. You can now import this XML file into iTunes.
For more details, refer to Apple’s guide on exporting playlists: https://support.apple.com/guide/music/mus27cd5060f/mac
Import Playlist to iTunes
Once you have exported the playlist from Apple Music as an XML file, you can then import it into iTunes as a new playlist. Here is the step-by-step process to import the XML playlist file into iTunes:
- Open iTunes on your computer.
- Go to File > Library > Import Playlist.
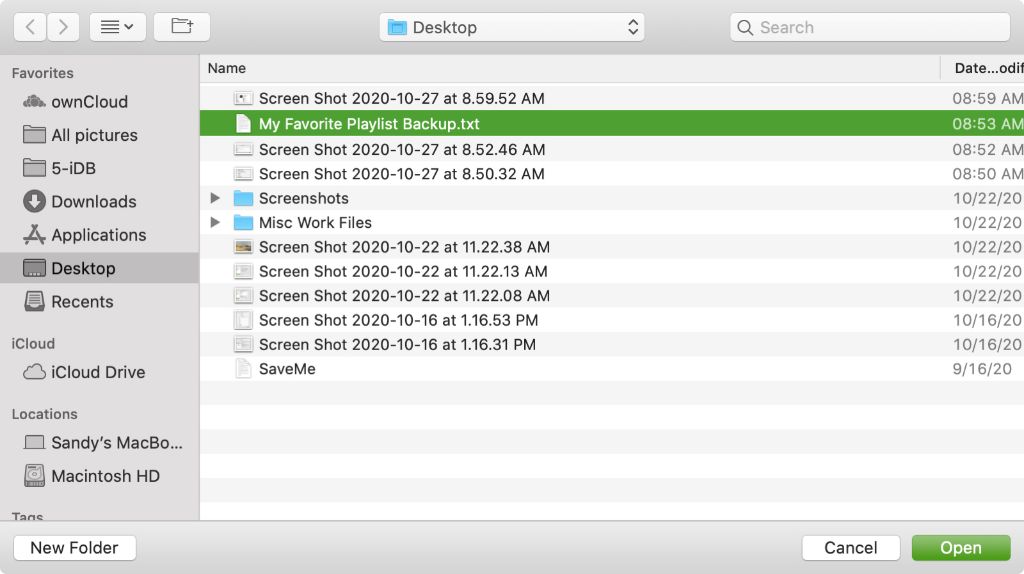
- In the file browser that opens, locate and select the XML file you exported from Apple Music.
- Click Open. [1]
- iTunes will now import the XML file as a new playlist.
- You can view the imported playlist under Playlists in the iTunes sidebar.
The playlist imported into iTunes will contain the same songs and order as the original playlist exported from Apple Music. You can now manage and edit the playlist directly within iTunes.
[1] “Import playlists”, Apple Support, https://support.apple.com/en-us/HT201019
Verify Imported Playlist
Once you have imported the playlist, it is important to check that it imported correctly with all of the tracks intact. Open the playlist in iTunes and scroll through to visually confirm each track is there. Check that the total number of tracks matches the original playlist in Apple Music.
Pay attention to the metadata as well – make sure the track titles, artist names, album information, etc. all match the original playlist. If you find any tracks are missing, you may need to go back and re-export the playlist from Apple Music and try the import again.
According to discussions on the Apple forums, sometimes imported playlists can lose tracks if the files have been moved or renamed since the playlist was first created. Check the file paths in the XML playlist file to troubleshoot any missing tracks.
Cite: https://discussions.apple.com/thread/254684855
Limitations
There are a few limitations to be aware of when transferring playlists from Apple Music to iTunes:
Metadata such as playlist descriptions, curator details, and album art will not transfer over. Only the playlist name and song list will be preserved.
The order of songs in the playlist may not be exactly the same when imported to iTunes. Apple Music and iTunes may sort songs differently.
Playlists with over 100,000 songs will be truncated when imported to iTunes, as iTunes limits playlist size to 100,000 songs [1]. Very large Apple Music playlists may need to be split into multiple smaller playlists before importing to iTunes.
Smart playlists created in iTunes cannot be transferred to Apple Music. Only static playlist imports are supported.
Any songs from Apple Music that have not been added to your iCloud music library will be omitted when importing the playlist to iTunes. Your iTunes library may not contain all the same songs available on Apple Music.
Automation Options
For users with large music libraries and multiple playlists, manually exporting and importing each playlist can be a tedious and time consuming process. Thankfully, there are tools available to help automate transferring multiple Apple Music playlists to iTunes.
The app Stamp is designed specifically for migrating playlists between different music services. It can transfer playlists from Apple Music to iTunes with just a couple clicks. Stamp matches tracks between services based on metadata so you don’t have to manually recreate playlists.
For users comfortable with code, the Python library applemusic2itunes provides a script to automatically transfer Apple Music playlists to iTunes. It exports the playlists as .m3u files that can then be imported into iTunes.
These automation tools help take the busy work out of moving multiple playlists between Apple Music and iTunes. They give users an efficient way to transfer their curated playlists collections between the two applications.
Additional Tips
Here are some additional tips when transferring Apple Music playlists to iTunes:
Refresh your iTunes library after transferring the playlist. Go to File > Library > Update iTunes Library to ensure the new playlist and its songs are properly indexed.
Check your iCloud permissions. Make sure you have enabled Apple Music on all linked devices under iCloud settings. This allows playlists to sync properly.
Update to the latest versions of macOS, iOS, iTunes and Apple Music. Older versions may have bugs or limitations for playlist transfers.
If you have issues transferring, try deleting the playlist in Apple Music and recreating it. Then export and import again.
Manually verify track listing after transfer. Make sure every song copied over properly and listen to sample tracks.
Consolidate your library in iTunes after importing playlists. This organizes the files within your iTunes Media folder.
Summary
In summary, transferring Apple Music playlists to iTunes involves a few simple steps:
-
First, make sure you have the latest versions of iTunes and Apple Music on your devices.
-
Next, open the Apple Music app and locate the playlist you want to export. Tap on the 3 dots next to the playlist name and select “Export Playlist”.
-
Choose a name and location to save the exported playlist XML file.
-
Open iTunes and go to File > Library > Import Playlist. Select the XML file you exported from Apple Music.
-
The playlist should now be imported into your iTunes library. You can verify by checking your playlists in iTunes.
By following these steps, you can successfully transfer playlists from Apple Music over to iTunes. This allows you to consolidate your music playlists in one place if you use both services.
