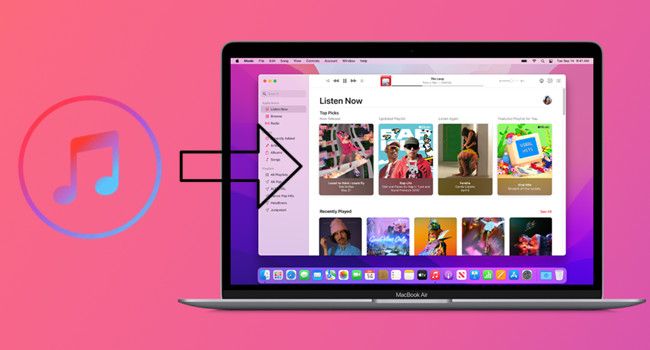
iTunes is Apple’s media management application for organizing and playing digital music and video. It allows you to import songs from CDs, purchase songs and albums from the iTunes Store, organize your media library, and sync content to devices like iPods and iPhones.
Apple Music, launched in 2015, is Apple’s streaming music service, similar to Spotify. It gives you access to over 90 million songs that you can listen to on demand, create playlists, get recommendations, and more. An Apple Music subscription also includes the ability to download songs for offline listening.
If you’ve built up an iTunes library over the years, you may want to access it through Apple Music so you can stream your songs across devices. Migrating lets you keep your playlists and play counts while gaining Apple Music features like unlimited streaming. This guide is for anyone looking to transfer their iTunes music library to Apple Music on Mac.
We’ll cover preparation steps like backing up your library, walk through the migration process, discuss what gets transferred and what doesn’t, and provide tips for managing your library after migration.
Why Migrate Your Library?
There are several key benefits to migrating your iTunes music library to Apple Music (https://www.apple.com/apple-music/):
Accessibility – With Apple Music, you can access your music library from any device where you are logged into your Apple ID. This includes not only Apple devices like iPhones, iPads, and Macs, but also Windows PCs. iTunes libraries are limited to the device they are stored on.
New Features – Apple Music comes with added features not available in iTunes, like expert-curated playlists, Beats1 live and on-demand radio, and integration with Siri. You can take advantage of these new features once your library is migrated.
Cloud Storage – Your Apple Music library is stored in the cloud rather than limited to the storage on your device. This protects your music collection and allows you to free up local storage space.
Simplified Library Management – Managing your library is streamlined with Apple Music. Any changes or edits you make on one device are automatically synced across all your devices.
In summary, migrating to Apple Music essentially future-proofs your music library with increased accessibility, new features for music discovery, and simplified management (https://www.reddit.com/r/AppleMusic/comments/16qovz9/benefit_of_apple_music/). iTunes libraries are limited to a single device while Apple Music libraries exist in the cloud.
What You’ll Need
To migrate your iTunes library to Apple Music, you’ll need the following:
- A Mac running OS X 10.10 or later with at least 512 MB RAM and at least 20 GB of available storage for your library (more for larger libraries) (1)
- The latest version of iTunes installed on your Mac
- An Apple ID
- The latest version of Apple Music installed on all your devices where you want access to your library
- Sufficient iCloud storage if you have a large library
- An internet connection
You’ll need the latest software versions to ensure compatibility with Apple Music and to access all the newest features for uploading and managing your library. Having enough storage space is also crucial – you’ll want at least 20GB free initially.
And of course, you’ll need an Apple ID for access to Apple Music across your devices. As long as you meet these requirements, you should be ready to transfer your iTunes collection over to Apple’s streaming service.
Back Up Your iTunes Library
Before migration, it is critical that you create a backup of your iTunes library. This ensures you have a copy of your music and playlists in case anything goes wrong during the transfer process. Backing up provides peace of mind and allows you to retry migrating as many times as needed.
The easiest way to back up your iTunes library is to an external hard drive. Here’s how to do it:
- Connect an external hard drive to your computer using a USB cable. The drive should have enough storage space for your entire iTunes library.
- Open iTunes and go to Edit > Preferences > Advanced. Make note of the location where your iTunes library is currently stored.
- Navigate to the iTunes folder on your computer. This is usually in the Music or My Music folder under your user account.
- Drag and drop the entire iTunes folder from its current location to your external hard drive. This may take awhile if your library is large.
- When finished, you now have a complete backup of your iTunes library stored safely on the external drive.
With your library backed up, you’re ready to begin migrating to Apple Music without worrying about data loss. Having a backup prevents headaches and lets you focus on uploading your music collection.
The Migration Process
Here are the step-by-step instructions for migrating your iTunes library to Apple Music:
1. Open the Music app on your iPhone, iPad, or iPod touch and tap the For You tab.
2. Tap the profile icon in the top right corner, then tap Settings > Music.
3. Toggle on iCloud Music Library. This will upload your iTunes library to iCloud and make it available across your devices.
4. Once enabled, your Apple Music catalog will begin uploading. This can take some time depending on your library size. You can check progress under Settings > Your Name > iCloud.
5. After your music finishes uploading, all of your purchased and ripped tracks from iTunes will appear in My Music in the Music app, mixed in with your Apple Music subscription songs.
6. If any tracks can’t match with Apple’s library, you’ll see an Upload tab under Library where you can manually upload those songs.
7. Once fully uploaded, you can stream your music from any device where you’re logged into your Apple ID.
Checking the Upload
Once the migration process begins, you’ll want to monitor the status to ensure your music is successfully uploading and matching to Apple Music. Here’s how to check on the progress:
On your Mac, open the Apple Music app and select “My Music” from the menu bar. Click on “Songs” in the sidebar. Then go to the “View” menu and click “Show Apple Music Status”. This will display the status of each song, indicating whether it was Uploaded, Matched, Purchased, or Apple Music.
The Matched status means Apple Music was able to match your song to one already in their catalog. Uploaded means it uploaded your local file. Purchased means you bought that song from the iTunes Store. And Apple Music indicates it’s an Apple Music streaming track.
You can also check the overall progress of the matching process on your iPhone by going to Settings > Music > Sync Library and viewing the status under “Apple Music”. It may show “Uploading” or a percentage completion.
Checking these statuses ensures your songs are being accurately identified and made available within your Apple Music library for streaming and downloads. If you notice songs stuck uploading or missing, you may need to retry matching or upload. But overall this allows you to verify your migration was successful.
Downloading Your Music
One limitation of Apple Music is that not all tracks in your iTunes library may be available to add to your Apple Music library. This is due to licensing restrictions on certain songs or albums. If a track cannot be added to your Apple Music library, you’ll get a notification during the upload process.
For music you own that is not available on Apple Music, you can download those tracks to your devices for offline listening. When viewing your library, you’ll see a cloud icon next to tracks that are only available through streaming. Songs that are downloaded to your device will show a download arrow icon instead.
To download music for offline listening, tap the 3 dots next to a track and select “Make Available Offline.” You can also hit “Download All” on playlists to save them for offline listening. Downloaded music takes up storage space on your device.
The key differences between streaming and downloading are:
- Streaming plays the music in real-time over an internet connection and doesn’t take up space on your device.
- Downloading saves the music to your device’s storage so you can listen offline.
For most situations, streaming music through Apple Music gives you access to their full library. Downloading is ideal for listening in areas with limited connectivity. Both streaming and downloads allow you to access your Apple Music library across all your devices.
Managing Your Library
Once your iTunes library has been successfully imported into Apple Music, there are various ways to organize and manage your music collection to optimize your listening experience. Here are some tips for organizing your Apple Music library:
Create playlists to group songs together for different moods, activities, or genres. Playlists allow you to listen to customized song selections. To create a new playlist, click the “+” icon in the playlists tab or right click on a song and select “Add to Playlist”. Name your playlist and add songs to get started.1
“Love” songs by clicking the heart icon to add them to your library. Loved songs are accessible in the playlist tab under “Loved Songs”. You can also dislike songs to remove them.
Use the Library section to browse by Artists, Albums, Songs, Genres, Composers and more. The Search tab allows you to quickly find music.
Edit song information like title, artist, genre, and year by right clicking a song and selecting Get Info. Add album artwork and lyrics.
Create smart playlists that automatically update based on rules you specify like date added, loved status, artist, genre, etc.
Use Recently Added and Recently Played playlists to discover new music you’ve added or remind you of songs heard recently.
Follow artists to keep up with new releases and concerts.
Overall, customizing your library through playlists, loving songs, and editing metadata can help you better organize your music and find what you want to listen to.
Limitations to Know
When migrating your iTunes library to Apple Music, there are some limitations to be aware of. The biggest one is that Apple Music has a library limit of 100,000 songs (Source). If your iTunes library contains more than 100,000 tracks, any songs over the limit will not be uploaded to Apple Music. You’ll need to pare down your library to under 100k songs before migration.
Additionally, there are some types of content that Apple Music does not support. This includes video files, audiobooks, podcasts, voice memos, and iTunes U collections (Source). These items in your iTunes library will not transfer over to Apple Music. Rented movies and TV shows are also ineligible for migration.
Finally, there are often issues migrating music purchased from outside the iTunes Store, like CD rips. Due to licensing restrictions, this content may fail to match during upload. You’ll need to manually re-add and re-upload any music that gets stuck in Apple Music’s “Ineligible Content” section after migration.
Additional Resources
Here are some helpful Apple support resources for more help with importing your iTunes library and using Apple Music:
Apple Music User Guide for Mac – https://support.apple.com/guide/music/welcome/mac
This official Apple guide covers using Apple Music on Mac, including how to add music to your library, download music for offline listening, view lyrics, and more.
Apple Music User Guide for the Web – https://support.apple.com/guide/music-web/welcome/web
This guide from Apple covers using Apple Music on the web, such as streaming music, viewing your library, creating playlists, and other tasks.
Apple Music Support Page – https://support.apple.com/music
Apple’s support page for Apple Music has links to setup guides, troubleshooting tips, how to articles, and options to contact Apple Support.
