What is SATA?
SATA stands for Serial Advanced Technology Attachment. It is a standard interface used to connect storage devices like hard drives and solid-state drives to a computer’s motherboard. SATA was designed to replace the older Parallel ATA (PATA) standard and provides faster data transfer speeds.
SATA allows you to connect storage drives to your computer’s motherboard via a cable and connector. The SATA specification defines various standards for SATA interfaces, with each revision providing faster theoretical transfer speeds compared to the previous version:
| SATA Version | Speed |
|---|---|
| SATA 1.0 | 1.5 Gbit/s |
| SATA 2.0 | 3 Gbit/s |
| SATA 3.0 | 6 Gbit/s |
| SATA 3.1 | 16 Gbit/s |
| SATA 3.2 | 22 Gbit/s |
The higher the SATA version, the faster the potential transfer speed. Most modern hard drives and SSDs use the SATA 3.0 standard, providing up to 6Gbps transfer speeds.
Benefits of SATA
Here are some of the major benefits of using SATA devices instead of the older PATA standard:
- Faster transfer speeds – SATA allows for much higher interface speeds compared to PATA.
- Thinner cables – SATA cables are thinner and more flexible compared to bulky PATA ribbon cables.
- Hot swapping support – SATA devices can be connected and disconnected without shutting down the system.
- Native command queuing – SATA supports native command queuing which optimizes drive operations.
- Lower power consumption – SATA devices use lower power, reducing energy costs and heat output.
By providing faster performance, better cable management, hot swapping capabilities and lower power requirements, SATA has become the standard for connecting storage drives in modern computer systems.
SATA Cables and Connectors
To install a SATA device, you will need SATA cables and connectors:
- SATA Data Cable – Used to connect SATA devices to the motherboard. Typically have a small L-shaped connector on one end and a flat connector on the other end.
- SATA Power Cable – Used to provide power to SATA devices. Has a larger L-shaped connector on one end that plugs into the device.
- SATA Connectors – Found on the motherboard to connect SATA cables. There are usually 4-8 SATA connectors on a motherboard.
Make sure you have the necessary SATA data cables to connect the drives to the motherboard. The SATA power connectors are usually built into the power supply on modern systems.
Installing a SATA Hard Drive
Follow these steps to install a new SATA hard drive:
- Mount the hard drive – Place the 3.5″ hard drive into an open drive bay and secure it with screws.
- Connect SATA data cable – Use a SATA data cable to connect the hard drive’s SATA connector to an open SATA port on the motherboard.
- Connect power – Use a free SATA power connector from the power supply to connect to the hard drive.
- Boot up computer – Turn on the PC and enter BIOS setup to verify if the drive is detected.
- Partition and format – Using Disk Management in Windows or a tool like GParted, partition and format the new drive so it is usable.
Once finished, the new SATA hard drive should show up in Windows File Explorer, ready to be used as extra storage space.
Installing a SATA Solid State Drive
Installing a SATA-based solid state drive (SSD) is similar, but faster and easier since no mounting is required:
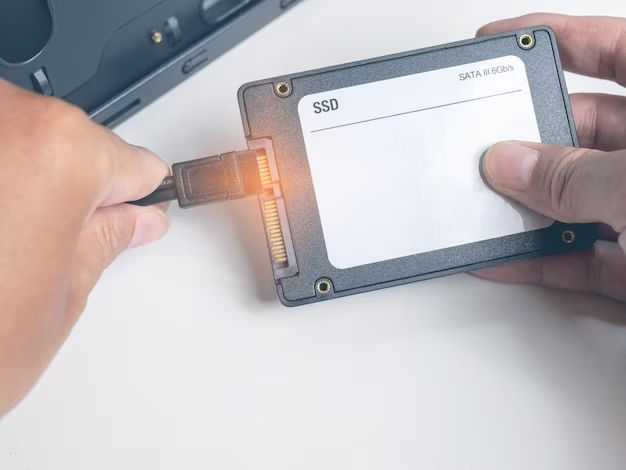
- Connect SATA cable – Connect the SSD’s SATA connector to an open SATA port on the motherboard.
- Connect power – Use a free SATA power connector from the power supply to connect to the SSD.
- Boot into BIOS – Power on and enter BIOS to verify if the SSD is detected.
- Partition and format – Use Disk Management or GParted to partition and format the SSD.
With the SSD connected via SATA and powered on, it will be ready for OS installation or as extra high-speed storage. Use SATA 3 ports for maximum performance when installing SSDs.
SATA Configuration in BIOS
After connecting new SATA devices, you should enter your motherboard’s BIOS setup utility to configure SATA settings:
- Enable AHCI mode – For best performance, ensure AHCI mode is enabled for SATA controllers.
- Disk boot priority – If installing an OS drive, ensure it is prioritized first in the boot order.
- Hot-plugging – Enable hot-plugging support for SATA ports if required.
Optimizing these BIOS settings will ensure your SATA devices like hard drives and SSDs function properly and achieve maximum performance.
Installing SATA Drivers
When installing an operating system to a new SATA drive, you may need SATA drivers for the OS installer to detect the drive:
- Obtain the latest SATA drivers for your motherboard chipset from the manufacturer’s website.
- Copy the SATA drivers to a USB flash drive.
- Boot to your OS installation media.
- When prompted, load the SATA drivers from the flash drive.
- The OS installer should now detect the SATA drive allowing you to proceed with installation.
This step may be skipped if the OS installer already has built-in support for your SATA controller.
Common SATA Problems and Solutions
SATA device not detected in BIOS
- Check SATA cable connections and try a different SATA port
- Ensure the storage device has power connected
- Try replacing SATA data and power cables
- Update motherboard BIOS/firmware
- Try the device in another computer to isolate issue
Slow SATA performance
- Ensure AHCI mode is enabled in BIOS
- Try a different SATA port and cable
- Disable hot-plugging if enabled
- Update SATA controller drivers
- Check drive for errors or bad sectors
OS not detecting new SATA drive
- Load SATA drivers during OS installation
- Update motherboard SATA controller drivers
- Ensure drive is partitioned and formatted
- Try a different SATA port and cable
Carefully going through SATA troubleshooting steps can help identify and resolve any issues when installing devices.
Conclusion
Installing SATA storage drives is straightforward with the correct cables and connectors. Always ensure BIOS settings like AHCI and hot-plugging are optimized for maximum performance. Take care when handling SATA drives and cables to prevent damage. Following proper installation and troubleshooting steps will help ensure a smooth SATA setup process. With the speed and simplicity of SATA, it has become the standard for connecting modern storage drives to motherboards and systems.