What is RAID?
RAID stands for Redundant Array of Independent Disks. It is a data storage technology that combines multiple disk drive components into a logical unit. RAID provides increased storage performance and reliability through redundancy.
With RAID, data is distributed across multiple drives. If one drive fails, the data can still be accessed from the remaining drives in the array. This minimizes the risk of data loss due to a single drive failure.
There are several different RAID levels, each with specific data distribution and redundancy features. Some common RAID levels include:
RAID 0
RAID 0 stripes data across multiple drives for increased performance. There is no redundancy, so if one drive fails, all data will be lost.
RAID 1
RAID 1 mirrors data between two drives. If one drive fails, data can be accessed from the other mirrored drive.
RAID 5
RAID 5 stripes data across multiple drives with parity information distributed among the drives. If one drive fails, the parity information can be used to rebuild the lost data.
RAID 6
RAID 6 is similar to RAID 5, but uses two sets of parity data instead of one. This allows for continued access to data even if two drives fail.
RAID 10
RAID 10 combines mirroring and striping for both performance and redundancy. Data is mirrored and those mirrors are then striped.
Signs Your Computer Has RAID
There are a few ways to determine if your computer is configured with RAID:
Check Disk Management
On Windows, access Disk Management by right-clicking the Start menu and selecting “Disk Management.” This will show all recognized disk drives. If multiple physical drives show up as a single large drive, that is an indicator of RAID.
Look in the BIOS
During system startup, enter the BIOS setup menu. There may be a section related to RAID configuration. This can provide details on the RAID level and disks involved in the array.
Use RAID Configuration Software
Most RAID controllers include proprietary software to view and manage RAID settings. For example, Intel Rapid Storage Technology for Intel RAID controllers. Check for any vendor-provided software like this.
Examine the File System
On Linux and some other systems, the file system can indicate the presence of RAID. For example, the “/dev/md0” device indicates Linux software RAID.
How to Confirm RAID Configuration
To get definitive confirmation of RAID status and details, follow these steps:
Identify the RAID Controller
The RAID controller is the hardware or software managing the RAID array. This could be a dedicated hardware card, integrated RAID capabilities on the motherboard chipset, or an OS-level software RAID driver.
Check Controller Settings
Use the configuration utility for the specific RAID controller to review settings. This will show the RAID level, number of disks, array capacity and other details.
Examine Attached Drives
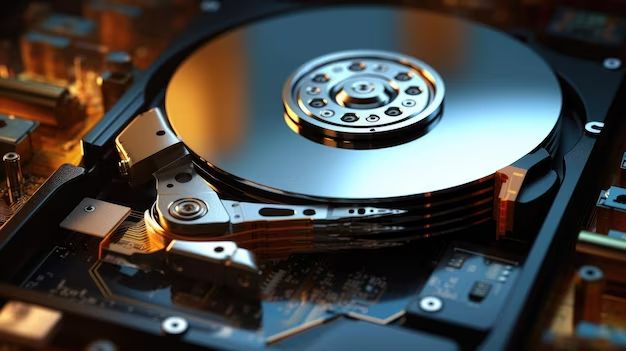
Open the computer case and note drives models and interfaces. Compare to expected models for RAID usage. SSDs and enterprise HDDs are commonly used in RAID.
Review Operating System Data
The OS itself may provide insight into the RAID configuration via tools like the Windows Disk Management utility or Linux mdadm command.
Run RAID Verification
Many RAID controllers include tools to verify consistency and health of the RAID array. Run these tools for confirmation the array is active.
| RAID Level | Minimum Drives | Redundancy | Capacity Efficiency |
| RAID 0 | 2 | No | 100% |
| RAID 1 | 2 | Yes | 50% |
| RAID 5 | 3 | Yes | 67%-94% |
| RAID 6 | 4 | Yes | 50%-88% |
| RAID 10 | 4 | Yes | 50% |
Key Benefits of RAID
There are several advantages to using RAID:
Increased Storage Capacity
Combining multiple drives into a RAID array creates a larger logical volume beyond the capacity of any single drive.
Improved Performance
Certain RAID levels stripe data across multiple disks for better read/write speeds and bandwidth.
Added Redundancy
RAID levels like 1, 5 and 6 provide redundancy through mirroring or parity so data survives drive failures.
Faster Rebuild Times
With a hot spare drive in some RAID setups, the rebuild process finishes faster after replacing a failed drive.
Higher Availability
By minimizing downtime from drive failures, RAID enhances availability and uptime of systems.
Use Cases for RAID
Some examples of where RAID delivers significant advantages:
Transactional Database Servers
The redundancy of RAID is important for databases needing constant uptime and quick recovery. Mirrored RAID 10 is common.
Virtualized Servers
Hypervisors and virtual machines can leverage fast RAID 1/10 for better performance across many VMs.
Media Editing Workstations
The large stripes of RAID 0 enable continuous high read/write speeds for smooth video editing.
Network Attached Storage (NAS)
RAID 5 or 6 provides home/business NAS with ample networked storage and the ability to survive drive failures.
Disk-Intensive Scientific Computing
High-throughput RAID 0 improves computing performance and storage capacity for data-driven research.
RAID Performance Considerations
When planning a RAID setup, consider:
RAID Level Tradeoffs
Understand the performance vs. redundancy tradeoffs of different RAID levels for the workload.
Disk Speeds and Types
Use disks with similar speeds and interfaces for optimal performance in a RAID array.
RAID Controller Cache
Larger cache on the RAID controller improves read/write speeds and allows faster rebuilds.
Drive Interface Bandwidth
Use faster interfaces like SAS or NVMe when possible for high bandwidth to the drives.
RAID Rebuild Times
More drives and larger capacity in an array can result in very long rebuild times after a failure.
Choosing the Right RAID Level
Consider these factors when selecting a RAID level:
Required Redundancy
If uptime and redundancy are critical, use mirrored (RAID 1) or parity (RAID 5/6) RAID levels.
Desired Performance
RAID 0 provides the best read/write speeds, while RAID 10 balances performance with redundancy.
Number of Drives
Certain RAID levels like RAID 10 require a minimum of four drives.
Drive Costs vs. Capacity
Lower capacity efficiency of some RAID levels requires purchasing more costly drives for the same usable capacity.
Expected Workload
Transactional and database work has different RAID needs than streaming media servers.
Reconstruct Write Penalty
RAID 5/6 incur a write speed penalty during reconstruction, RAID 1/10 do not.
Implementing RAID
There are two main approaches to implementing RAID:
Hardware RAID
Uses a dedicated RAID controller card for maximum performance and firmware-level management.
Software RAID
Relies on RAID functionality integrated into the operating system and drivers. A lower cost option.
Many server motherboards also include onboard RAID capabilities through the chipset. This provides some hardware acceleration while still using OS-based management.
For critical data protection, always use RAID controllers with battery or flash-backed write caches. This protects data in the cache waiting to be written to the array.
Choosing RAID Hardware
Key considerations for RAID hardware:
RAID Level Support
Ensure the controller supports advanced RAID levels like 1, 5, 6, 10, 50 etc. if required.
Drive Interface Support
Optimal performance requires support for the fastest drive interfaces in use like SAS, SATA, NVMe etc.
Cache Memory Capacity
Larger controller caches improve performance. 1GB or more is recommended for busy arrays.
RAID Management Tools
Look for monitoring, alerts, easy configuration and other management features.
Redundant RAID Cards
High-end servers can have two controllers for failover redundancy at the RAID card level.
Battery or Capacitor Backup
Prevents data loss in cache during power failures. Mandatory for production RAID systems.
Setting up Software RAID on Linux
To configure software RAID on Linux:
Install mdadm
The mdadm utility manages software RAID arrays on Linux:
“`
sudo apt install mdadm
“`
Create Partitions
Use fdisk to create partitions on the disks to be used in the array:
“`
sudo fdisk /dev/sdX
“`
Set the partition type as “FD Linux RAID”.
Build the Array
Assemble the RAID array with mdadm:
“`
sudo mdadm –create /dev/md0 –level=1 –raid-devices=2 /dev/sdX1 /dev/sdY1
“`
Replace level and devices to match the desired RAID setup.
Create the File System
Format the array with a file system like ext4 for usage:
“`
sudo mkfs.ext4 /dev/md0
“`
Mount the Array
Finally, mount the array to make available to the operating system:
“`
sudo mount /dev/md0 /mnt/RAID
“`
Monitoring RAID Status
It’s important to proactively monitor RAID arrays. Some techniques include:
Review Logs
Many RAID controllers and software RAID utilities log events like errors and failures. Review these logs regularly.
Test Alerting
Configure the RAID system to send alerts for critical events via email or SNMP monitoring. Test that alerts are working.
Monitor Performance
Graph controller and array performance over time to spot inconsistent trends possibly indicating issues.
Schedule Parity Checks
Run scheduled parity consistency checks on RAID 5/6 arrays to verify data integrity.
Monitor Self-Monitoring/Reporting
Newer drives support self-monitoring of drive health and reporting via S.M.A.R.T. Enable this monitoring.
Review Built-in Monitoring
Many RAID solutions include monitoring and reporting features – use them to check array status.
Recovering from RAID Drive Failures
When a drive in a RAID array fails, follow these general steps:
Identify the Failed Drive
RAID systems will indicate a failed or degraded drive. Physically identify the failed drive.
Replace the Failed Drive
Replace the failed drive with a new drive of the same capacity and type.
Rebuild the Array
The RAID system will automatically rebuild the data to the new replacement drive. Monitor rebuild progress.
Verify Successful Rebuild
Check the RAID management interface to ensure rebuild completes successfully. Run data verification.
Update Spare Drives
If applicable, swap in the failed drive as a new hot spare after rebuilding finishes.
Diagnose Underlying Issues
Analyze logs and performance data to determine if issues like bad sectors contributed to the failure.
When to Upgrade RAID Hardware
Some signs it may be time to upgrade aging RAID infrastructure:
Limited Drive Support
Older RAID cards may not support new drive interfaces like NVMe or large 16TB+ drives.
Bottlenecks Identified
Performance monitoring reveals storage bottlenecks limiting application performance.
Increasing Failures
Higher than expected failure rates indicating impending issues with controller or drives.
Lack of Modern Features
Missing important current features like storage tiering, SSD caching, thin provisioning etc.
End of Support
Vendor ends support and stops providing firmware updates and parts for older gear.
Capacity Limitations
Additional capacity is needed but maxed out due to limitations of older RAID equipment.
Inability to Recover
A failed component cannot be replaced with available parts or compatibility.
Conclusion
Determining if a computer has RAID storage configured requires checking for indicators like:
– Multiple disks showing as one volume in the OS
– RAID-related settings in the BIOS
– A RAID controller identified in the system
– The presence of RAID management and configuration utilities
Digging further into the specifics of the RAID setup requires using the management tools and examining connected drives. RAID delivers significant benefits like redundancy and improved performance but also adds complexity. Careful monitoring and maintenance is required.
Upgrading aging RAID hardware should be considered when feature gaps, bottlenecks or lack of support for modern drives are encountered. This will ensure maximum performance and reliability are maintained.