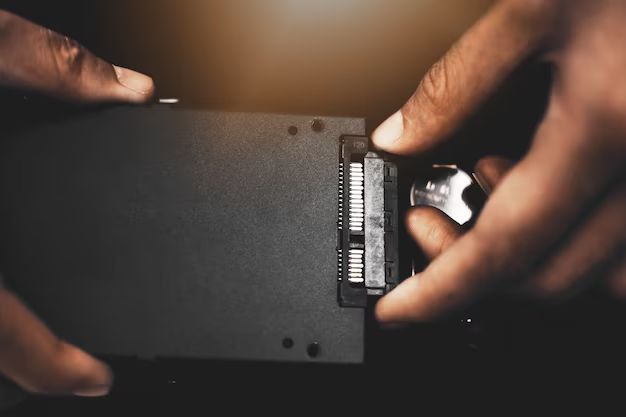
A solid-state drive (SSD) is a data storage device that uses flash memory chips to store data persistently. Unlike traditional hard disk drives that use spinning magnetic disks, SSDs have no moving parts and provide much faster data access speeds.
SSDs are increasingly used in laptops, desktop PCs, and servers due to their speed, durability, and smaller form factor compared to hard drives. However, the data stored on an SSD is not inherently secure. Since SSDs can be easily removed and connected to another computer, it’s important to encrypt the drive if it contains sensitive information.
Encrypting an SSD essentially scrambles its data so that it can only be accessed by someone with the right encryption key. This prevents unauthorized users from being able to read the data if they get physical possession of the drive. Encryption protects the confidentiality of your data in case your SSD gets lost, stolen, or improperly accessed.
Back Up Important Data First
Before encrypting and locking down your SSD drive, it is crucial to back up your important files and data first. As https://www.quora.com/What-are-the-best-ways-to-encrypt-and-backup-data-on-an-external-hard-drive notes, once you encrypt a drive, you will no longer be able to access the data on it without the proper encryption key. So if you don’t have a backup, encrypting the drive could result in permanent data loss if you ever forget the password or encryption key.
There are a few recommended approaches to backing up your data before drive encryption:
- Copy important files to an external drive or cloud storage. Services like Google Drive, Dropbox, or OneDrive allow you to encrypt and securely store backups.
- Create a disk image or clone of the entire drive before encrypting it. This provides a full backup you can restore from if needed.
- Enable versioning in cloud backup services to preserve previous copies of files.
The key point is to have one or more backups of your sensitive data before locking down the SSD. This gives you a safety net in case anything ever goes wrong with the encryption or access to the drive. So take the time to fully back up your drive first, before taking any steps to encrypt or lock it.
Using BitLocker to Encrypt the Drive
BitLocker is the built-in full-disk encryption feature included in some versions of Windows. It allows you to encrypt your entire SSD to secure the data stored on it.
To enable BitLocker on your SSD drive (source):
- Go to Control Panel > System and Security > BitLocker Drive Encryption.
- Click “Turn on BitLocker” next to the drive you want to encrypt.
- Choose your encryption method – TPM or password.
- If using password, enter a password to unlock the drive on boot.
- Click “Start encrypting” to begin the encryption process.
BitLocker encrypts the entire drive by generating an encryption key and storing it securely. On reboot, BitLocker will request the key or password to unlock the drive and access the data. This prevents unauthorized access if the drive is removed.
Using VeraCrypt to Encrypt the Drive
VeraCrypt is an open source disk encryption software that can encrypt the Windows system drive to protect sensitive data. VeraCrypt allows for full disk encryption, including the partition or drive where Windows is installed, not just for individual files or folders like some other encryption tools.
To use VeraCrypt to fully encrypt a drive on Windows, first download and install the VeraCrypt software from the official website https://www.veracrypt.fr/en/Downloads.html. Then launch VeraCrypt and select “System” > “Encrypt System Partition/Drive” to start the VeraCrypt System Encryption wizard. This will guide you through the steps to securely encrypt the entire system drive.
VeraCrypt will first have you select the partition or drive to encrypt, choose a strong encryption algorithm like AES or Serpent, and set a secure password. The setup wizard will then prepare the drive for encryption, which can take some time for a large drive. Finally, it will encrypt the system drive in the background while you continue to use the computer normally. Overall the process is straightforward for fully encrypting system drives with VeraCrypt.
Using Device Encryption in Windows
Device encryption is a full disk encryption feature built into Windows that can be used to encrypt the hard drive on your PC, including solid state drives (SSDs). It utilizes the industry standard BitLocker encryption technology.
To enable device encryption on Windows 10 or 11:
- Go to Settings > Update & Security > Device encryption
- Under “Device encryption,” click “Encrypt device”
- Follow the on-screen instructions to set up device encryption. You’ll be prompted to create a recovery key in case you forget your password.
Once encryption is enabled, everything on the drive will be encrypted including the Windows operating system itself. The encryption keys are secured using your account password. Just make sure to remember the password or you won’t be able to access the drive!
The main advantage of device encryption over BitLocker is that it’s built into Windows and easy to enable with just a few clicks. However, BitLocker offers more customization options for advanced users.
Using FileVault on Macs
FileVault is Apple’s built-in full disk encryption tool for Mac computers. When enabled, FileVault encrypts the entire startup disk, protecting data at rest. Only authorized users can access the encrypted data by entering their login password.
According to Apple’s support article, FileVault uses XTS-AES 128 encryption to encrypt the Mac startup disk. When FileVault is turned on, macOS automatically encrypts the startup disk in the background as you use your computer normally. All of your files are protected using advanced encryption.1
To enable FileVault on a Mac:
- Go to System Settings > Privacy & Security
- Click Turn on FileVault
- Follow the onscreen instructions to begin the encryption process
It may take several hours for FileVault to fully encrypt your startup disk. During this time, you can use your Mac normally while encryption runs in the background. Once enabled, FileVault will automatically decrypt your data when you log in with your password.
Encrypting External SSD Drives
External SSD drives are portable storage devices that allow you to store large files and carry data with you anywhere. Many external SSD drives use USB connections to plug into PCs and Macs to access the data. While external SSD drives offer convenience, they also raise privacy and security concerns since the data is physically accessible if the drive gets lost or stolen.
To protect sensitive data stored on external SSD drives, encryption is highly recommended. Encryption scrambles the data so it cannot be accessed without entering a password or encryption key. Here are some tips for encrypting external SSD drives:
On Windows, use BitLocker to encrypt the entire external SSD drive. BitLocker is built into Windows and provides full-disk encryption to lock the drive. Enable BitLocker through the Control Panel or Windows Explorer 1.
On Macs, use FileVault to encrypt external SSD drives. FileVault is the native disk encryption system on macOS. Turn on encryption through System Preferences to encrypt external drives 2.
For cross-platform encryption, use VeraCrypt. VeraCrypt is a free, open source disk encryption tool that works on Windows, Mac, and Linux. Create an encrypted volume on the external SSD drive with a strong password 3.
Set a firmware password if available on the external SSD drive. This password protects the drive at bootup before the operating system loads.
Store encryption keys separately from the encrypted drive as a backup. Don’t lose the password or encryption keys, or the data will be inaccessible.
Perform backups before encrypting the drive, in case data gets lost if encryption fails or password gets forgotten/lost.
Setting a Firmware Password
A firmware password is a protection mechanism that prevents unauthorized access to a Mac computer at start up. It works by asking for a password when booting the Mac before the operating system loads. Even if the hard drive is removed or replaced, the firmware password will still be required on boot up.
To set a firmware password on a Mac, start up the computer in macOS Recovery mode by holding down Command + R on boot. Then under the Utilities menu, select “Firmware Password Utility” and follow the prompts to create a firmware password [1]. Store this password in a safe place, as resetting a firmware password requires taking the Mac to an Apple Store or authorized service provider.
Once enabled, the firmware password prevents bypassing file vault encryption or starting up from unauthorized disks. It also cannot be reset or removed without the proper credentials. This makes it a powerful layer of security on Mac devices.
The downside to firmware passwords is that they can make certain hardware repairs and upgrades more difficult. If you forget the firmware password, it will need to be removed by Apple Support which takes time and money [2]. So only set a firmware password if you are certain you can keep track of it.
Pros and Cons of Encryption
Full disk encryption provides strong security by encrypting all data on the drive, preventing unauthorized access if the device is lost or stolen. However, there are some downsides to consider as well.
On the pro side, full disk encryption like BitLocker and FileVault provides comprehensive protection for sensitive data at rest on the SSD. The encrypted data is inaccessible without the encryption key. This prevents breaches if the SSD is physically accessed by bad actors.
Some cons of full disk encryption include reduced drive performance, especially during initial encryption. Encrypting and decrypting data on the fly can reduce read/write speeds. There are also potential issues with data recovery if encryption keys are lost. Specialized recovery is needed to decrypt data if the keys are unavailable. Additionally, full disk encryption alone does not protect data in transit or prevent malware or user error.
Overall, encryption provides important security benefits for data at rest but also introduces potential downsides around performance and data recovery. Understanding these tradeoffs allows users to make informed decisions about implementing drive encryption.
Sources:
https://www.datanumen.com/blogs/6-advantages-disadvantages-full-disk-encryption-fde/
https://www.quora.com/What-are-the-advantages-and-disadvantages-of-full-disk-encryption
Conclusion
There are several effective methods to encrypt your SSD drive and keep your data secure. The main options covered here include using BitLocker or VeraCrypt encryption software, Device Encryption through Windows, FileVault on Macs, encrypting external drives, and setting a firmware password.
Encryption is crucial for protecting sensitive personal and business data in case your device gets lost, stolen, or accessed by an unauthorized party. While it adds an extra step to unlocking your drive, encryption provides peace of mind that your files and information are safe and inaccessible without the correct password or keys.
The specific encryption method you choose depends on your operating system, whether it’s an internal or external drive, and your individual needs. Take time to properly back up your data, then encrypt your SSD using the most appropriate solution to keep your data locked down.