When building or upgrading a computer, it can be frustrating to install a new hard drive, SSD, or other storage device only to find that it doesn’t show up in the BIOS or operating system. There are a few potential reasons a drive may not be visible and several steps you can take to troubleshoot and fix the issue.
Why a Hard Drive May Not Show Up in BIOS
There are a few common reasons why a newly installed hard drive or SSD might not be detected by the BIOS:
- The drive is not properly plugged into the motherboard SATA port.
- The SATA cable connecting the drive is loose or damaged.
- The drive is not receiving power from the power supply.
- The drive is installed but not properly mounted in the case.
- The BIOS mode (IDE vs. AHCI) is not set correctly for the drive.
- The drive jumpers or switches are not set correctly.
- There is a driver, controller, or firmware compatibility issue.
Carefully checking all the physical connections and making sure the BIOS settings match your hardware is crucial. If those basic steps do not reveal the issue, there may be a deeper technical problem with compatibility or the drive itself.
Steps to Make a Drive Visible in BIOS
Follow these steps to troubleshoot a newly installed hard drive or SSD that is not being detected in BIOS:
- Check drive connections: Shut down the computer, unplug the power cable, and open the case. Check that the power and SATA cables are firmly plugged into the back of the drive and the motherboard. If using a SATA-to-Molex power adapter, verify both ends of the adapter are properly connected.
- Try a different SATA port and cable: Try connecting the drive to a different SATA port and using a different SATA cable, if available. This will confirm the ports and cables are functioning.
- Verify drive jumpers/switches: Some drives have small jumper blocks or DIP switches that configure the drive. Make sure these jumper settings match the type of controller the drive is connected to.
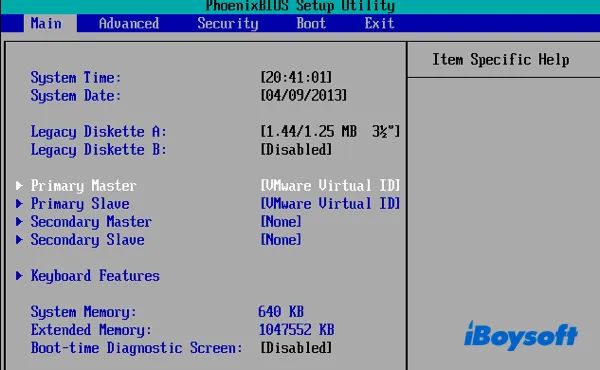
- Check BIOS boot mode: Enter the system BIOS setup utility, usually by pressing F2, F10, or Delete during bootup. Verify that the boot mode for the SATA controller/ports is set to AHCI rather than IDE or RAID mode, which matches most modern drive types.
- Update BIOS/drivers: Check the system and motherboard manufacturers’ websites for any available BIOS, chipset, or storage driver updates. Install these to improve hardware compatibility.
- Check for drive errors: Use the drive manufacturer’s drive fitness test, diagnostics, or disk check utility to scan for any drive errors or failures.
- Try a different system: If possible, connect the drive as a secondary drive in a different computer system. If it also fails to show up, the drive itself likely has a serious problem.
- Initialize the disk: Using disk management in Windows, initialize an unallocated new disk to create a valid partition table before it can be accessed and formatted.
With some probing and testing, you should be able to find the underlying cause for a drive not showing up in BIOS. Pay special attention to snug connections, matching the hardware specs, looking for disk errors, and updating firmware. If the drive fails tests on multiple computers, it likely has a hardware defect and may need to be replaced under warranty if applicable.
Why Properly Connecting Drives Is Important
A loose data or power cable is one of the most common reasons a drive will not show up as expected in BIOS or in the operating system. SATA cables carry data from the drive to the motherboard, while the larger power cables supply electricity from the power supply to run the drive. Without a proper connection for either cable, the drive will fail to function.
SATA cable connections can work loose over time, especially if there is frequent component swapping or movements of the computer case. If your system drive with the operating system is disconnected, the entire system may fail to boot. Data cables can pull loose from the SATA port connections slightly if they are not fully inserted or locked in place.
Power connections are especially prone to problems due to weaker friction and insertion locks. Using a SATA-to-Molex adapter requires two solid connections, and a loose adapter can entirely cut power to a drive. Checking that SATA and power cables are firmly inserted or even replacing suspect cables can resolve drive detection issues.
Tips for Proper Drive Connections
- Listen for a click when plugging data and power cables fully into SATA ports to ensure a snug fit.
- Use locking SATA cables that click into place at the drive connection if possible.
- Avoid twisting or bending SATA cables at extreme angles that may stress connections.
- Open the computer case and visually inspect SATA connections for any loose or unplugged cables.
- Replace old SATA cables with deteriorated or damaged connectors.
- Secure loose drive power and data cables with zip ties or clips as needed.
- Refer to drive manuals for proper jumper, switch, and cable arrangements if needed.
Taking steps to create reliable physical connections ensures that drive communication and power delivery are maintained. This in turn allows the BIOS and operating system to reliably detect installed storage drives.
How BIOS Settings Effect Drive Detection
In addition to cabling, the configured BIOS mode and settings dictate how drives are accessed and therefore whether they will show up as expected in the system. If the SATA controller mode and communication protocols are not properly set, the BIOS will be unable to initialize and detect drives at boot.
Key factors in BIOS config that impact drive detection include:
- AHCI vs IDE mode: Modern SATA drives typically require the SATA controllers to use AHCI mode rather than IDE or combined mode, which is for older legacy drives.
- RAID mode: If set to a disk array mode like RAID, the drives will only show up configured as part of the array rather than individually.
- Hot-swap settings: Docked hot-swap drives usually only show properly if the SATA controller is set to enable hot-swapping.
In addition to drive detection, mismatched BIOS settings can also lead to blue screens, read/write errors, or severely reduced performance if the communication protocols don’t match the drive capabilities.
Updating to the latest BIOS version can also resolve detection issues caused by bugs or lack of support for new drives. Driver or firmware updates may be required for the storage drives themselves as well for full hardware compatibility.
Tips for Configuring BIOS Settings
- Check manuals for recommended BIOS settings for your specific drive models and SATA controller.
- Choose AHCI mode unless certain legacy IDE drives are required.
- Disable RAID if using drives independently rather than in a RAID array.
- Enable hot-swapping if using removable drives like SSDs in enclosures.
- Update to the latest stable BIOS, chipset, and storage drivers from manufacturer websites.
By matching the SATA and drive modes in BIOS to your specific hardware, you can ensure reliable detection and integration of storage devices into the booting process.
Troubleshooting Drive Connectivity
If you’ve verified that cables are properly plugged in and the BIOS settings match your hardware, yet the drive still does not show up, try the following troubleshooting techniques:
Test SATA ports and cables
Swap cables and ports that the drive is plugged into to test if a loose port or fault cable is the issue.
Eliminate conflicts
Unplug other drives to see if a port or cable conflict is preventing drive detection. Also remove add-in cards and disconnect external drives.
Check controller mode
Toggle the SATA controller mode between IDE, AHCI, and RAID (if available) to see if the drive appears.
Update drivers/firmware
Update storage drivers, controller drivers, SSD firmware, and the system BIOS to the latest stable revisions.
Reset CMOS
Reset the BIOS to factory defaults by clearing the CMOS values on the motherboard, in case settings changes are causing conflicts.
Boot into Safe Mode
Boot into Windows Safe Mode, which loads minimal drivers. See if the drive appears under this limited hardware environment.
Test in another PC
Connect the drive to another computer if available to rule out the system as the cause of detection issues.
Taking a systematic approach to isolating where connectivity is failing can help pinpoint if the drive, controller, port, or cables are producing the problem.
Checking for Drive Errors
If you’ve exhausted hardware connectivity troubleshooting using the steps outlined above, the drive itself may have problems. Corrupted firmware, electrical failure, or physical damage on the drive could prevent the operating system from being able to access and initialize the drive correctly.
To scan for drive errors, try the following software tools:
Drive manufacturer tools
Run the disk checking and diagnostic utilities from the drive manufacturer like Seagate SeaTools, WD Data Lifeguard Diagnostics, etc. These tools will scan for read/write errors or media defects.
CHKDSK
Microsoft’s built-in disk scanning tool CHKDSK can check connected drives for a variety of file system and data errors.
S.M.A.R.T. monitoring
S.M.A.R.T. drive monitoring checks disk health statistics via tools like Speccy to detect potential hardware problems before total failure.
Third-party tools
Disk check utilities like HDTune Pro or MHDD provide comprehensive S.M.A.R.T. status reports and disk benchmarking to uncover issues.
If drive errors are reported, the drive may need to be replaced and the data potentially recovered by a professional service. Otherwise, the errors could be related to connection problems.
Initializing New Drives in Disk Management
One step that is easy to miss when installing a brand new bare hard drive or SSD is that it needs to be initialized and formatted first via Disk Management before it can be accessed by the operating system. If an unused disk shows up in BIOS but not under My Computer in Windows, it likely needs to be initialized.
Follow these steps to initialize a new disk:
- Open Windows Disk Management (press Windows+R and type “diskmgmt.msc”).
- Locate the new disk shown as “Unknown” without a drive letter.
- Right-click the disk entry and choose Initialize Disk.
- Select a disk partition table format (typically GPT or MBR).
- Right-click the volume area and choose New Simple Volume.
- Walk through the prompts to create a formatted volume with a drive letter.
Once complete, the new drive should be available for use and show up normally in Windows File Explorer.
When to Get Professional Help
Working through all the above troubleshooting steps may seem daunting. If you’ve exhausted your troubleshooting options and the drive still fails to show up properly in BIOS and operating system, it may be time to seek professional assistance.
It can be well worth the cost to get an expert opinion if you have important data at stake or little experience tackling complex PC issues. In some scenarios, data recovery services could potentially rescue your files and information from a damaged drive.
Consider enlisting professional help if:
- No drive connections, cables, or BIOS settings resolve detection problems.
- Fixing it yourself would void an existing warranty.
- Drive errors are reported that you don’t know how to clear.
- You exhausted all troubleshooting steps to no avail.
- The drive and data are extremely valuable.
Computer repair technicians have specialized tools, extensive knowledge and resources to recover data and identify failures that an average user does not. If the DIY options are hitting a dead end, let the pros have a crack at solving your stubborn drive visibility problems.
Conclusion
Getting a new hard drive or SSD properly recognized and showing up requires carefully validated hardware connections, correct BIOS configuration, installed drivers, and partition creation. If issues arise, methodically go through each troubleshooting step to find the failure point.
With the right cables snugly plugged in, proper controller and disk modes set in BIOS, and up-to-date firmware, your drive should display normally so you can take advantage of the speedy new storage upgrade. Don’t hesitate to call in professional help if you remain stuck getting a newly installed drive to become visible in the BIOS and operating system boot process.