An SD card is a type of removable storage device that allows you to transfer files between devices. SD cards are commonly used in digital cameras, video cameras, tablets, drones, smartphones or other portable devices to expand the storage capacity. When you take photos or videos with your digital camera, the files are stored on the SD card. To access these files on your Mac, you’ll need to remove the SD card from your camera and connect it to your computer. This guide will walk you through the steps for how to open files from an SD card using your Mac’s built-in SD card reader or an external USB card reader. We’ll cover how to locate the SD card, open and view the files, import photos, and safely eject the SD card when you’re done transferring files.
Insert the SD Card
To insert the SD card into your Mac, locate the SD card slot. The slot is typically located on the side of the Mac laptop or on the back of a desktop Mac. Recent MacBook Pro and MacBook Air models have the SD card slot on the right side of the computer.
Older MacBook Pro models may have the SD slot on the left side. Mac desktop computers like the Mac mini and iMac have the SD card slot on the back. The Mac Pro tower has SD card slots on the front.
Once you’ve located the SD card slot, gently insert the SD card with the label side facing up. Push the card into the slot until it clicks into place. Avoid forcing the card into the slot.
According to Apple Support, “Make sure the label faces up when you insert the card. Don’t force the card into the slot. If your SD card doesn’t fit easily into the slot, it might be a different card, like miniSD or microSD.” (https://support.apple.com/en-us/102352)
Open Finder
To access the files on your SD card, you’ll need to open a Finder window on your Mac. Here are the steps to open Finder and locate your SD card:
- Click on the Finder icon in your Dock or open Finder from the Applications folder.
- In the Finder menu bar at the top, click Go > Computer.
- This will open a Computer view window showing all connected drives and devices.
- Look for the name of your SD card under Devices on the left side. It will likely be named after the brand, such as “NO NAME” or “SD”.
- Click on the SD card name to open it.
You should now see the contents of your SD card displayed in the Finder window. From here you can access and manage the files just like you would with any other folder on your Mac.
Use an SD or SDXC card with Mac – Apple Support
Locate the SD Card
Once the SD card is inserted into your Mac’s SD card reader, it should show up in Finder. To locate it, open Finder and look in the sidebar under “Devices”. You should see your SD card listed there.
If you don’t see it, try going to Finder > Preferences > General and make sure the “External disks” option is checked. Then go to the Sidebar tab and make sure “External disks” is checked there as well. This will ensure external devices like SD cards show up in the Finder sidebar.
You can also try searching for the SD card by name in Finder’s search bar. Type the name of the SD card and it should show up in the search results if properly connected.
If you still can’t locate the SD card in Finder, make sure it is properly inserted in the SD card slot. Reinserting it may help the Mac recognize it. Additionally, check if the SD card works on another device to rule out a corrupted card. If the issue persists, see further troubleshooting tips in the conclusion.
Open the SD Card
Once the SD card is inserted into your Mac’s SD card reader or USB port, you’ll need to open it in Finder to access the files. Here’s how:
- Open Finder on your Mac. You can click the Finder icon in the Dock or use the keyboard shortcut Command+Spacebar to launch Finder.
- In the Finder sidebar, you should see the name of your SD card listed under the Devices heading. This may be labeled as the brand name of the SD card, or simply as “SD Card.”
- To open the SD card, double click on the SD card name in the Finder sidebar. This will open a Finder window showing the contents of the SD card.
- You can now view all the files and folders on the SD card. To access a specific file, simply double click on it to open.
Once you’ve double clicked on the SD card name in Finder, you’ll have full access to all the files so you can open them, copy them to your Mac, or import photos.
Copy Files
Once the SD card is mounted on the Mac and you’ve located it in Finder, you can easily copy files from the SD card to your Mac using drag-and-drop or copy/paste.
To copy files using drag-and-drop:
1. Open a Finder window and navigate to the SD card.
2. Select the files or folders you want to copy from the SD card.
3. Drag the selected items to the desired location on your Mac like the Desktop or a folder.
The items will be copied from the SD card to the Mac.
To copy using copy/paste:
1. Open a Finder window and navigate to the SD card.
2. Select the files or folders you want to copy.
3. Choose Edit > Copy from the menu bar.
4. Navigate to the desired location on the Mac.
5. Choose Edit > Paste from the menu bar.
The selected items will be copied from the SD card to the Mac.
The copy process lets you duplicate files and folders from the SD card to your Mac for organizing and backing up. You can copy as many files as needed from the SD card to your Mac using these simple methods.
Import Photos From the SD Card
Once you have located your SD card in Finder, you can import photos and videos into the Photos app to view and edit them on your Mac. Here are the steps:
1. Open the Photos app on your Mac. You can find it in your Applications folder or use Spotlight Search.
2. Click on File in the menu bar at the top of your screen and select Import from the drop-down menu.
3. In the import window that pops up, navigate to your SD card which should be listed in the left sidebar under Devices.
4. Select the photos and videos you wish to import by checking the boxes next to each file. You can also select a folder to import all contents.
5. Click on the Review for Import button at the bottom right once you’ve selected your files.
6. On the next screen you can review, edit or delete items before importing. When ready, click Import All to complete the transfer from SD card to your Photos library.
The photos and videos will now be accessible in the Photos app on your Mac for viewing, editing, sharing and more. The original files on the SD card will remain unchanged.
Eject the SD Card
It’s important to properly eject the SD card before physically removing it from your Mac. Failing to eject the card may result in data loss or corruption. Here are the steps to safely eject an SD card:
1. Click the eject button next to the SD card icon in your Finder sidebar. This will unmount the SD card from your system.
2. A message will appear telling you it’s safe to remove the card. You can now physically remove the SD card from your Mac’s card reader slot.
Alternatively, you can right-click on the SD card icon on your desktop and select “Eject” 1. This will also properly unmount the card before removal.
Never remove an SD card without ejecting it first. Doing so risks corrupting files or losing unsaved data. Safely ejecting ensures all writes to the card are completed before removal.
Troubleshooting
If your SD card is not showing up on your Mac, here are some solutions to try:
- Make sure the SD card is properly inserted into the SD card slot or reader. Push it in firmly until it clicks into place.
- Try connecting the SD card directly to a built-in SD card reader if using an external reader. The built-in reader could work better.
- If using an external reader, try connecting it to a different USB port on your Mac.
- Check if the SD card is locked. A locked SD card will not show up on Mac. Slide the small switch on the side of the SD card to the unlocked position.
- Restart your Mac computer and reopen Finder to see if the SD card shows up after a reboot.
- Try inserting the SD card into a different device like a camera. If it doesn’t work there either, the SD card itself could be corrupted.
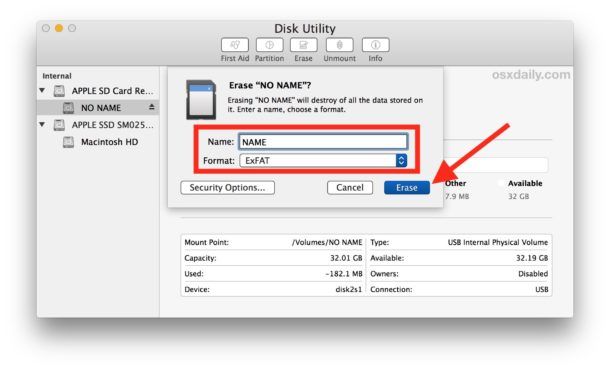
- Run First Aid on the disk using Disk Utility to check for errors and attempt to fix them. (See: https://support.apple.com/guide/disk-utility/repair-a-disk-dskutl1040/mac)
- Reset NVRAM on your Mac to clear out any potential conflicting settings. (See: https://www.cleverfiles.com/help/reset-nvram-pram-mac.html)
If none of these steps work, the SD card may be corrupted or damaged and may need to be replaced.
Conclusion
In this guide, we covered the main steps for accessing files on your Mac from an SD card. First, you physically insert the SD card into your Mac’s SD card slot. Then open Finder and locate the SD card, which will appear in the Finder sidebar under Devices. Once you’ve opened the SD card, you can view, open, copy, or import files from the SD card to your Mac. When finished, remember to properly eject the SD card before removing it. Now you have the knowledge to quickly and easily open photos, videos, documents or other files from an SD card on your Mac computer.
With just a few clicks in Finder, you can access all of your important files stored on an SD card. You no longer have to worry about not being able to find, open or transfer files from your camera’s memory card. This simple process makes working with an SD card on a Mac smooth and hassle-free.