Encrypting and password protecting drives on your Windows 11 computer is an important step to take for privacy and security. It helps prevent unauthorized access to your sensitive files and data by essentially “locking” the drive until the correct password is entered to decrypt it. With the prevalence of data breaches, ransomware attacks, and malware, adding this extra layer of protection gives users more control over their information and peace of mind.
There are a few key reasons why users should consider password protecting their drives in Windows 11:
- Prevent access to personal, financial, medical, or other confidential data if the device is lost, stolen, or accessed by someone else
- Protect sensitive business files, documents, projects etc. from being viewed by unauthorized parties
- Guard against viruses, malware, ransomware and other cybersecurity threats from encrypting files for ransom or stealing data
- Allow safe storage of backups and archives that contain old files and information you want to keep secure
- Give users more control over their privacy and ability to restrict access to their data
By learning how to fully encrypt and password protect a drive in Windows 11, users can take advantage of this built-in security feature to better safeguard their information.
Things to Know Beforehand
BitLocker and encrypting a single drive work differently. BitLocker provides whole-disk encryption for your boot drive and other fixed drives. It helps protect your data in case your device is lost or stolen (1).
Encrypting a single drive only secures that one drive. It does not encrypt your boot drive or other attached drives. This can be useful for protecting sensitive data on external or removable drives (2).
So in summary:
- BitLocker encrypts the full boot drive and any other fixed internal drives
- Encrypting a single drive only protects that one drive’s data
For encrypting data on a single drive on Windows 11, BitLocker is not needed. The built-in Windows encryption tools are sufficient.
Sources:
(1) https://learn.microsoft.com/en-us/windows/security/operating-system-security/data-protection/bitlocker/
(2) https://www.thewindowsclub.com/difference-between-device-encryption-and-bitlocker
Requirements
To encrypt a drive using BitLocker in Windows 11, you need to have Windows 11 Pro or Enterprise. BitLocker drive encryption is not available in Windows 11 Home edition. This is an important requirement, as the home edition does not include the necessary group policy editor and other features to fully enable BitLocker.
According to Microsoft’s documentation, “BitLocker encryption is available on supported devices running Windows 10 or 11 Pro, Enterprise, or Education.” [1]
So before trying to set up BitLocker disk encryption on your Windows 11 device, double check that you have Windows 11 Pro or Enterprise. The BitLocker feature will not be present in Windows 11 Home.
Encrypting a Drive
Encrypting a drive in Windows 11 is a straightforward process that can be done in just a few steps. Here is the step-by-step process to encrypt a drive in Windows 11:
1. Open the Start menu and search for “BitLocker”. Select the “Manage BitLocker” result.1
2. In the BitLocker Drive Encryption window, click “Turn on BitLocker” next to the drive you want to encrypt.2
3. Choose how you want to unlock the drive in the future. You can use a password, smart card, or USB drive. Using a password is the simplest option for most people.
4. If you choose to use a password, type in the password you want to use twice to confirm it. Make sure it’s a strong, unique password.
5. Click “Next” and then “Start encrypting” to begin the encryption process. This may take a while depending on the size of the drive.
6. Once encryption is complete, the drive will show as “BitLocker protected” and will require the password to unlock it each time you restart your PC or disconnect and reconnect the drive.
And that’s it! Those six steps are all you need to fully encrypt a drive with BitLocker on Windows 11.
Setting a Password
To set a password for drive encryption in Windows 11, you’ll need to use BitLocker Drive Encryption. BitLocker is Microsoft’s built-in full disk encryption feature included with Windows.
To set a password with BitLocker:
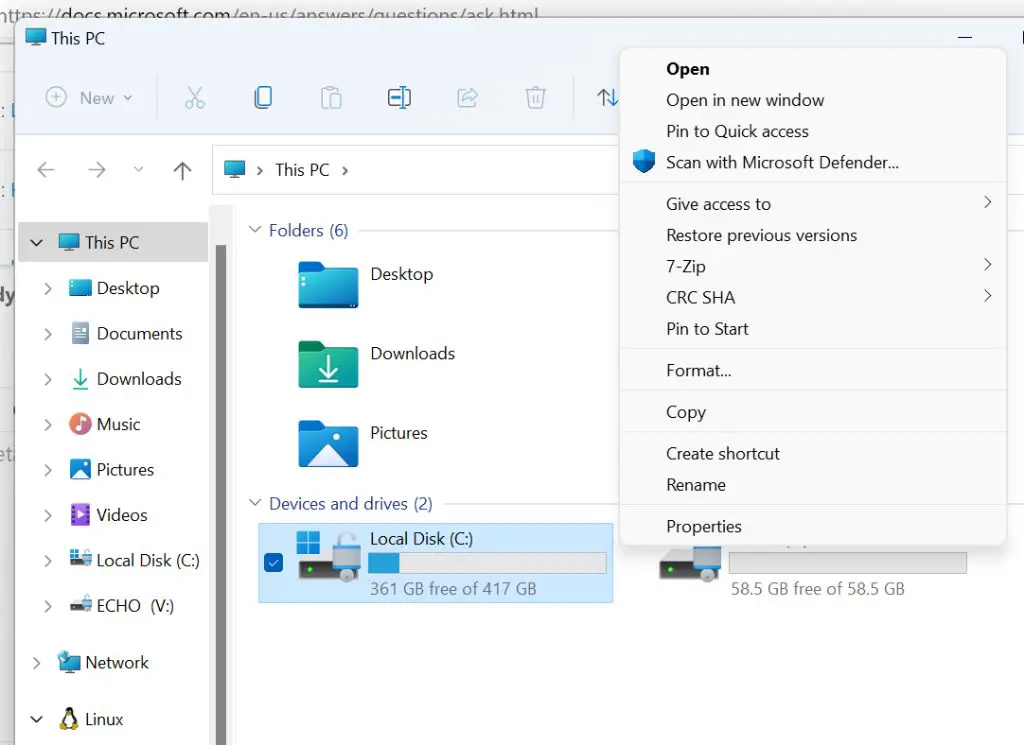
- Open File Explorer and right-click on the drive you want to encrypt.
- Select “Turn on BitLocker.”
- In the BitLocker setup window, select “Use a password to unlock the drive.”
- Enter a password in the “Type a password” field. This will be your encryption password. Be sure to choose a strong password.
- Re-enter the password in the “Confirm password” field.
- Click “Next” to continue and complete the encryption process. BitLocker will encrypt the entire drive.
Once encryption finishes, you’ll need to enter the password each time you connect the drive to access files. Microsoft recommends using a minimum 8 character password with letters, numbers, and special characters for optimal security.
Accessing the Encrypted Drive
After enabling BitLocker encryption on a drive in Windows 11, you will need to enter a password each time you restart your computer to access the encrypted drive. This is an important security measure that prevents unauthorized access to the protected data.
When rebooting the computer, you will be prompted to “Unlock BitLocker” by entering the password you set during the encryption process. Without entering the correct password, Windows will not be able to read the encrypted data on the drive and it will remain locked.
According to Microsoft, if you enter the password incorrectly too many times, the BitLocker recovery process will initiate and you may need your recovery key to regain access to the encrypted drive [1]. Therefore, it’s crucial that you remember the password or keep it stored securely.
If for some reason your encrypted drive does not unlock and boot normally after entering the password, there are troubleshooting steps you can try, like using the BitLocker recovery key. Consult Microsoft’s support article for details on how to resolve the issue [2].
Changing the Password
You may want to change your BitLocker password periodically as a security best practice. Here are the steps to change your BitLocker password in Windows 11:
1. Open File Explorer and right-click on the encrypted drive. Select “Change BitLocker Password” from the context menu.
2. Enter the current password when prompted and click Continue.
3. Enter the new password you want to set. The password must be at least 8 characters long. Click Change Password.
4. You’ll get a confirmation that the password was successfully changed. Click OK.
You can also change your BitLocker password from the command line. Open an elevated Command Prompt and type:
manage-bde -changepassword X:
where X is the drive letter of the encrypted drive. Follow the prompts to enter the old and new password [1].
To change the recovery key as well, use the “manage-bde -changepin” command instead [2]. This will generate a new recovery key that you should save.
Removing Encryption
If you want to remove encryption from your drive and decrypt it, there are a couple steps you need to take:
First, open the Start menu and search for ‘BitLocker’. Open the BitLocker Drive Encryption control panel.
Next, click ‘Turn off BitLocker’ for the drive you want to decrypt. You will be prompted to enter the drive’s password.
After entering the password, BitLocker will begin decrypting the drive. This may take some time depending on the size of the drive and the encryption method used.
Once decryption is complete, the drive will no longer require a password to access it. The data on the drive will now be unencrypted and accessible without authentication.
If you lost your BitLocker recovery key and password, decryption becomes more complicated. You can use the ‘manage-bde’ command in Command Prompt to disable encryption, or boot into the recovery environment to access the drive. See this guide for steps.
Removing encryption leaves your data exposed and unprotected. Consider the security tradeoffs before fully decrypting a drive.
Encryption vs Erasing Data
Encryption and data erasure are commonly confused as being equivalent in protecting sensitive information. However, there are some key differences between the two methods:
Encryption encodes data so that it becomes unreadable without the proper cryptographic key. The data still exists on the drive, but is scrambled and inaccessible without decryption. Data erasure techniques like degaussing or cryptographic erasure actually remove data by overwriting it with random data patterns. After erasure, the original data no longer exists on the drive 1.
Encryption provides protection only while data is still encrypted. If the encryption key is compromised, the data is then accessible. With erasure, the data is permanently removed and unrecoverable even with the encryption key. However, erasure destroys the original data, while encryption allows continued use of the data with the proper key 2.
For ultimate data security, encryption during active use and erasure upon disposal provide layered protection. Encryption keeps data private until it’s no longer needed, then erasure removes residual data traces. Relying solely on encryption or erasure has limitations compared to using both techniques together 3.
Conclusion
Encrypting your drive with BitLocker provides important security benefits. It protects your data by encrypting your entire drive, preventing unauthorized access if your device is lost, stolen, or compromised. Some key benefits include:
- Preventing data theft – Encryption ensures your files cannot be read without the password.
- Compliance with regulations – Encryption may be required to comply with data security regulations.
- Built-in Windows feature – BitLocker is conveniently integrated into Windows.
- Hardware-based encryption – Utilizes TPM for enhanced security.
- Central management – Can be controlled via group policy for business networks.
Overall, BitLocker makes full disk encryption easy and effective for securing your data. Just be sure to safely store your recovery key in case you ever need to unlock the drive.
