Pioneer is a well-known brand for car audio systems and receivers. Many of their models, such as the DEH-X2700UI and DEH-X3800UI, allow you to play music files stored on a USB device.
USB playback gives you a convenient way to access your digital music library in the car. Simply load audio files onto a USB flash drive or external hard drive, connect it to the Pioneer receiver’s USB port, and you’re ready to listen.
With USB playback capabilities, you can bring your personalized playlists and favorites along for the ride. Pioneer’s receivers also include features like MIXTRAX that add DJ-inspired effects and transitions between songs from a USB device.
This guide will cover everything you need to know to play music from a USB device on compatible Pioneer car stereos. We’ll walk through preparing your USB drive, connecting it, accessing and playing your music, playback controls, sound settings, and troubleshooting tips.
Preparing Your USB Device
Before connecting your USB device to a Pioneer DJ player, it’s important to properly format and organize your files for compatibility. Pioneer recommends using the exFAT file system to format your USB drive, as it is optimized for USB storage and works well with large playlists and file sizes. The exFAT format is supported across Windows, Mac, and Pioneer equipment.
After formatting, organize your music files into folders on your USB device. This allows you to easily navigate and load tracks when performing. A folder structure by genre, artist name, or playlist is recommended. You can prep your USB device using Pioneer’s Rekordbox software, which allows advanced preparation of playlists, cue points, and more.
Finally, make sure your files are either uncompressed WAV/AIFFs, or high-quality 320kbps MP3s. Lossy formats like 128kbps MP3s can degrade audio quality on professional DJ gear. Follow Pioneer’s guidelines for USB device formatting and file preparation to ensure the best experience.
Connecting Your USB Device
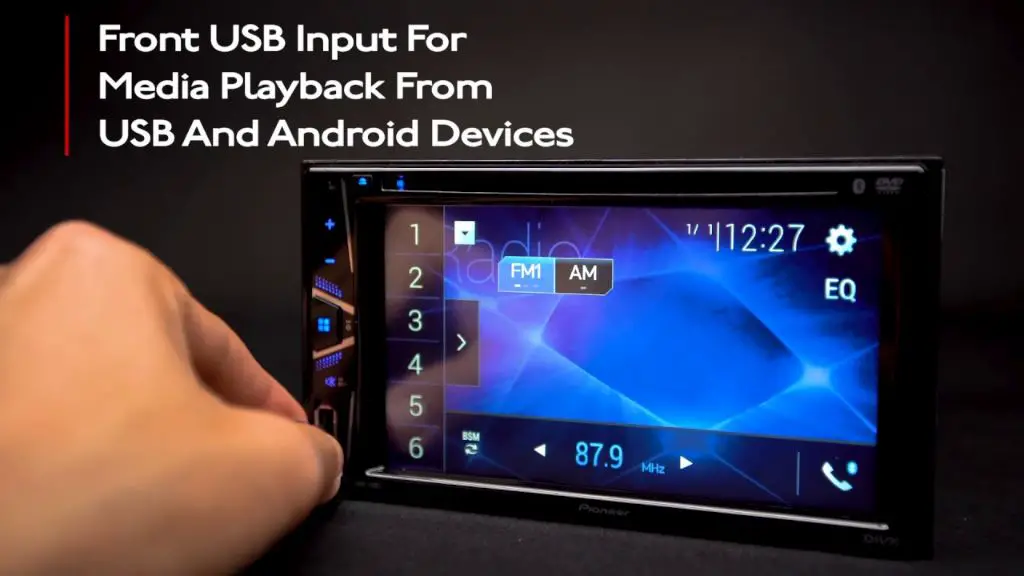
To connect your USB device to your Pioneer stereo, first locate the USB port. On most Pioneer models, the USB port is located on the front panel of the stereo near the volume knob or in the glove compartment. Some models may have the USB port located under a small cover on the front panel that needs to be opened to access the port.
Once you’ve located the USB port, insert your USB device all the way into the port. Make sure that the connector on the device is oriented correctly before inserting so you don’t damage the port. Push the USB device gently but firmly into the port until it clicks into place and is seated securely. Avoid using excessive force when inserting the device. If you encounter resistance, pull the device out, check the orientation, and try inserting again.
For cable connections, insert the USB cable fully into the port without bending or straining it. Make sure the cable is securely connected at both ends for proper operation.
Refer to your owner’s manual to identify the exact location of the USB port for your specific Pioneer model. If you have difficulties connecting, double check that the USB device or cable is oriented correctly before trying again. Avoid excessive force to prevent damage.
Accessing USB Music
Once your USB device is properly connected, you will need to switch the audio source on your Pioneer head unit to USB mode. This is usually done by pressing the “Source” or “Input” button on the front panel of the stereo until you see “USB” in the display.
From there, you can browse and select music files stored on the USB device. On most Pioneer models, turning the rotary knob will let you scroll through artists, albums, songs, playlists, etc. Pressing the knob will select a folder or song to play.
The file system and folder structure you have set up on the USB device will determine how music is accessed. For example, if your audio files are sorted into folders by Artist, you can navigate to each artist folder and play full albums. Some Pioneer units also allow you to browse by playlists if you have M3U files stored on the drive.
Using a well-organized folder structure and naming convention will make finding and playing music on your USB device quick and easy. Refer to your Pioneer owner’s manual for details on the file types, folders, and playlists supported over USB.
Playback Controls
When playing music from a USB device, Pioneer head units provide typical playback controls for managing your music. [1] This includes options like play, pause, skipping tracks, shuffle, and repeat.
To play or pause the current track, press the Play/Pause button on the face of the head unit. To skip to the next track or previous track, use the Track Up/Track Down buttons.
Many Pioneer models also allow you to enable shuffle and repeat modes when playing music from USB. Press the Repeat button to toggle between repeat off, repeating the current track, or repeating the entire playlist or folder. Press the Shuffle button to shuffle the playback order of tracks.
Some newer Pioneer receivers have additional playback controls accessible through the touchscreen interface, such as options to skip forward or back by 10 seconds. Refer to your owner’s manual for details on any specialty playback functions for your specific model.
[1] Pioneer USB Audio Device Driver for Android (Consumer Products). https://www.pioneerelectronics.com/StaticFiles/PUSA/Files/Home%20AV/AV%20Receivers/SC-LX704_OM_EN_final.pdf
Playlists and Favorites
You can create playlists directly on your Pioneer DJ player using tracks stored on a connected USB device. This allows you to organize your music files into different playlists for easy access during performance. To create a new playlist:
1. Press the [Menu] button on your Pioneer device.
2. Select “Create Playlist” using the rotary selector.
3. Use the rotary selector to choose tracks from your USB device to add to the playlist. The tracks will appear on the right side as you select them.
4. Once you’ve finished adding tracks, press the rotary selector to save the playlist. You can rename the playlist if desired.
The new playlist will now appear in the playlists menu on your Pioneer device. Keep in mind playlists are not saved back to your USB device – they are only stored on the player itself.
You can also easily add tracks to your Favorites list for quick access during performance:
1. Load a track you want to favorite.
2. Press the [Add to Favorites] button on your Pioneer device.
3. The track will now appear in your Favorites menu for easy recall.
Using playlists and favorites allows you to efficiently organize and access your music library while performing.
Sound Settings
You can adjust the sound settings on your Pioneer receiver to optimize the audio playback from your USB device. The key settings to customize are the Equalizer (EQ) presets and custom EQ configuration.
Pioneer receivers come with several preset EQ options like Powerful, Natural, Vocal, Flat, and Custom. Selecting Powerful provides a dynamic boost to bass and treble for lively sound. Natural aims for balanced audio reproduction. Vocal emphasizes the midrange for clearer vocals. Flat provides an unmodified, reference-level response. Custom allows you to manually adjust each frequency band.
To customize the EQ, select Custom and use the on-screen sliders or rotary knob to boost or cut frequency ranges like 60 Hz for deep bass, 1 kHz for midrange, and 10 kHz for treble. Adjustments allow you to tune the sound signature to your preferences. For example, you can add 6 dB at 60 Hz and 3 dB at 10 kHz for more powerful bass and crisp treble (source).
Saving custom EQ presets allows you to quickly switch between optimized settings for different genres. Carefully tuning the EQ can make a significant difference in audio playback quality from your USB device.
Display Options
You can customize what information and graphics are shown on your Pioneer stereo’s display screen. This allows you to set up the look and feel of the screen to your preferences. Here are some display settings you can adjust:
Changing Info Shown on Screen
In the main settings menu, go to “Display Settings” then select “Screen Adjustment.” Here you can choose what information is shown on the different screen views like the AV source screen. Options include enabling the clock, turning on status icons, displaying your connected Bluetooth device, and more. Refer to your owner’s manual for the specific adjustments available for your Pioneer model.
You can also select from preset display modes in the “Display Mode” settings. Modes like “Modern” and “Simple” change multiple display settings at once to optimize for different visual styles.
Adjusting Colors/Theme
To change the background colors and theme of your Pioneer display, go to “Theme Settings” in the display menu. Here you can select preset color themes like “Clock” which shows a clock widget background. There are also options to manually change background and key color hues.
Refer to the “Theme” section of your stereo’s owner’s manual for details on all the different theme and color options available. Customizing these display settings can give your Pioneer system a unique personalized look.
Troubleshooting
If you encounter issues playing music from a USB device on your Pioneer stereo, here are some common problems and solutions:
Errors Connecting USB Device
If your Pioneer stereo does not recognize your USB device, first check that the USB cable is properly inserted into the USB port. Try disconnecting and reconnecting the USB device. Also make sure your USB device is formatted to FAT32, as per Pioneer’s requirements. Some common error messages include:
- Error 19 – Typically means the USB device is drawing too much power. Use a powered USB hub or try another USB stick.
- Error 23 – Usually indicates the USB device is incompatible. Try reformatting the device or use a different one.
See this guide for more details on fixing Pioneer USB Error 23.
Trouble Accessing Files
If you can connect your USB device but cannot access the music files, verify that your files are in a supported format such as MP3, WMA, AAC, or FLAC. Make sure your files and folders are organized properly and not buried too deep in subfolders. Album artwork over 2MB in size may cause issues. Check that your USB is not corrupt or damaged.
Playback Issues
Problems like skipping, interrupted playback, or no sound could indicate a damaged music file. Try playing the file on another device to test it. Larger high-bitrate files may not play properly – try converting to a lower bitrate. Also check that sound settings like EQ are not interfering with playback quality.
If troubleshooting does not resolve your issue, consult your Pioneer user manual or contact Pioneer customer support for further assistance.
Additional Tips
Here are some extra pointers to help you get the most out of playing music via USB on your Pioneer device:
Supported Audio Formats
Pioneer CDJs support a wide variety of audio formats like MP3, AAC, WAV, and AIFF. For best compatibility, it’s recommended to use high quality MP3 or AAC files at 320kbps or higher. WAV and AIFF files contain uncompressed audio which provides the highest sound quality but takes up more USB space.
Using Multiple USB Devices
You can connect up to two USB devices to each CDJ simultaneously for expanded storage capacity. This allows you to access your entire music library by spreading it across two USB drives. Just make sure the music files and folder structure are organized identically on both drives.
Firmware Updates
Be sure to keep your Pioneer device’s firmware up to date via the Pioneer DJ website or using the included USB cable and software. Firmware updates add new features and fix bugs to enhance the overall functionality.
