Losing an important file on your Mac can be incredibly frustrating. Thankfully, there are several ways you may be able to recover a file that seems to have vanished into thin air.
Quick Answers
Here are some quick answers to common questions about recovering disappeared files on a Mac:
What are some reasons a file may disappear on my Mac?
There are several potential reasons a file can disappear on a Mac, including:
- Accidental deletion
- Corruption or damage to the file system
- The file being moved to a different location without you realizing
- A drive failure or other hardware issue
- A bug or glitch causing the file to become hidden
Where should I look first when a file goes missing?
When a file disappears, the first place to check is the Trash. Even if you didn’t intentionally delete the file, it may have been moved there by a glitch or accidental keystroke. The Trash holds deleted files for 30 days before permanently erasing them.
What software can help me recover a missing file?
Some helpful software options for recovering disappeared files on a Mac include:
- Time Machine – Allows you to browse and restore missing files from backups.
- Data Rescue – A data recovery app designed to retrieve deleted, corrupted, or lost files.
- Disk Drill – Scans your Mac’s drives and aids in file recovery.
- PhotoRec – An open source undelete utility, good for photos, videos, documents.
Check the Trash Bin
When a file goes missing on your Mac, the very first place you should check is the Trash bin. Any files you delete manually or accidentally get sent to the Trash, where they’re kept for 30 days before being deleted permanently.
To open the Trash on your Mac:
- Click the Trash icon in your Dock, or open Finder and click “Trash” in the sidebar.
- Browse through the contents of your Trash bin and see if the missing file is there.
- If you find the file, simply drag it back out of the Trash to restore it to its original location.
One thing to keep in mind is that files you delete on external or networked drives won’t go into your regular Trash bin – they’ll go into a Trash folder on the external drive itself. So be sure to check the Trash on any external drives if a file went missing from there.
Use Time Machine to Recover Deleted Files
If the missing file isn’t in your Trash bin, your next step should be to scan your Time Machine backups. Time Machine is the built-in backup software in macOS, and it can help you restore lost files and folders.
Here’s how to recover disappeared files using Time Machine:
- Open the Time Machine interface – Go to System Preferences > Time Machine and click “Enter Time Machine”.
- Browse back through your Time Machine snapshots to a time before the file went missing.
- Search for or locate the missing file within one of the snapshot folders.
- Select the file and click the Restore button to retrieve it.
This process allows you to roll back the state of your system’s files and folders to an earlier point in time. As long as Time Machine was actively backing up before the file disappeared, there’s a good chance you can get it back this way.
Try Spotlight Search
Sometimes a missing file hasn’t been deleted at all – it has just been moved or renamed without you realizing. In that case, a quick Spotlight search across your entire Mac may turn it up.
To use Spotlight to find a missing file:
- Click the magnifying glass icon in the top right corner of your screen.
- Type in the name of the missing file (or part of the name).
- Browse through the search results to see if the file turns up.
- If you find the file, note its current location so you can access it again.
With a tool as robust as Spotlight search, there’s a good chance your file is still hiding somewhere on your Mac if you deleted it recently. But if it’s well and truly gone, you’ll likely need more advanced recovery tools.
Recover Deleted Files with Data Rescue
For more comprehensive file recovery, one of the best options is a dedicated utility like Data Rescue. This app specializes in recovering files that have been deleted from your Mac, including:
- Files erased from your hard drive or Trash.
- Files lost due to drive corruption or reformatting.
- Files removed from external drives and other media.
- Files lost due to OS crashes, viruses, or hardware issues.
Data Rescue thoroughly scans your internal and external drives, pulls up a list of recoverable files, and allows you to decide what to restore. Follow these steps:
- Download and install Data Rescue.
- Select the drives or volumes you want to scan.
- Choose a scan type (Quick, Deep, or Deleted Files).
- Preview found files to identify the ones you want to recover.
- Select the files to restore and save them to a safe location.
Data Rescue offers advanced filtering and search tools to help isolate the missing file in all the recovered data. And it supports most file types and drive formats.
Try Disk Drill for File Recovery
Disk Drill is another highly-rated Mac data recovery app. It scans your internal and external drives to locate and restore lost or deleted files. Some key features:
- Recovers hundreds of different file types.
- Allows quick and deep scans of your drives.
- Scans for deleted files as well as existing ones.
- Has advanced filtering tools and an intuitive interface.
- Retrieves data from damaged or corrupted volumes.
- Restores files lost due to emptying the Trash, OS crashes, drive errors, and more.
Follow these steps to recover a missing file with Disk Drill:
- Install and launch Disk Drill.
- Select the drive(s) you want to scan for the missing file.
- Choose a Quick or Deep scan method.
- Preview and select the files you wish to recover.
- Click the Recover button to restore the files to a safe location.
In many cases, Disk Drill can successfully recover files even after they’ve been emptied from the Trash. It’s one of the top data recovery apps for Mac.
Use PhotoRec for Media Files
If your missing file is a media file like a photo, video, audio file, or PDF document, then PhotoRec is worth considering. It’s a free, open source utility that specializes in these types of files.
PhotoRec can recover files from:
- Hard drives, memory cards, flash drives.
- Cameras, iPods, MP3 players.
- CDs, DVDs, and other optical media.
It uses data carving techniques to extract media files from drives, even if the file system is corrupted or formatted. Here are the basic steps for recovery:
- Download and install PhotoRec.
- Select the drive to scan.
- Choose the types of files you want to search for.
- PhotoRec will carve the matching files from the drive and display them.
- Copy the recovered files to another drive.
PhotoRec lacks the polish and advanced features of paid tools like Disk Drill and Data Rescue. But as a free, open source option, it can be very effective for recovering media files specifically.
Send Your Drive to a Data Recovery Service
If you’ve exhausted all self-service file recovery options, your last resort may be turning to a professional data recovery service. Experts have access to sophisticated tools and clean room facilities to attempt extracting files from even severely damaged drives.
Reasons you may need to use a data recovery service include:
- Drive failures, corruption, or physical damage.
- Accidental formatting/reformatting of a drive.
- Files lost due to file system damage.
- Encryption issues.
- Inability to access the drive or operating system.
The process involves shipping your Mac’s internal drive or the external drive to a recovery lab. Technicians will attempt to repair it, recover the files, and send back the recovered data. This comes at a fairly high cost – anywhere from $300 to over $1000 in many cases.
Reputable Mac data recovery services to consider include:
- DriveSavers
- Ontrack
- Gillware
- Secure Data Recovery
- Data-Medics
File recovery services should be viewed as a last resort, but can sometimes retrieve data when all else fails. Weigh the cost versus the value of the lost file(s) when deciding whether to attempt professional recovery.
Prevent File Loss in the Future
To avoid misplaced and disappeared files down the road, here are some data protection best practices for Mac users:
- Enable Time Machine backups – Automatic hourly backups let you easily restore lost and deleted files.
- Do occasional manual backups – To backing up important files and folders.
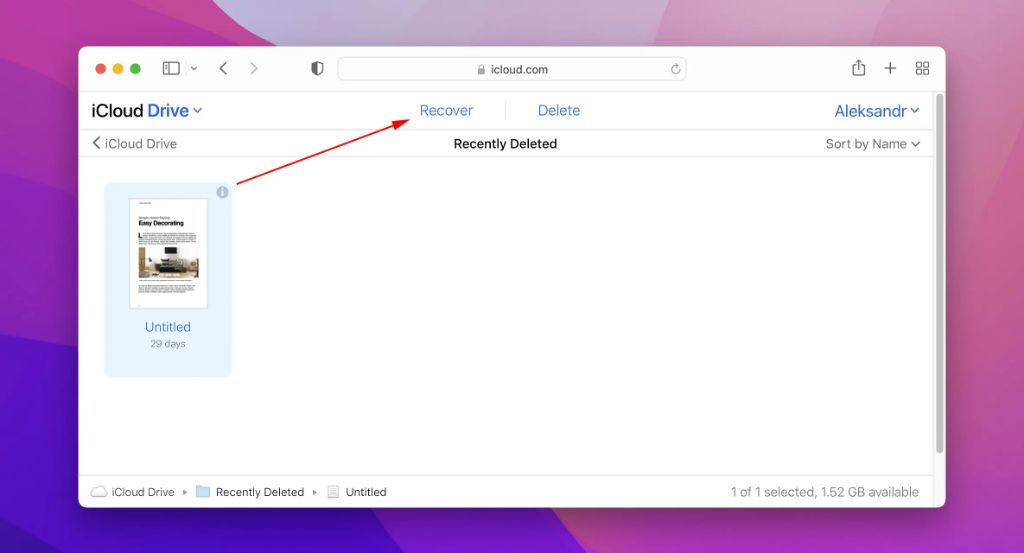
- Store files in cloud sync services – Such as Dropbox, iCloud or Google Drive for remote backup.
- Use file management best practices – Properly eject devices, organize files into folders, avoid drive corruption.
- Utilize recovery software – Such as the options covered in this article.
- Consider RAID storage devices – Which offer redundancy by writing data across multiple internal drives.
While you can almost always recover deleted files on Mac in some way, prevention is the best medicine when it comes to data loss. Implementing ongoing backups, cloud syncing, and general file management best practices will go a long way toward avoiding disappearing files in the future.
Conclusion
Recovering a file that has gone missing on your Mac is often possible if you use the right tools and techniques. Check the Trash bin, leverage Time Machine restores, and use Spotlight to search across your system. If those options fail, turn to data recovery software like Disk Drill, Data Rescue, or PhotoRec. And as a last resort, enlist a professional recovery service to attempt restoring the data.
With the methods covered in this article, you have a full toolbox to address almost any situation where a file goes missing or gets deleted on your Mac. Just go through each option systematically until you locate and recover those lost bits and bytes.