Recovering data from a computer that won’t turn on or otherwise function properly can be challenging, but is often possible with the right tools and techniques. The most important first step is to correctly diagnose why the computer is not working, as different problems will require different data recovery methods.
Quick Diagnosis of Common Computer Problems
Here are some quick things to check if your computer is not powering on or functioning properly:
- Is it plugged in and receiving power? Check that cables are fully inserted into the power outlet and back of the computer.
- Does the computer make any sounds, light up, or show any signs of receiving power when you press the power button? If not, the issue may be with the power supply, motherboard, or connection between them.
- Do any fans start spinning? This indicates the power supply is at least partially functional.
- Do you see any image at all on the display screen when powered on? A completely blank or black screen points to a display, graphics card, or motherboard issue.
- Do any lights flash on the computer case or motherboard? Flashing lights can indicate where a hardware failure is detected.
- Did you recently install new hardware like RAM or a hard drive? Improperly seated components can prevent booting.
- Have you made any software changes like updates or installations? New software conflicts can sometimes prevent loading the operating system.
Carefully inspecting your non-working computer and noting down any lights, sounds, or displayed errors can help narrow down where the problem lies. This will determine the best approach to retrieving your data.
Steps to Recover Data from a Non-Booting Computer
If your computer will not complete the boot process to load Windows or other operating systems, here are some steps to take:
- Remove and reseat components like RAM and hard drives. Improperly installed hardware can prevent successful booting. Unplug then firmly reinsert RAM chips and data drives to make sure contacts are touching.
- Try booting into Safe Mode. Repeatedly press F8 as the computer starts to access Safe Mode, which only loads minimal drivers and settings. If this works, you may be able to backup files from here.
- Boot from a live CD or USB drive. Create a bootable Linux disc or USB stick, configure the computer to boot from it, and use it to access the hard drive.
- Remove the hard drive and connect it to another computer. Use a hard drive enclosure or cable to connect the drive from the non-working computer to a working computer as a secondary drive. You can then access all files to backup data.
- Replace hardware components. If you suspect a failed power supply, RAM stick, or other damaged hardware, replacing it may get the computer operational enough to retrieve files.
- Use advanced recovery software. If no bootable media can read the drive, specialized software like Recoverit can create a bootable recovery environment to access data.
The key is getting the computer to a state where the storage drive with your files can be read by the operating system. Safe Mode, live CDs, and connecting the hard drive externally are the most common DIY approaches to gain access.
Using Another Computer to Recover Data
One of the quickest ways to recover data from a crashed computer is to physically remove the storage drive and connect it to a working computer with a USB hard drive enclosure, cable, or internally if there is space. This allows you to access it like any other external or secondary drive to copy files off it.
Steps when connecting to another PC:
- Open the non-working computer case and locate the hard drive.
- Note the drive interface (SATA, IDE, etc. based on the connectors).
- Remove the drive from the computer.
- Connect it to the working PC with a matching interface using either enclosure or cable.
- The drive should appear in ‘My Computer’ like any disk. Navigate to your files and copy them to the working PC.
This method works well for mechanical hard drives. Solid state drives may have encryption that prevents access on another machine.
What You’ll Need:
- Phillips-head screwdriver
- External drive enclosure OR cable with appropriate interfaces
- Working computer with available connectivity port and space
With the right tools, you can quickly detach the hard drive from a computer that won’t start and access the files from another working device. Just be sure not to accidentally damage connectors or static-sensitive drives.
Using a Linux Live CD/USB Drive
If the computer is able to boot into an operating system from a CD or USB drive, you can use a Linux-based bootable disk to access the hard drive. This is often effective when Windows is damaged but the actual hard drive reading hardware still works.
Steps for Using Linux Live Disk:
- Download Ubuntu or other Linux-based ISO file.
- Use CD burning software or USB tool to create bootable media.
- Access BIOS on the problem PC and set boot order to optical or external drive first.
- Insert disc or USB and reboot computer.
- Computer should load Linux environment. Use file manager to access and copy data.
The Linux OS runs directly from the disc or USB, allowing you to read from hard drives even if Windows is not working properly to start. This is a handy recovery option before more advanced data recovery tools are needed.
What You’ll Need:
- Blank CD/DVD or USB flash drive, 4GB+ in size
- Software to create bootable media (Rufus, etc.)
- Access to change BIOS settings on startup
- Linux ISO file (Ubuntu, Mint, etc.)
This is often the first DIY method to try for recovering files from an unbootable computer. Make sure to have spare media and check BIOS options to enable booting from the external CD/USB drive.
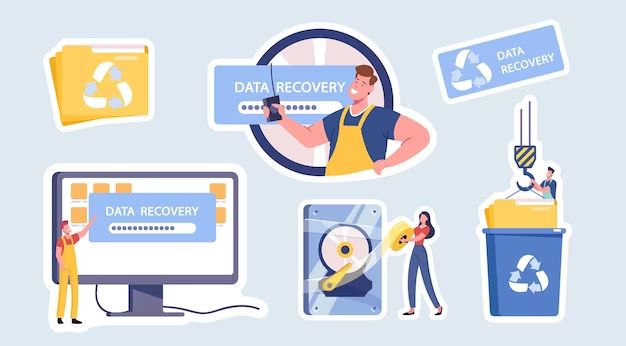
Using Data Recovery Software
When hardware swaps, bootable media, and safe modes all fail to provide access to recover files, special data recovery software is the next step. These tools can read drives at the lowest level to reconstruct file tables and pull data even from failed hard drives.
General Recovery Software Steps:
- Download and install the recovery program to a working computer.
- Remove the storage drive from the non-working computer and connect it to the system running the software.
- Launch the recovery program and select the attached drive.
- Scan the drive for recoverable files and partitions. This can take hours for large drives.
- Preview found files to identify those you want to recover.
- Select files and recover them to another attached drive with ample space.
Advanced recovery software can rebuild the drive’s file structure and directories to make previously inaccessible files available again. The key is having another drive to recover the files to.
Examples of Data Recovery Software:
| Software | Details |
|---|---|
| Recoverit by Wondershare | – Recovers 1000+ file types – Has physical drive tools – Advanced video recovery |
| Ontrack EasyRecovery | – Has RAID recovery – Easy wizard interface – Previews file contents |
| Stellar Data Recovery | – Has iPhone recovery – Retrieves from SSDs – Has cloning tools |
These programs provide more recovery options compared to manual methods, improving your chances of salvaging data from even severely damaged or corrupted drives. Just be prepared for the process to take a while when rebuilding file structures.
Sending Off for Professional Data Recovery
For critical data loss situations where DIY options have proven unsuccessful, you may need to turn to a professional data recovery service. These experts use specialized tools in cleanroom environments to attempt fixes of drives with physical damage or complex logical failures.
When to Use Professional Recovery:
- Water damaged or corroded hard drives
- Clicked heads, failed actuators, or noise from drive
- Drives that have been opened or physically tampered with
- Completely failed motherboards or controllers
- Advanced RAID or NAS recovery scenarios
Professional recovery can cost $500 or more but offers the highest chance for salvaging data when all else fails. Weigh the value of your lost data against the cost to determine if professional help is merited.
Finding a Reputable Professional Service:
- Search for ‘data recovery’ near you and look for long-standing companies with strong reviews.
- Check they have a cleanroom facility for safely opening failed drives.
- Discuss the failure circumstances honestly so they can properly set expectations.
- Get a cost estimate in writing before approving service.
- Ensure they have multiple price tiers based on repair complexity.
While costly, professional recovery services like Gillware, Secure Data Recovery, and DriveSavers can recover data when consumer-grade options cannot. Their specialized tools and controlled environments let them attempt physical repairs beyond most people’s capabilities.
Preventing Data Loss in the Future
Alongside recovering lost files, it is equally important to implement protections against data loss going forward. Some tips include:
- Keep devices backed up locally and to the cloud automatically.
- Maintain up-to-date antivirus and anti-malware software.
- Handle drives carefully and properly eject them before unplugging.
- Keep liquids away from devices to avoid spill damage.
- Install surge protectors and use battery backups during outages.
- Know the location of recovery keys for encrypted devices.
- Keep operating systems, programs, and firmware updated.
While data recovery remedies issues after the fact, ideal practice is prevention. Be proactive against loss scenarios through vigilant backup and protection measures for your important digital files and information.
Conclusion
Recovering data from a computer that will not start or otherwise function involves first determining why it is non-operational. From there, common DIY recovery options include safe mode, Linux live discs, connecting the drive externally, or using data recovery software. Professional recovery services offer advanced tools and cleanroom facilities when DIY is unsuccessful. Combining preventative backups with these recovery methods will help ensure you can access important files even when a system fails unexpectedly.
