What Removing an Icon Does
Removing a folder icon from your desktop does not delete the actual folder itself. The desktop icon is just a shortcut or pointer to the folder location. When you remove the icon from the desktop, you are only deleting the shortcut – the original folder still exists in its location and contains all the same files and subfolders. You simply lose the convenient access to it from your desktop. The folder itself will remain intact in its original location, such as in your user account’s folders or on an external drive.
It’s important to understand the difference between removing a shortcut icon versus deleting the actual folder. Removing the icon just takes away the visual reference and convenient access point on your desktop. But the folder continues to take up disk space and contains all data until you purposefully delete the folder itself. So removing the icon does not affect the contents of the folder at all.
Find the Icon
Locating the desktop icon you want to remove will depend on how many icons are on your desktop. If you only have a few icons, you can likely spot the one you want easily. However, if your desktop is cluttered with many icons, it can be tricky to find the specific one you need.
To quickly locate a desktop icon on Windows 10 or 11:[1]
- Press the Windows key + D to minimize all open windows and show your desktop.
- Click once anywhere on the desktop to select it.
- Begin typing the first few letters of the icon name you want to remove. This will highlight the icon if it matches.
- Alternatively, you can search the desktop visually to find the icon.
Knowing the icon name or the first few letters makes finding it much faster. You can also try arranging the desktop icons in a tidy grid to make scanning easier.
Right Click the Icon
Once you’ve located the folder icon you want to remove from your desktop, the next step is to right click on it. Right clicking brings up a context menu with various options. On Windows, you can right click by moving your mouse over the icon and clicking the right mouse button (or tapping with two fingers on a touchpad).
When you right click on a desktop icon, a menu will pop up with options like Open, Delete, Rename, Properties, and more. For removing an icon from the desktop, you’ll want to look for the “Remove from Desktop” option in this right click menu.
Right clicking is the way to access contextual options for items in Windows. So right clicking the desktop icon provides the menu needed to remove it. If you left click or double click the icon, it would open the folder rather than bringing up options for managing the icon.
Select “Remove from Desktop”
Once you right-click on the desktop icon you want to remove, a context menu will appear. Scroll down and select the “Remove from Desktop” option. This can be found near the bottom of the menu.
According to How to add or remove desktop icons (shortcuts) in Windows, selecting “Remove from Desktop” will delete the shortcut icon from your desktop while keeping the actual folder or file intact in its original location. The article confirms this option is available in Windows 10 and 11.
Be sure not to confuse “Remove from Desktop” with the “Delete” option, which will permanently delete the folder or file itself. The “Remove from Desktop” option only deletes the shortcut icon.
Confirm Removal
When you right click on the desktop icon and select “Remove from Desktop”, Windows will display a prompt asking if you want to delete the shortcut or remove the shortcut. This is an important distinction.
Deleting the shortcut will delete the actual file or folder that the icon points to, which is irreversible. Removing the shortcut simply takes the icon off the desktop but leaves the underlying file or folder intact. So be sure to select “Remove Shortcut” when prompted.
As noted in the Lifewire article, modern versions of Windows include this intermediate confirmation prompt specifically to prevent accidental deletion of files when people intend only to remove desktop icons.
Icon Disappears
Once you right click on the desktop icon you want to remove and select “Remove from desktop”, the icon will immediately disappear from the desktop screen. This happens instantaneously as soon as you confirm the removal. The operating system immediately takes the desktop icon out of view on your desktop. According to SoftwareKeep, when you toggle desktop icon visibility settings, it can cause icons to vanish from the desktop view.
So in summary, as soon as you confirm removing the desktop icon, it will instantly disappear from the desktop screen. The icon is no longer visible or accessible from the desktop, but the actual folder/file still exists on your computer.
Folder Still Exists
It’s important to note that removing an icon from the desktop does not delete or remove the actual folder itself. The folder and all of its contents remain intact in their original location, typically under the user’s profile folder or another spot on the hard drive.
The only thing that changes when you remove a desktop icon is that the visual shortcut is eliminated. The underlying folder continues to exist and can still be accessed through File Explorer or other methods. So no files are lost or deleted.
As explained on SuperUser, “Removing the icon from the desktop does not delete or affect the actual folder at all.” The folder itself remains in place, only the desktop shortcut is removed.
This means you can safely eliminate clutter on your desktop without worrying about destroying folders and their contents. The icon is merely a visual representation that can be removed as needed without impacting the original folder.
Re-Add the Icon
If you accidentally remove a desktop icon and want to restore it, there are a couple ways to re-add the shortcut icon back to the desktop on Windows 10 and 11:
Method 1:
Open File Explorer and navigate to the folder or file the icon pointed to. Right click on the folder/file and select “Send to” and then “Desktop (create shortcut)”. This will create a new desktop shortcut for that item.
Method 2:
Open the Desktop folder by typing “shell:Desktop” into the File Explorer address bar. Then simply drag the desired folder/file from your File Explorer window onto the Desktop folder window. This will create a shortcut on your desktop.
Method 3:
Use the “Personalize” settings in Windows 10/11 to restore desktop icons. Go to Settings > Personalization > Themes > Desktop icon settings. Then turn on the switch for the desired desktop icons.
Sources:
https://answers.microsoft.com/en-us/windows/forum/all/i-deleted-all-desktop-shortcuts-accidentlycan-they/f28aa64c-2916-497c-a339-499e21ef4ae7
https://support.microsoft.com/en-au/topic/how-to-restore-icons-that-have-been-removed-from-the-desktop-in-windows-xp-b3f92507-b984-5378-a5b7-be00ac020053
Alternate Methods
In addition to right-clicking the icon, there are a couple other ways to remove desktop icons without deleting the actual folders or files:
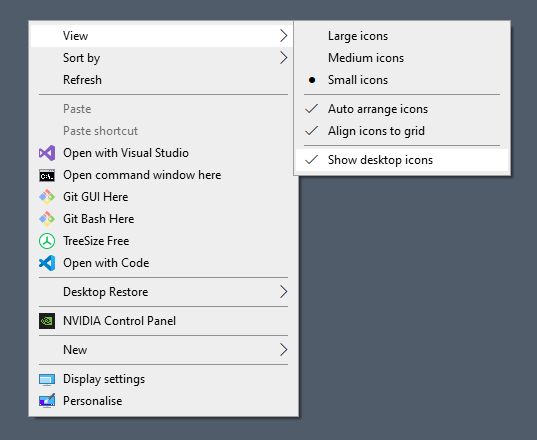
You can use the desktop context menu to remove all desktop icons at once. Right-click on a blank area of the desktop and select “Personalize”. In the “Desktop Icon Settings” section, choose “Remove all desktop icons.” This will remove every icon from the desktop, while keeping the folders and files intact.
For more granular control, you can use the Command Prompt. Open the Command Prompt as Administrator and enter the following command:
reg delete HKCU\Software\Microsoft\Windows\CurrentVersion\Explorer\Desktop\NameSpace\{DesktopFolderGUID}
Replace {DesktopFolderGUID} with the specific GUID of the folder whose icon you want to remove. You can find the GUID by going to the folder properties. This will remove just that single icon from the desktop.
The Command Prompt method may be preferable if you only want to remove one or two specific icons, rather than removing all icons.
Additional Tips
Here are some final notes and advice for managing desktop icons:
Use folders to group similar icons together. This keeps things organized and makes it easier to find what you need. Give the folders clear, descriptive names like “Documents” or “Personal Photos” so you know what’s inside. Consider grouping by project, topic, or frequency of use.
Name files and folders in a consistent way. Decide on a naming convention, like always starting with a date or including keywords. This makes searching for desktop items quicker.
Limit desktop items to the essentials. Only keep shortcuts to applications and files you use daily. Archive old files into folders or external storage. A cluttered desktop can be distracting.
Set up sections using your taskbar or desktop widget apps. Dividing up areas into sections like work, personal, and tools visually separates things.
Adjust icon size and arrangement as needed for easy viewing. Icons can be sorted automatically or dragged to custom locations.
Regularly reassess and clean up the desktop. Remove unused items, archive old files, and reorganize as needed. This maintenance keeps things from getting out of hand over time.
There are many ways to organize desktop icons on Windows. Find an approach that makes items easy to locate and suits your personal style.