The Steam Deck is a powerful handheld gaming device developed by Valve that allows users to play PC games on the go. It features a large 7-inch touchscreen, built-in gamepads, and runs SteamOS. The Steam Deck has become hugely popular thanks to its portability and ability to play AAA games.
One of the key features of the Steam Deck is the ability to expand its internal storage using microSD cards. The base model comes with just 64GB of built-in storage, so adding a microSD card allows you to install more games and software. Choosing the right microSD card is important to get good performance.
This article will provide a step-by-step guide on how to properly remove and replace the microSD card in the Steam Deck. This is useful for anyone who wants to upgrade to a new card or troubleshoot any storage issues.
Locating the MicroSD Card Slot
The microSD card slot on the Steam Deck is located on the bottom of the device, below the right corner of the screen. There is a small narrow opening that runs horizontally along the bottom. This opening is the microSD card slot.
To locate it specifically: Hold the Steam Deck so the screen is facing towards you. Look at the bottom right corner of the device, right below where the screen ends. You will see a thin horizontal opening in the bottom casing. This opening is the microSD card slot.
The slot is flush with the bottom of the Steam Deck. You can slide your fingernail along the bottom to feel where the slot opening is. Visually, it looks like a narrow horizontal gap in the plastic on the underside.
So in summary, the microSD card slot is located on the bottom of the Steam Deck, below the lower right corner of the screen along the bottom edge. Just look for the small horizontal opening on the underside and you’ve found the microSD card slot.
Precautions Before Removing
It is crucial to take some precautions before removing the microSD card to avoid the risk of corruption. You should never remove the card when data is being written to it or read from it, as this can corrupt the file system. Corrupting the file system can make the data on the card inaccessible and potentially unrecoverable.
According to Raspberry Pi Forums, “If you loose power when writing to the SD Card it can corrupt the card. This is typically due to cutting power during shut down, power on, etc.” Therefore, you must make sure to properly shut down the Steam Deck before removing the microSD card.
Additionally, do not remove the card when any application is open that may be reading or writing data to it. Close any games or apps before proceeding. Following these precautions will help prevent corruption and data loss when removing your microSD card from the Steam Deck.
Powering Off
Before attempting to remove the microSD card from your Steam Deck, it is crucial that you first power off the device completely. Failing to power off the Steam Deck before removing the card can lead to corruption of data stored on the card or damage to the card itself.
According to Sony’s user guide, “Right-click the microSD memory card icon and select Eject. Push in the microSD memory card toward your VAIO computer and release. Pull the microSD memory card out of the slot.” [1] This emphasizes the importance of properly ejecting the card through the software interface first before physically removing it.
Similarly, a Reddit user advised “Uplug the cord, take it out of the mount, remove SD card. Taking it out of the mount is just because it’s easier to get to the SD card that way…” [2] This reinforces powering down completely before attempting removal.
Powering off protects against data corruption and damage by ensuring no reads or writes are occurring when you detach the card. Follow proper ejection procedures, then power down fully before physically removing the microSD card.
Pressing the Card In
Before attempting to pull the microSD card out, you need to press it in to eject it. This is an important safety precaution to avoid damaging the card or the Steam Deck’s card reader.
To press the card in:
- Locate the microSD card slot on the top edge of the Steam Deck.
- Place your fingertip over the microSD card.
- Apply gentle pressure to press the card into the slot.
You should feel the card click as it disengages from the locked position.
Pressing the card in signals to the Steam Deck that you are ready to remove the card safely. This helps prevent corruption or damage that could occur from pulling out the card while it is still in use.
According to SD Card Best Practices [1], you should always fully power down a device before removing an SD card. Simply pressing the card in ejects it, but does not power down the Steam Deck. So make sure to power down first before pressing in and removing the microSD card.
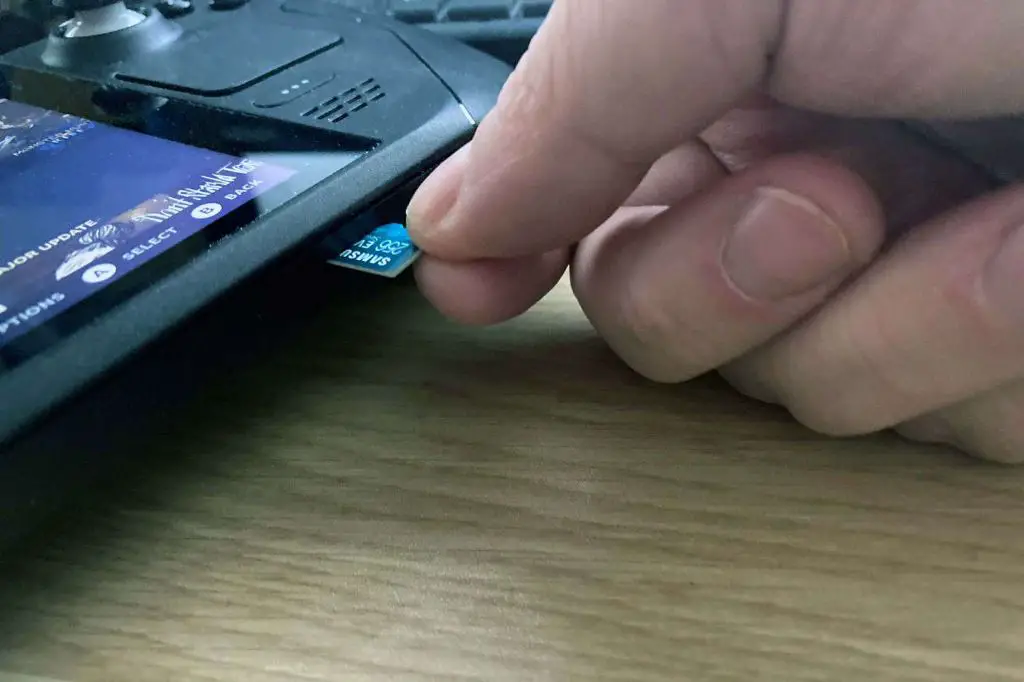
Pulling the Card Out
Once the microSD card has been ejected, you can gently pull it out of the slot. Be careful not to use excessive force, as this could damage the card or the slot. Grip the card between your thumb and index finger and slowly pull it straight out. If there is any resistance, do not force it – double check that the card has been properly ejected first. Remove just the microSD card itself and not any adapter that may be attached.
According to Wondershare, it’s important to safely eject the SD card before removal to avoid data corruption or damage. Once ejected, gently pull the card directly out without rocking it back and forth or applying too much force.
Inserting a New Card
Once you have safely removed the old microSD card, you can insert a new one. Follow these steps:
- Locate the microSD card slot on the bottom of the Steam Deck under the right side of the screen.
- Hold the new microSD card with the contacts facing down and the angled corner facing the slot.
- Gently insert the card into the slot until it clicks into place.
- Boot up or wake your Steam Deck if powered off.
- The card should automatically mount and show up in the storage settings. If not, you may need to format it first (see the Formatting the Card section).
Once inserted and mounted, the microSD card will be available as expanded internal storage for your Steam Deck. You can install games, software, media files, and more onto the card.
Be sure to get a high speed microSD card to ensure good performance. Refer to Valve’s recommended cards for ideal options. See this guide for more details on choosing a microSD card for your Steam Deck.
Checking the Card
After inserting the new microSD card into the Steam Deck, you’ll want to verify that the device is properly detecting it before trying to use it. According to Asurion, you can check if the Steam Deck recognizes the card by going to the Desktop Mode.
In Desktop Mode, open the Konsole app and type in the command “lsblk”. This will list all connected storage devices. You should see your microSD card listed if it is being detected properly. The name may vary, but look for a storage device name like “mmcblk0” or “sda1”. If you don’t see the microSD card listed, it likely means there is an issue with the card or the connection.
You can also check in Gaming Mode by going to the Steam Menu and looking under Storage. If your microSD card is detected, you will see the name and details listed there.
If the card still isn’t showing up, you may need to try reinserting it or troubleshooting further. But if you can confirm it is detected in Desktop or Gaming Mode, you know your Steam Deck is properly communicating with the microSD card.
Formatting the Card
Before using a new microSD card in your Steam Deck, you’ll want to format it to optimize performance. Formatting erases all data on the card and prepares it for use with the SteamOS operating system.
To format a new card on your Steam Deck:
- Insert the new microSD card into the card slot on the top edge of the Steam Deck.
- Press the Steam button to open the main Steam Deck menu.
- Navigate to Settings > System.
- Scroll down and select “Format SD Card.”
- In the pop-up window, select “Format.”
- Wait for the formatting process to complete. This may take several minutes depending on the card size.
Once formatting is finished, the microSD card will be ready for use. Any games or data you transfer to the card will be optimized for the Steam Deck’s onboard storage system.
Formatting erases everything on the card, so be sure to back up any data you want to keep before starting. You’ll only need to format a brand new SD card that hasn’t been used before.
If you run into any issues formatting the card on your Steam Deck, you can also format it on a Windows PC. Just insert the card into your computer and use the built-in disk utility to format it.
With a high speed microSD card properly formatted and installed, you can greatly expand the storage capacity of your Steam Deck. This allows you to keep more games installed and ready to play on the go.
[1]
Conclusion
Removing the microSD card from your Steam Deck is a quick and straightforward process as long as you follow the proper steps. The key things to remember are to fully power off the device, locate the card slot, gently press in to release the card, and pull it out carefully without bending it. When inserting a new card, make sure it clicks into place and shows up properly when powered back on. Checking that the card can be read and formatting it through SteamOS prepares it for game downloads.
With these simple precautions, you can swap microSD cards in and out of your Steam Deck seamlessly. Avoiding damage to the card reader or connections ensures your device continues functioning. Overall, just be gentle yet firm when removing or inserting the card. By following this guide, you can expand your Steam Deck’s storage quickly and keep gaming!