Removing an all-in-one hard drive from your computer can seem daunting, but with the right steps, it can be done safely and easily. An all-in-one hard drive contains the hard drive and other computer components in a single enclosed unit, rather than having separate components inside a tower. This allows for a more compact design, but makes repairs and upgrades more challenging.
When Should I Remove an All-In-One Hard Drive?
There are a few reasons why you may need to remove an all-in-one hard drive:
- Upgrading to a larger hard drive
- Replacing a failed or damaged hard drive
- Adding more RAM or other components that are housed in the all-in-one enclosure
- Troubleshooting hardware issues
If your computer is running slowly, crashing frequently, or displaying signs of a hardware failure, removing and inspecting the hard drive is a good troubleshooting step. Back up any important data first before attempting removal.
Safety Precautions
When working with computer hardware, it’s important to take precautions against electrostatic discharge (ESD). Static electricity can build up in your body and discharge onto components, potentially damaging them. Avoid this by:
- Working in an ESD-safe environment. Carpeted rooms tend to build up more static.
- Using an anti-static wrist strap connected to an electrical ground.
- Frequently touching a metal grounded object, like the computer case, to discharge static buildup.
- Avoiding handling components directly. Handle by the edges if possible.
Also be sure to power off and unplug the computer before removing any components.
Gather Necessary Tools
You’ll want to have the following tools on hand before beginning the all-in-one hard drive removal process:
- Phillips head screwdriver
- Prying tool like a flathead screwdriver or spudger
- Flashlight
- ESD-safe mat or surface to place components
For some computers, you may also need Torx or other specialized screwdrivers. Closely inspect your all-in-one to determine if any special tools are required before starting.
Opening the Computer Case
The exact steps to open up an all-in-one computer vary by make and model, but often involve the following general process:
- Unplug all cables from the back of the computer.
- Lay the computer screen-side down on a flat, padded surface. Avoid having the screen directly contact the surface.
- Remove any screws securing a plastic back panel. These are often found along the perimeter edges.
- Use a spudger to gently pry up the back panel, working around the perimeter to release plastic clips.
- Remove the back panel and set it aside.
With the back panel removed, you’ll have access to the internal components. Closely inspect the layout and identify the hard drive location before proceeding.
Disconnect Cables and Remove Screws
Once inside the computer case, follow these steps:
- Disconnect any cables attached to the hard drive, including the SATA data cable and power cable. Release any cable locks.
- Use the Phillips head screwdriver to remove any screws securing the hard drive to the internal frame.
- Take note of the screw hole locations and screw size to aid reassembly.
Be gentle when manipulating cables and components inside the computer. Avoid bending cables at sharp angles or applying too much force.
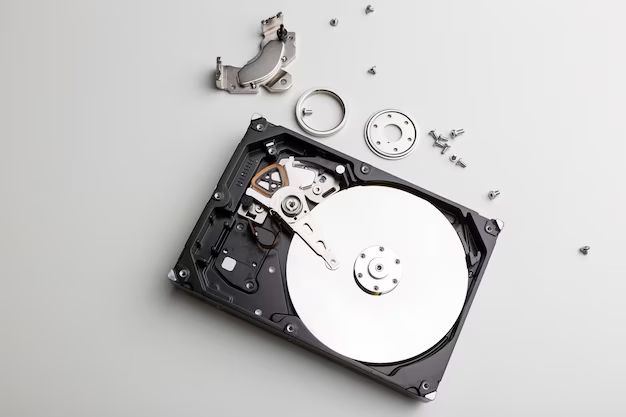
Extract the Hard Drive
With the cables detached and screws removed, you can now extract the hard drive. Different computer makes may have slightly different removal techniques, but often sliding or tilting the drive out works. Refer to the computer manual or online videos for specific guidance if needed.
Here are some common all-in-one hard drive removal methods:
- Lift straight up – The hard drive may be mounted in plastic brackets that allow you to simply lift it vertically out once the screws are removed.
- Slide forward – Brackets may have open fronts or tops, allowing you to slide the hard drive forward and out.
- Swing out – The drive may be on hinges that allow it to pivot outward from the front once unlocked.
- Disconnect from rear – Some designs have the hard drive connected to a removable mount plate from the back side.
Carefully manipulate the hard drive to get it out of the all-in-one enclosure without forcing anything. If it feels stuck, double check for any overlooked screws or locking mechanisms.
Install the Replacement Hard Drive
Once the old hard drive is fully removed, you can install a replacement drive if desired. This will involve:
- Aligning the replacement hard drive into the empty drive bay.
- Reattaching any plastic rails or brackets.
- Securing the drive with the same screws removed earlier.
- Reconnecting the SATA data and power cables.
Take care to fully seat the hard drive in its connector and not pinch any cables. Refer to your notes on screw hole locations and cable connections from removal.
Closing Up
With the new hard drive installed and connected, you’re ready to close up the computer case:
- Double check all cables are securely attached and screws tightened.
- Replace the plastic back panel, pressing around the perimeter to reseat the clips.
- Replace any external screws to secure the back panel.
- Carefully flip the computer right-side up.
- Reconnect all external cables removed earlier.
Take care when flipping over the computer to avoid knocking any internal components loose. You may want to test powering it on before securing the back panel just to verify the new drive is detected.
Initializing the New Hard Drive
If you’ve installed a brand new blank hard drive, it will need to be initialized before use. Here’s the process to initialize a new drive in Windows:
- Open the Disk Management utility (press Windows + R and type “diskmgmt.msc”).
- The new drive should appear as an “Unallocated” block. Right click it and select “Initialize Disk”.
- Accept the default partition style of GPT. Click “OK”.
- Right click the “Unallocated” space again and select “New Simple Volume”. Go through the wizard options to initialize the drive.
Once complete, the new drive will show up in File Explorer, ready for use. You may need to assign it a drive letter if it does not have one already.
Cloning the Old Drive
Rather than starting completely fresh, you also have the option of cloning your old hard drive contents to the new one. This duplicates your full operating system, programs, and files.
To clone a hard drive, you’ll need a third party utility designed for the task. Some top options include:
- Macrium Reflect
- AOMEI Backupper
- EaseUS Todo Backup
- Clonezilla
Follow the steps in your chosen software to clone the old drive to the new one. This process can take a while depending on the amount of data being copied.
Troubleshooting
If you run into any issues getting your all-in-one computer to recognize the new hard drive, try these troubleshooting tips:
- Confirm all internal cables are securely attached. Reseat connections.
- Try a different SATA cable in case the original is damaged.
- Verify the hard drive is compatible with your computer model.
- Double check that all mounting screws are tightened down.
- Boot into your computer’s BIOS settings and confirm the drive is detected.
- Reset your computer’s SMC or PRAM/NVRAM if it fails to boot.
If drive cloning fails, reboot both computers and retry. Cloning can fail if there are I/O errors reading the old drive.
For continued issues, you may need to take your computer to a repair technician for assistance. Professional computer repair shops should have the parts and tools needed to properly diagnose and fix hardware problems encountered during all-in-one hard drive replacement.
Conclusion
Removing and replacing the hard drive in an all-in-one computer has some additional considerations versus a tower PC. With the proper precautions, tools, and techniques, it can be performed successfully as a DIY project.
Key steps include opening up the computer casing, disconnecting the cables, extracting the old drive, installing the new one, and closing everything back up. Initialize the new drive and clone over your old data to get back up and running again.
Take your time, follow manufacturer’s guides, and be gentle with components. With some patience and care, you can upgrade or replace the hard drive in an all-in-one desktop computer.