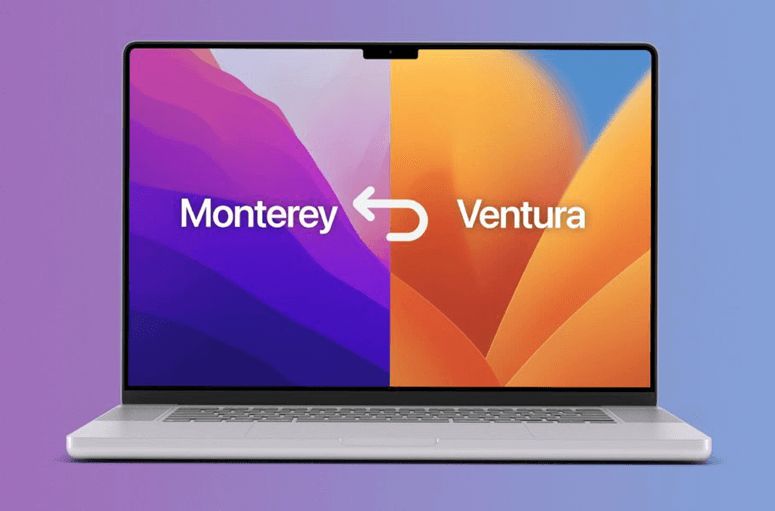
If you recently upgraded to macOS Ventura and find that it’s causing performance or compatibility issues on your MacBook Pro, you may want to downgrade back to macOS Monterey or an earlier version of the operating system. Here are some quick answers about how to remove Ventura and revert to an older macOS:
Can I easily downgrade from Ventura to Monterey?
Yes, it is possible to downgrade from Ventura to Monterey, but the process is a bit more involved than a normal update. You’ll need to completely erase your startup drive and reinstall macOS from recovery mode or an external drive.
Will I lose all my apps and data if I downgrade?
Downgrading requires erasing your startup drive, so you will lose everything that is on the drive. Be sure to fully backup all your important files, photos, etc. before attempting a downgrade.
What steps do I need to take to remove Ventura and install Monterey?
Here is a summary of the downgrade process:
- Backup your MacBook Pro to an external hard drive or Time Machine.
- Boot into recovery mode by restarting and holding Command + R.
- Use Disk Utility to erase the startup drive. Choose “Mac OS Extended (Journaled)” as format.
- Reinstall macOS – you’ll be able to download and install Monterey here.
- Migration Assistant can transfer data from your backup during setup.
Is it possible to downgrade without losing all my data?
Unfortunately, the only way to revert to an older OS version is to completely erase your startup drive. This will remove all data that is on the drive. Your best option is to backup everything important before downgrading.
What if I only want to remove Ventura and go back to Monterey?
The steps are the same whether you want to go back to Monterey specifically or just revert to an older macOS in general. You’ll need to erase your drive and reinstall the desired older OS version.
Should I avoid upgrading to Ventura in the first place?
Major macOS updates like Ventura always bring the risk of compatibility issues and bugs. It’s often best to wait a few weeks after release to upgrade, so that any major problems can be identified and patched early.
What are some of the benefits of downgrading from Ventura to Monterey?
Here are some of the main reasons you may want to downgrade back to Monterey:
- Resolve performance, overheating or battery drain issues caused by Ventura bugs
- Regain compatibility with apps or peripherals that aren’t working properly in Ventura
- Revert to a more familiar or stable OS if you find Ventura too problematic
- Avoid bugs or issues that Apple has not yet patched in Ventura
- Go back to Monterey if you don’t need any Ventura-only features
What should I do if I am experiencing bugs or problems in Ventura?
If you start noticing issues after upgrading to Ventura, here are some troubleshooting steps to try:
- Check for macOS updates – install any bug fix or security updates from Apple.
- Reset SMC and NVRAM/PRAM on your MacBook Pro.
- Try safe mode to see if problems persist – this disables 3rd party extensions.
- Create a fresh user account and test if issues occur there.
- Backup critical data and reinstall Ventura from recovery mode to refresh the OS.
- Downgrade to Monterey if bugs are severe and you need a stable system.
Will Apple release patches soon to fix Ventura bugs?
Yes, Apple typically releases frequent software updates after a major new macOS release to address bugs, performance issues and other problems reported by users. Check frequently for Ventura updates to install fixes as they become available.
Should I upgrade to Ventura again after downgrading?
After downgrading, it’s best to wait at least a few weeks or months before considering upgrading back to Ventura. This allows Apple time to release continuous bug fixes and improvements that should make Ventura more stable.
What version of macOS Monterey should I reinstall after removing Ventura?
For the most stability, downgrade to the latest version of Monterey, which is 12.6.1 as of November 2022. However, earlier versions like 12.5.1 or 12.4 should also work fine if you have those installers available.
Can I downgrade if I don’t have a Time Machine or other backup available?
Without a full system backup, downgrading will cause all data loss. Your best option is to clone your startup drive to an external drive using a utility like Carbon Copy Cloner before erasing. This will allow full data recovery after reinstalling Monterey.
How can I download older macOS installers to use for downgrading?
You have a few options to get Monterey or earlier macOS installers:
- Use the App Store’s Purchased section if you previously downloaded it there.
- Get the installer from Apple’s website if they still distribute older versions.
- Use a utility like CloneZilla to make a bootable copy from someone else.
- Find installer DMG files on developer sites, but only trust legitimate sources.
Is it possible to dual boot Ventura and Monterey on my MacBook Pro?
Yes, with some advanced partitioning you can setup dual booting to choose Ventura or Monterey at startup. However, this is complex to setup and maintains two OS installs using significant drive space.
Can I install Monterey on an external drive to test it out before downgrading?
This is a great idea before committing to a full downgrade. Use Disk Utility to create a partition on an external USB drive. Install Monterey to that partition fresh to test compatibility with your apps and accessories.
What version of macOS should I consider downgrading to if Monterey is also problematic?
If you are experiencing system issues even in Monterey, consider downgrading further to macOS 12.3 or 12.2. These 2021 releases are typically very refined and stable on MacBook Pros after months of updates from Apple.
Summary of Steps to Remove Ventura and Downgrade to Monterey
- Backup MacBook Pro fully to an external drive
- Boot into Recovery mode and open Disk Utility
- Erase the internal drive, formatting as APFS
- Quit Disk Utility and reinstall macOS Monterey
- Restore data from backup using Migration Assistant
What if I change my mind and want Ventura back after downgrading?
If you decide you want to upgrade back to Ventura after downgrading, you can reinstall it just like any macOS update:
- Backup Monterey system using Time Machine or cloning utility.
- Download the Ventura installer from the App Store.
- Run the installer and follow prompts to upgrade.
- Use Migration Assistant to transfer data back from your Monterey backup.
Is it possible to downgrade from Ventura to Big Sur or earlier?
While it is possible to downgrade even further to Big Sur (macOS 11) or earlier, this is not recommended in most cases. Those older operating systems lack security patches, bug fixes, compatibility updates and newer features.
Can I get a refund if I purchased a new MacBook Pro and want to downgrade from Ventura?
Unfortunately Apple does not offer refunds if you wish to downgrade from the pre-installed macOS version on a new MacBook Pro purchase. The best option is to resolve any Ventura issues by troubleshooting bugs or waiting for software updates.
Is there a way to downgrade without losing all my apps and settings?
No, the system erase required to downgrade macOS removes everything from the startup drive. This includes apps, settings, and user data. Be sure to backup everything before wiping and reinstalling an older OS.
Should I avoid installing macOS updates right when they are released?
It’s often wise to wait to install major macOS updates for a few days or weeks. Early adopters more frequently encounter significant bugs that Apple may not have discovered during beta testing.
Conclusion
Downgrading from Ventura to Monterey on a MacBook Pro requires completely erasing the startup drive and reinstalling the older OS version. Be sure to fully backup your data first. While downgrading can resolve Ventura issues, try troubleshooting bugs first or waiting for Apple to release fixes before taking this drastic step. Avoid upgrading to new macOS versions right when they are released to minimize stability problems.
Common Bugs and Issues with Ventura
Here are some of the most frequently reported bugs and problems in the initial release of Ventura (macOS 13):
| Slow performance and choppy animations |
| Excessive battery drain |
| Mac overheating |
| Wi-Fi and Bluetooth connectivity problems |
| Issues waking from sleep |
| Apps crashing or becoming unresponsive |
| Inability to shut down or restart |
| External displays not being detected |
| Accessory and peripheral compatibility problems |
| iCloud sync issues |
Best Practices when Downgrading macOS
Follow these tips for a smooth and successful downgrade from Ventura to Monterey:
- Research which macOS version you want to revert to before downgrading.
- Fully backup your entire Mac with Time Machine or a bootable duplicate.
- Make a copy of critical documents, photos, and other media.
- Confirm you have the installer for the older macOS version.
- Delete unnecessary files and apps to avoid transferring clutter.
- Erase startup drive using Disk Utility from recovery mode.
- Use wired ethernet for faster reinstall speed if possible.
- Carefully follow the prompts when asked about data migration.
- Test that all your apps, accessories, and data work correctly after downgrading.
- Re-enable Time Machine backups once the OS reversion is complete.
Conclusion
Downgrading a MacBook Pro from Ventura to Monterey requires planning, preparation, and patience but can resolve system issues caused by Apple’s latest macOS release. Always backup fully, erase the startup drive, and reinstall the desired older OS version. Wait to upgrade next time until macOS updates have stabilized for a smooth experience. With some care, you can revert Ventura and regain a properly functioning MacBook Pro.