Replacing an old hard drive with a new one is a common upgrade for many computer users. As drives age, performance can decrease and the risk of failure increases. This guide will walk through the full process of replacing an existing hard drive with a new one. It will cover important steps like backing up data, choosing a compatible new drive, the physical installation process, partitioning and formatting the new drive, transferring data over, and configuring the new drive to work as the main system disk. Following the steps outlined here will allow the new hard drive to be properly installed and optimized as a replacement for the original disk.
Reasons to Replace a Hard Drive
There are several common reasons why you may need to replace your computer’s hard drive:
Failing drive: Hard drives can start to fail as they age, leading to slow performance, file corruption, crashes, and data loss. Signs of a failing drive include strange noises, long load times, frequent freezes, and errors opening files. Replacing an old, worn-out drive before it fails completely can prevent catastrophic data loss (https://www.gophermods.com/signs-your-computer-hard-drive-is-failing-and-if-you-need-a-replacement-and-what-to-do/).
Need more space: If your current hard drive is constantly full, upgrading to a higher capacity drive provides more storage for files, photos, videos, games, and applications. Hard drive capacities have increased dramatically over the years, so replacing an old, small capacity drive with a new, larger one enables you to keep pace with growing storage needs (https://www.techbuyer.com/au/blog/4-benefits-of-upgrading-your-hard-drive-techbuyer-au).
Upgrade to SSD: Replacing a traditional hard disk drive (HDD) with a solid state drive (SSD) significantly improves speed and performance. SSDs have faster read/write times, quicker boot ups, faster file transfers, and better overall system responsiveness. Upgrading to an SSD provides one of the biggest performance boosts available (https://www.ifixomaha.com/blog/upgrade-hdd-to-ssd-6-reasons-youll-want-to-replace-your-old-hard-drive/).
Back Up Your Data
Backing up your data is the most important step to take before replacing your hard drive. A hard drive failure can happen at any time, so having a recent backup ensures you won’t lose your files, photos, or other important data. According to Backblaze, the annualized failure rate for hard drives in 2022 was 1.37%, up from 1.01% in 2021.
There are several options for backing up your data:
- External hard drive – An external USB hard drive allows you to easily copy your data for safekeeping. Make sure the external drive has enough capacity to hold all the data you want to back up.
- Cloud backup – Services like Backblaze and CrashPlan allow you to back up your data to the cloud automatically. This protects your data even if your computer and external drive are lost or destroyed.
- Time Machine (Mac) – Apple’s built-in Time Machine software makes it easy to back up everything on your Mac to an external drive.
- File History (Windows) – Windows’ File History tool can back up your files to another drive automatically.
Ideally, you should use both a local backup like an external drive and an offsite cloud backup. This gives you both fast access to your backup and protection if your external drive fails.
Make backing up your data a priority before continuing with the hard drive replacement process. Having your data copied safely elsewhere gives you peace of mind in case anything goes wrong during the hardware upgrade.
Choose a New Hard Drive
When selecting a new hard drive, you’ll need to decide between a traditional hard disk drive (HDD) or a solid state drive (SSD). HDDs have moving parts like a spindle and platters, while SSDs are completely electronic using flash memory with no moving parts. There are tradeoffs to consider:
SSDs are faster, more durable, use less power, generate less heat, and are silent since there are no moving parts. However, HDDs have larger capacities for less money. For example, a 1TB SSD may cost around $100 while a 4TB HDD is around $100 (Source).
For capacity, consider how much storage you need. HDDs are available from 250GB up to 10TB+, while SDDs commonly range from 120GB to 4TB. Make sure to get a drive that has enough capacity for your needs.
The drive should be compatible with your computer’s motherboard and interface. Most modern PCs use SATA connections. Some newer SSDs use PCIe/NVMe which offers even faster speeds.
For performance, SSDs are much faster for boot times, launching programs, and opening files. HDDs are fine for basic usage but SSDs provide a more responsive experience. Gamers and power users benefit greatly from SSD speeds (Source).
Prepare for Installation
Before installing the new hard drive, you’ll need to gather the necessary materials and make some changes in your computer’s BIOS. Here’s what you’ll need to prepare:
- The new hard drive
- A SATA data cable to connect the drive to the motherboard
- A SATA power connector from the power supply
- A Phillips head screwdriver
- An external hard drive or backup service to backup your data (https://www.backblaze.com/blog/ssd-upgrade-guide/)
Before shutting down your computer, enter into the BIOS setup menu on startup. Look for the boot order settings and make sure the optical drive or USB bootable media is set as the first boot option so you can install your operating system. Also check that AHCI mode is enabled for SATA connections.
Take precautions against static discharge by using an anti-static wrist strap grounded to the computer chassis. Make sure to discharge any built up static electricity before handling components by touching a grounded metal object.
Physically Install the New Drive
Follow these step-by-step instructions to physically install your new hard drive:
- Open your computer case and locate an empty drive bay to install the new hard drive into. Most desktop computers have multiple drive bays where hard drives can be mounted.
- Remove any existing drive tray or caddy from the drive bay if one is currently installed. You will install the new drive into this drive tray/caddy.
- Attach the SATA and power cables to the back of the new hard drive. Make sure the cables are securely connected.
- Slide the new hard drive into the empty drive tray/caddy and secure it. Depending on the case, you may need to screw it into place or it may use a tool-less mounting system.
- Insert the loaded drive tray/caddy back into the open bay and secure it in place. For tool-less drive bays, this just involves sliding it in until the mechanisms click. Otherwise, you may need to screw it into place.
- Close up your computer case once the new hard drive is securely installed.

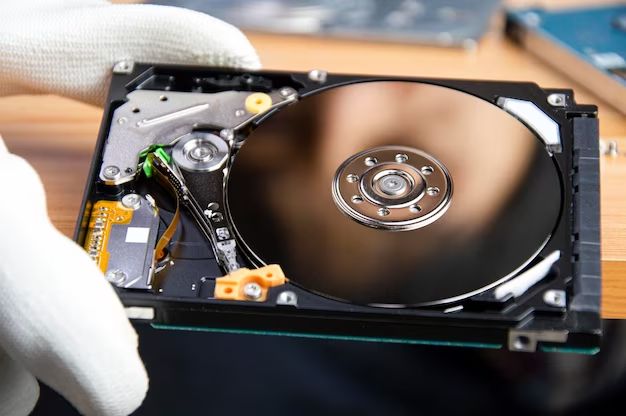
Insert the hard drive in the drive tray or caddy. Image source: wikiHow
With the new hard drive physically installed, it is ready to be partitioned, formatted, and set up within your operating system.
Partition and Format the New Drive
Before the new drive can be used, you need to partition and format it. Partitioning divides the hard drive into separate logical sections. The two main partitioning schemes for hard drives are Master Boot Record (MBR) and GUID Partition Table (GPT). MBR is older and limited to disk sizes under 2TB. GPT is newer and supports larger disks over 2TB. For most modern PCs, GPT is preferred.
Once partitioned, the drive needs to be formatted with a file system. For Windows PCs, the main options are NTFS and exFAT. NTFS is the standard file system for Windows and offers the best performance and security. However, it is proprietary to Windows. exFAT is compatible across Windows and Mac computers, but lacks some of NTFS’s features like file permissions and data integrity. For a drive used just with Windows, NTFS is recommended. But for a drive used with both Windows and Mac, exFAT is a better cross-platform choice.1
To partition and format the drive in Windows 10 and 11:
- Open Disk Management.
- Right-click the new disk and select Initialize Disk.
- Select GPT and click OK.
- Right-click the “Unallocated” space and create a new simple volume.
- Follow the prompts to select NTFS or exFAT and complete the formatting.
Once formatted, the new drive will be ready for data transfer and usage.
Transfer Data to the New Drive
Once you have partitioned and formatted the new drive, you’ll need to transfer your data from the old drive to the new one. You have two main options for transferring your data: performing a clean install or cloning the old drive.
A clean install involves backing up your files, applications, and settings, installing a fresh copy of your operating system on the new drive, and then restoring your data. The advantage of this method is that it gives you a completely fresh start without any clutter or unnecessary files from the old drive. However, it can be time consuming to reinstall and configure everything.[1]
Cloning your old hard drive provides an exact replica of the old drive, including the operating system, settings, programs, and files. Cloning software makes an exact sector-by-sector copy of your original hard drive to the replacement drive. This allows you to continue where you left off without reinstalling and reconfiguring your system. Popular cloning utilities include Macrium Reflect, Clonezilla, and EaseUS Todo Backup.[2]
For most users, cloning is the quicker and easier option to get your new drive up and running without data loss. Just make sure your cloning software is compatible with your operating system and drives.
Configure the Replacement Drive
After installing the new hard drive, you’ll need to configure it so that it works properly with your system. Two key steps here are assigning a drive letter and configuring optimization settings.
To assign a drive letter in Windows, open up Disk Management. Right-click on the volume for your new hard drive and choose “Change Drive Letter and Paths”. Choose an unused drive letter to assign to the new volume. This drive letter will allow you to access the hard drive like any other drive on your system.
You’ll also want to configure optimization settings for your new hard drive. Open the Device Manager, find your new hard drive, right-click and choose Properties. Go to the Policies tab. For optimal performance, enable the “Enable write caching on the disk” option. This enables disk write caching which can speed up write operations.
Additionally, you may want to optimize performance by aligning partitions. Tools like Paragon Partition Manager allow alignment when creating partitions which can improve IO performance. Proper partition alignment avoids performance issues caused by unaligned partitions.
Finally, don’t forget to format the new hard drive using NTFS which is the preferred file system for modern Windows versions. After following these steps your new drive will be ready as the boot drive or for data storage.
Conclusion
Replacing your old hard drive with a new one can seem daunting, but following the step-by-step process outlined here will ensure a smooth upgrade. To recap, be sure to back up your data, choose a compatible new drive, clone or transfer your data, and properly configure the new drive before swapping it into your computer.
If you run into any issues during the installation or data migration process, be sure to refer back to the manufacturer’s instructions for your specific hard drive model. Their technical manuals and support forums can provide more detailed troubleshooting advice. You can also find helpful tutorials online and on YouTube from computer technicians walking through the hard drive replacement process.
With your data safely migrated to the new drive, you can now enjoy the benefits of added storage capacity, faster loading times, and improved reliability. Don’t forget to properly recycle or dispose of your old hard drive if it is no longer functioning.