Xcode simulators allow developers to test and debug iOS, iPadOS, tvOS, and watchOS apps on a Mac without needing an actual physical device. The simulators emulate the hardware and software features of real devices, providing an environment nearly identical to a real device for testing purposes.
Sometimes it can be useful to reset the simulators to clear out any leftover data, settings, or issues from previous development sessions. Resetting simulators ensures you start from a clean state and eliminates inconsistencies that may affect testing. This guide will walk through the steps to completely reset and reinstall all Xcode simulators on a Mac.
Prerequisites
Before resetting the Xcode simulators, you’ll need to have Xcode installed on your Mac. Xcode is Apple’s integrated development environment for creating apps for Apple platforms like iOS, macOS, watchOS, and tvOS. The latest stable release of Xcode can be downloaded for free from the App Store.
Make sure you have Xcode installed and updated to the latest version. The Xcode simulators are tightly integrated with Xcode itself. Resetting the simulators requires Xcode to be installed.
Finding the Simulators
To find the Simulators in Xcode, first open Xcode on your Mac. At the top of the screen, click on Window and select Devices and Simulators from the dropdown menu. This will open the Devices and Simulators window.
The Devices and Simulators window shows all available simulators and any connected devices. This is where you can view, manage, and delete your simulators.
According to the Apple Developer documentation, the Devices and Simulators window in Xcode allows you to “view and manage connections to your real devices.”
Select All Simulators
The next step is to select all the simulators you want to reset. You can do this quickly by using the keyboard shortcut Cmd+A or going to the menu bar and selecting Edit > Select All. This will select all available simulators at once.
Delete Simulators
To delete all the simulators you no longer need, first click on “Window” in the top menu bar, then go to “Devices and Simulators.” This will open a new window showing all the available simulators and devices.
From there, you can select the simulators you want to delete by clicking on them. To delete all simulators, simply press Command+A to select all of them. Once your desired simulators are selected, click on the delete/trash icon in the bottom left corner of the window. This Stack Overflow answer provides a helpful screenshot of the delete icon’s location.
Deleting the simulators from this window will remove them completely from your system. This allows you to free up space taken up by old simulators you no longer need.
Confirm Deletion
Before deleting all simulators, Xcode will display a prompt asking you to confirm the action. This helps prevent accidental removal of simulators. The prompt will say “Are you sure you want to delete all devices and device pairs? This action cannot be undone.” You must click the “Delete” button to proceed with removing all simulators.
As the prompt indicates, deletion of simulators is permanent, so be certain you have backups or don’t need the current devices before continuing. Once deleted, the simulators and all their data and settings cannot be recovered.
Simulators Deleted
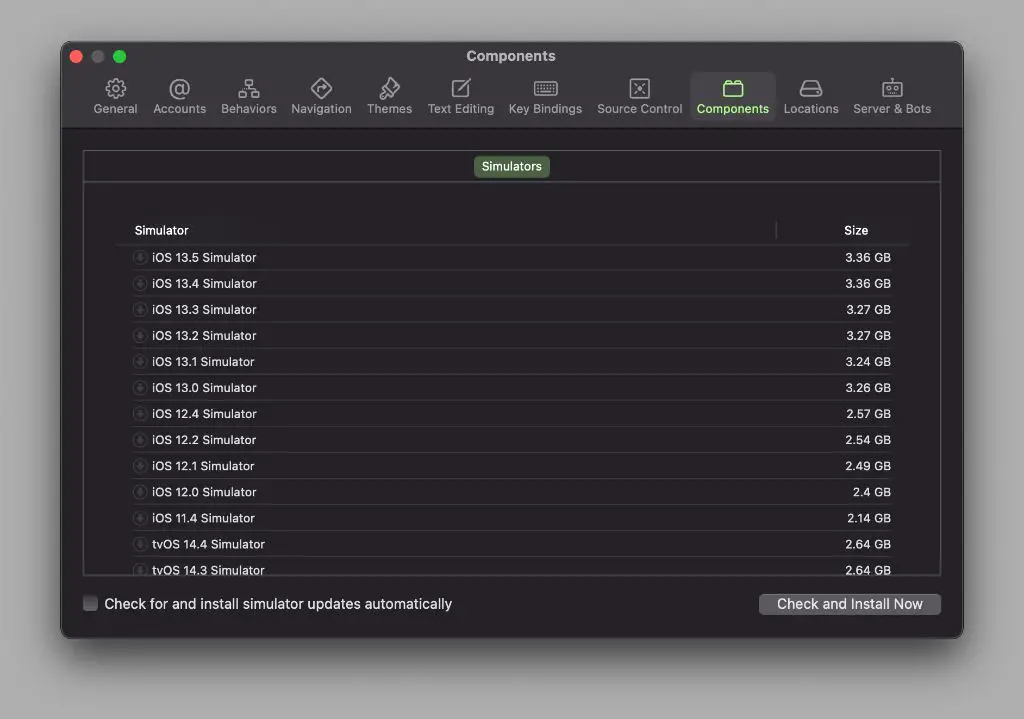
When you select the “Delete” option, Xcode will delete all of the listed simulators. This removes the simulator files and configurations from your system. The result is that the simulators will be removed from the list in Xcode. If you go to Xcode > Preferences > Components, you will see the simulator list is now empty.
According to the Xcode developer forum, deleting the simulators completely removes them, including any devices, runtimes, data, and configurations associated with those simulators.
Resetting Content and Settings
This step will delete all content and settings for the iOS/iPadOS/tvOS/watchOS simulators, not just the simulator instances themselves. According to the Apple Developer documentation, you can reset a simulated device to factory settings to clear out all installed apps and any data you may have added.
To do this, go to the Simulator menu and select “Reset Content and Settings”. This will bring up a prompt to confirm the reset. Be aware this will delete all simulator contents, so make sure you have anything backed up that you want to keep.
Resetting the content and settings is useful to clear out any problematic data that may be causing crashes or other issues. It’s also handy before testing a new app, so you have a clean simulator environment.
Reinstalling Simulators
If you need to reinstall a simulator that has been deleted or is not functioning properly, you can easily redownload simulators from Xcode’s Simulator settings. Open Xcode and go to Xcode > Preferences > Components. In the Components panel, you will see a list of available simulators to download. Check the box next to any simulators you want to install or reinstall. The selected simulators will download and install automatically.1
This allows you to conveniently redownload any simulators without needing to reinstall the entire Xcode application. Just use the Components preferences to reinstall simulators as needed.
Conclusion
Resetting all Xcode simulators is a straightforward process that can provide several benefits. It clears out any clutter and resets the simulators to their default state, which can fix a variety of issues like slow performance or crashes. After resetting the simulators, it’s simple to reinstall just the desired ones as needed for development and testing. Overall, periodically resetting the simulators helps maintain a clean development environment and optimize the simulator performance.
In summary, resetting the Xcode simulators involves finding and selecting all of them, deleting the simulators to reset them, and then reinstalling any needed ones. This process only takes a few minutes and can help resolve many common simulator problems. By periodically resetting the simulators, developers can maintain efficient simulator performance.

