What to Do Before Restoring Your iTunes Library
Restoring your iTunes library from an iPhone backup can be a great way to recover your music, movies, apps, and more if something goes wrong with your primary iTunes library. However, there are a few things you should do first to make sure the process goes smoothly:
Make Sure You Have a Recent Backup
First, you’ll want to check that you have a recent backup of your iPhone that contains the iTunes content you want to restore. Connect your iPhone to your computer and open the iTunes app. Go to the summary page for your iPhone and check the “Last Backup” date. Ideally, you’ll want a backup from the last few days or weeks. An older one may be missing music, apps, or other data you’ve added recently.
Consolidate Your iTunes Library
Before restoring, it’s also a good idea to consolidate your current iTunes library if you haven’t done so recently. Consolidating the library compacts it and organizes any files that have been moved or renamed. This can prevent issues down the road. To do this, go to File > Library > Organize Library and check the “Consolidate files” box.
Back Up Your Current iTunes Library
Additionally, you may want to make a backup of your existing iTunes library before you overwrite it with the iPhone backup – just in case. You can back up your iTunes library by going to File > Library > Backup to Disk. This will save a copy of your iTunes library database.
Deauthorize Computers
If you’ve authorized iTunes on more than one computer, you may want to deauthorize them before restoring. That way you don’t run into authorization limits when adding your restored music. Go to Account > Authorizations > Deauthorize This Computer.
Using iMazing to Extract an iTunes Backup
Once you’ve prepped your libraries, you can move on to restoring your iTunes content. One of the easiest ways to do this is by using the app iMazing on your computer. iMazing can extract an iTunes backup directly from your iPhone to your computer.
Here are the steps to use iMazing to restore an iTunes library from an iPhone backup:
1. Download and install iMazing on your computer.
You can download iMazing for free from the company’s website (https://imazing.com/download). Install it on the computer where your iTunes library is located.
2. Connect your iPhone to your computer.
Use the USB cable that came with your iPhone to connect it directly to your computer. This allows iMazing to access the backup files stored on your iPhone. Make sure to unlock your iPhone and tap “Trust” if prompted.
3. Open iMazing and select your iPhone.
Launch the iMazing app. It will automatically detect your connected iPhone. The app may ask you to install the iMazing helper tool on your iPhone – allow this for full functionality.
4. Navigate to Backups in iMazing.
In iMazing, click on your connected iPhone icon at the top. Then click the Backups tab on the left menu.
5. Select the backup you want to restore from.
On the Backups tab, you’ll see a list of backups stored on your iPhone. Click to select the one you want to use to restore your iTunes library. The latest backup is usually the best option.
6. Tap “Restore to iTunes”.
With your desired backup selected, click the Restore to iTunes button. This will extract the contents of the backup and restore it to your iTunes app.
7. Select the media types to restore.
iMazing will prompt you to select which types of media to restore to iTunes – for instance, music, podcasts, movies, books, etc. Check the boxes next to the media you want to restore.
8. Choose a location to save the restored files.
Next, iMazing will ask you to select a location on your computer to save the extracted backup files. Select a folder on your hard drive or external storage.
9. Let iMazing extract the files.
Finally, click the Restore button and let iMazing work its magic. It will extract all of the selected media from the iPhone backup and save it to the designated location on your computer.
10. Add the restored media to your iTunes library.
Once the extraction is complete, you can add the restored media files back into your iTunes library on your computer. Open iTunes, go to File > Add to Library and select the folder where iMazing saved the backup. iTunes will add all extracted media to your library.
And that’s it! With just those steps you can use iMazing to easily restore your iTunes music, movies, apps and more from an iPhone backup.
Manually Restoring from an iTunes Backup File
Alternatively, you can manually restore an iTunes library from an iPhone backup file without using third-party software like iMazing.
Here is how to manually restore iTunes from an iPhone backup:
1. Locate your iPhone backup files.
First, you need to find where your iPhone backups are stored on your computer. They are usually located in the following folders:
Windows: \\Users\\[username]\\AppData\\Roaming\\Apple Computer\\MobileSync\\Backup
Mac: ~/Library/Application Support/MobileSync/Backup/
Navigate to that location and look for a folder with a random name – this is your iPhone backup data.
2. Copy the iTunes files from the backup.
Go into that backup folder and look for files and subfolders related to iTunes, such as iTunes Library.itl and iTunes Media. These contain your music, movies, apps, and books. Copy them to a temporary location on your computer.
3. Restore iTunes preferences.
There are also iTunes preferences and settings files stored in the backup. Look for files like iTunesPrefs.plist and copy these as well. They will restore things like app layouts and playlists.
4. Disable iTunes syncing.
Temporarily disable syncing between your iPhone and iTunes library to avoid any conflicts. Go to the iTunes summary page for your phone and uncheck “Sync with this iPhone”.
5. Restore the copied files to iTunes.
Now you can restore the backup files to iTunes. Quit iTunes if it is open. Then copy the files you extracted from your iPhone backup to the iTunes app data folder:
Windows: \\Users\\[username]\\Music\\iTunes\\
Mac: ~/Music/iTunes/
Overwrite any existing files when prompted.
6. Reopen iTunes and rebuild your library.
Finally, open iTunes again. It may automatically recognize the new library files and rebuild your library based on the backup. If not, you can manually rebuild by going to File > Library > Rebuild Library. This will restore your music, movies, apps, and other iTunes data.
Using iPhone Backup Extractor Software
If you don’t want to use iMazing or manually dig through your iPhone backups, another option is using dedicated iPhone backup extractor software. These tools are designed specifically for retrieving files from an iPhone or iTunes backup.
Some top iPhone backup extractor apps include:
- iBackup Extractor (for Windows and Mac)
- iBackup Viewer (for Windows)
- iPhone Backup Extractor (for Windows and Mac)
- EaseUS MobiMover (for Windows)
The steps to use these software tools are very similar:
1. Install the backup extractor app.
Download and install the app on your computer. Make sure you get one compatible with your operating system (Windows or Mac).
2. Connect your iPhone and select it in the app.
Launch the app and plug in your iPhone. The app should recognize your device. Select your iPhone model and backup file to extract.
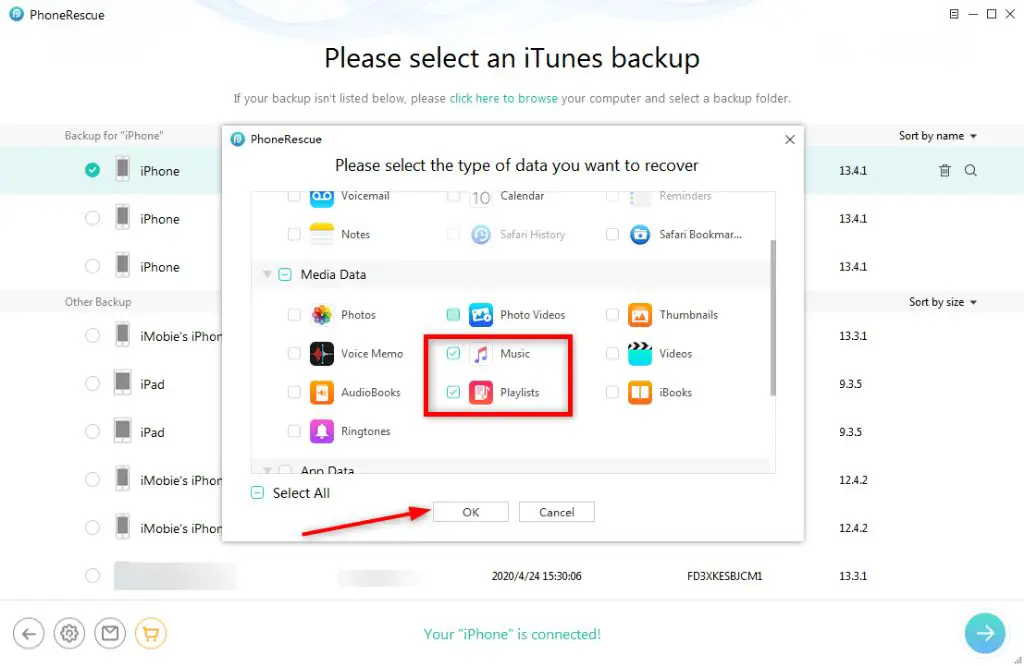
3. Select the data types to restore.
Choose which media files, apps, and other data to extract from the backup – such as music, photos, messages, app data, etc.
4. Pick an export location on your computer.
Choose a folder where you want to save the extracted backup files.
5. Export the selected data.
Hit the Export or Restore button. The app will retrieve the selected data types and media files from the iPhone backup and save copies to your computer.
6. Import files into iTunes.
Once extracted, add the media files and library data back into iTunes using the “Add to Library” option or rebuiding your library.
Using iCloud to Restore iTunes Purchase History
If you use iTunes Match or Apple Music, another handy option for rebuilding your iTunes library is downloading your previous iTunes purchases from iCloud.
This leverages iTunes in the Cloud, which stores your iTunes purchase history. Here’s how to redownload music, movies, apps, and more from iCloud:
1. Enable iTunes in the Cloud.
First, make sure you have iTunes Match or Apple Music enabled. You must be signed into your Apple ID in iTunes with one of these services active to access your cloud content.
2. View your purchased history.
In iTunes, go to Account > View My Account. This will show your purchase history including music, movies, apps, books, and more bought through iTunes.
3. Use the Download button to redownload items.
Find purchased content you want to restore and click the Download icon next to it. This will download that item from iCloud back into your iTunes library.
4. Check previously downloaded items.
Go to Account > View Purchased Items to see media you’ve already downloaded. Click the Download button next to anything you want to download again.
5. Turn on Automatic Downloads.
You can enable automatic downloads for future iTunes purchases. Go to iTunes > Preferences > Store and check “Download new purchases automatically”.
This makes repopulating your iTunes library from your purchase history quick and easy. Just make sure to have an active iTunes Match or Apple Music subscription first.
Restoring from an iTunes Backup on an External Drive
If you keep your iTunes backups on an external hard drive or other external device, the process is very similar to restoring from an internal drive.
Here’s what to do:
1. Connect the external drive to your computer.
Plug in the external hard drive, USB stick, or other storage device that contains your iTunes backups. Make sure your computer recognizes the connected drive.
2. Find the iTunes backup folder on the external drive.
Navigate the external drive folders until you locate the path with your iTunes backups. It is usually in a MobileSync/Backup folder.
3. Copy the iTunes backup files to your computer.
Copy the entire iTunes backup folder from the external drive to a temporary location on your main hard drive. This can take some time depending on the backup size.
4. Follow the standard restore steps.
Once copied internally, you can follow the regular iTunes restore steps covered above – using backup extractor software, manually replacing files, or redownloading from iCloud.
5. Redirect the iTunes Media folder location.
To make sure new iTunes content gets saved internally, go to iTunes > Preferences > Advanced and change the iTunes Media folder location to your internal hard drive rather than the external.
Common Questions and Issues When Restoring iTunes from Backup
Here are some common questions and troubleshooting tips when restoring your iTunes library from an iPhone or iTunes backup:
Why does some music show as unavailable after restoring?
If some tracks show with an exclamation point and “Unavailable” after restoring, this is usually due to licensing restrictions. Try signing in to the iTunes Store on your computer and redownloading those unavailable tracks.
How do I restore my playlists?
Playlists should restore automatically if you exported the iTunes playlists files from your backup. If not, you can recreate them manually by making new playlists and adding songs back in iTunes.
Why are my iTunes Match songs not downloading?
Double check that iTunes Match is still turned on in your account settings after restoring. Toggle it off and back on if needed to reactivate the service. Also ensure you have an active internet connection.
Some of my album artwork is missing – how do I get it back?
You may need to manually change back some album artwork that didn’t restore properly. Just right-click on the affected albums in iTunes, choose Get Info, then look for replacement artwork online to update the files.
How can I restore iTunes app data like layouts and settings?
Make sure to copy iTunes preference files like iTunesPrefs.plist in addition to your media files when extracting a backup. This will restore app interface settings, views, and other preferences.
What if I get authorization errors after restoring to a new computer?
If you restore iTunes to a new machine, you may need to deauthorize your old computer first under Account > Authorizations. You can then authorize the new computer to play your purchased content.
Why is my iPhone empty after restoring a backup to iTunes?
Restoring an iTunes backup to your iPhone is a separate process from restoring to iTunes on your computer. To get the same content back on your iPhone, connect it and sync to your newly restored iTunes library.
Conclusion
Restoring your iTunes library from an iPhone or iTunes backup is an excellent way to recover your music, movies, apps and more if anything happens to your main iTunes collection. Whether you use convenient extractor software, manual file wrangling, or iTunes iCloud downloads, you have several solid options to choose from. Just make sure your backups are current before you need them. Follow the steps in this guide and you’ll be back jamming to your tunes in no time.