Restoring your Mac to a previous backup can be a great way to revert your system to a known good state if you are having problems with your current setup. It allows you to roll back your Mac’s system files, settings, apps, and data to a previous point in time. This can help resolve issues caused by software corruption, problematic macOS updates, or other system changes. Here are the key steps involved in restoring a Mac from a backup.
Prerequisites for Restoring from a Backup
Before proceeding with the restore process, make sure you have the following:
- A valid Time Machine or other backup to restore from. This should be an external hard drive or Time Capsule backup disk that contains backups of your Mac.
- The external backup drive connected to your Mac.
- Enough free storage space on your Mac’s startup drive to restore the backup. Ideally, the free space should match or exceed the size of your backup.
- Time and patience. Restoring a backup can take hours depending on the backup size.
- Your Mac computer and any necessary accessories (power adapter, keyboard, mouse, display).
If you do not have a backup disk or your backups are too old, you may need to rethink your restore plan. Valid backups are key to a successful restore.
1. Restart Your Mac in Recovery Mode
The first step is to boot your Mac into Recovery Mode. Here’s how:
- Fully shut down your Mac.
- Restart your Mac and immediately press and hold Command (⌘)-R after you hear the startup sound. Continue holding until you see the Apple logo or a spinning globe.
- After a few moments, you should be presented with the macOS Utilities window.
The Recovery environment provides access to tools like Restore From Time Machine Backup which we will use later.
2. Choose Restore From Time Machine Backup
In the macOS Utilities window:
- Select “Restore From Time Machine Backup” and click Continue.
- The Restore From Time Machine Backup utility will open.
This tool allows you to restore your entire Mac or specific files from a Time Machine backup.
3. Select the Backup Source
Designate the Time Machine backup drive you want to restore from:
- Connect your backup drive if it is not already connected.
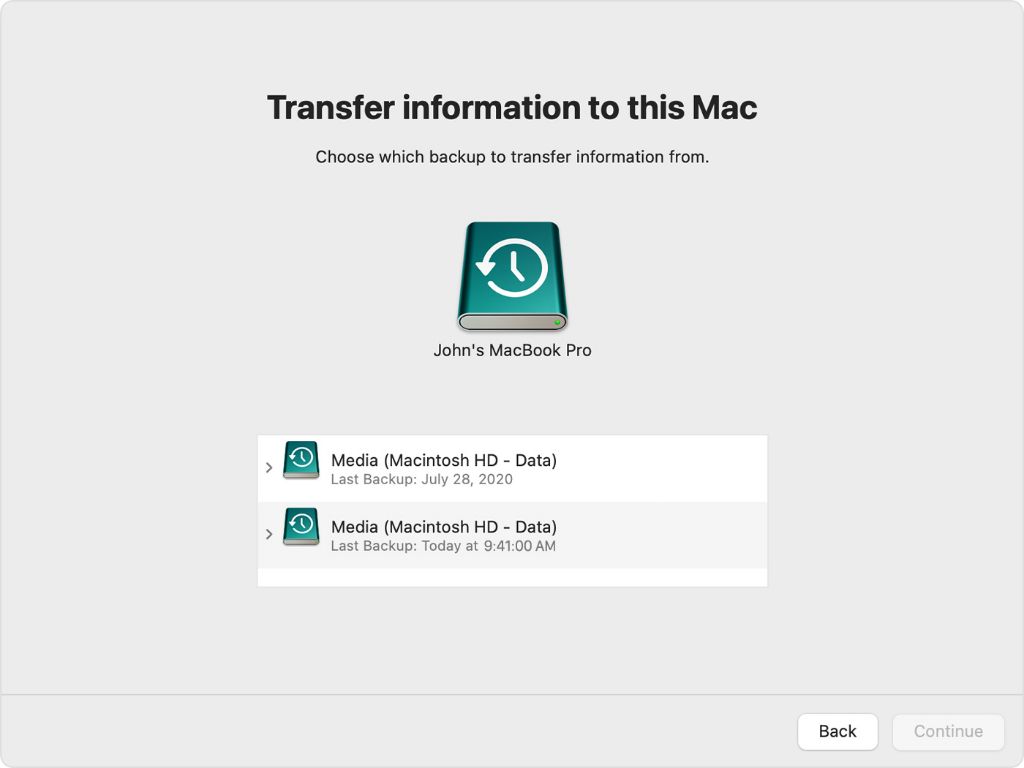
- The Select Backup Source dialogue should appear. Choose your backup drive.
- Click Continue after selecting the drive. Time Machine will scan the drive and list available backups.
Make sure you select a backup that contains the files from the date you wish to restore to.
4. Choose the Backup Date
Pick a backup date to restore:
- Browse the list of available backups and select a date.
- Choose a date before the issues began happening on your Mac.
- Click Continue. This will ready the backup for restore.
Ideally pick a backup date where your system was in a good state.
5. Select the Restore Type
Choose whether to restore your entire Mac or just specific files:
- Restore Full System – This option will erase your startup drive and restore your entire Mac system from the backup.
- Restore Specific Files/Folders – This will let you navigate your backup and only restore certain files or folders.
Restoring the full system will completely revert your Mac to the state captured in the backup. Restoring specific files lets you retrieve only certain data.
6. Select the Destination Disk
If restoring your full system, choose the destination disk:
- The Select Destination dialogue will appear. Pick your current startup drive volume.
- Click Continue. A warning message will appear about erasing the destination drive.
This will write the backup to your Mac’s main startup drive, overwriting any existing files/data.
7. Begin the Restore Process
Start restoring the backup:
- Click Continue in the warning message to proceed with erasing the destination drive.
- Click Restore in the confirmation box that appears.
- The restore will begin by erasing and reformats the target drive, then restoring data.
The restore can take hours if restoring an entire system backup. Let the process complete – do not interrupt it.
8. Restart from the Restored Backup
Once complete, restart your Mac:
- When the restore finishes, click Quit to exit the Restore From Time Machine Backup utility.
- Return to the macOS Utilities window and click Restart.
- Your Mac will reboot, restored to the selected backup state.
You should now have your Mac’s system, apps, and data as they were on the backup date you chose.
Tips for a Successful Restore
Follow these tips for best results when restoring your Mac from a Time Machine or other backup:
- Use a wired Ethernet connection instead of Wi-Fi when restoring. This provides greater reliability if you are restoring a large backup set.
- Update macOS after the restore if the backup is old. This will install any updates released since the backup date.
- Reinstall apps updated since the backup date to get the latest versions.
- Check settings like network configurations that may need to be adjusted after restoring.
- If just restoring specific files/data, copy them to another drive first as a safety net.
Alternative Restore Options
Aside from the Recovery HD Restore From Time Machine Backup tool, you also have these options to restore from a backup:
- Time Machine interface – You can restore files directly within Time Machine.
- Migration Assistant – Use when migrating data to a new Mac.
- Target Disk Mode – Allows direct file transfer from another Mac.
- Third party tools – Such as Carbon Copy Cloner allow full system backup and restore.
These may offer more flexibility for your specific restore needs.
Restore Specific Files Instead of Full System
If you don’t want to erase your entire Mac, you can use Time Machine to restore specific files instead:
- From the Restore From Time Machine Backup dialogue, select “Restore Specific Files” and click Continue.
- Navigate the Time Machine backup in the interface to find the files/folders to restore.
- Select the files/folders and click the Restore button.
- Choose a destination on your current Mac to save the restored files.
This lets you retrieve only important documents, settings, or lost files instead of reverting everything.
Before Restoring a Backup
Keep these important tips in mind before restoring:
- Make sure you have a valid backup available to use for restore before erasing or overwriting anything.
- Back up any current files you may want to keep before restoring.
- Check backup integrity – Verify it completed properly and contains the expected data.
- Ensure you have enough free space for the restore.
Taking these precautions will prevent data loss and other issues.
When to Restore From a Backup
Consider restoring your Mac from a backup when:
- You want to revert system changes made after a certain date.
- Your Mac is suffering from software corruption or damage.
- You need to downgrade/rollback from a macOS update.
- Your Mac will not start up or boot properly.
- You have a drive failure and need to restore to new hardware.
- You accidentally deleted important files.
A restore can help recover from many different problems by utilizing your backup data.
Conclusion
Restoring a Mac from a Time Machine or other backup allows you to revert your system to a previous known good state. It provides a safety net in case of significant software issues, hardware failures, or user error. Make sure to maintain bootable backups on an ongoing basis so you have backups available to restore from if needed. With a current backup and the restore steps outlined above, you can get your Mac back up and running again quickly should disaster strike.
