Ripping a CD refers to extracting or copying the audio tracks from a CD and encoding them into a digital audio format, such as MP3 or AAC, on a computer. The process “rips” the CD tracks from the physical disc and allows you to store them digitally on your computer and devices like iPods or iPhones. The main reasons someone would want to rip a CD are:
- To save a digital copy of the music from a CD for playback on computers and devices
- To preserve their music collection in case the physical CD gets lost or damaged
- To easily transfer tracks from CDs into digital music libraries and playlists
- To compress the audio into smaller files using codecs like MP3 or AAC
This guide specifically covers how to rip CDs into the iTunes media player application on Mac and Windows computers. iTunes makes it easy to quickly import tracks from CDs and encode them into digital formats like AAC that work seamlessly with iPods, iPhones and iTunes itself.
Prerequisites
Before you can rip a CD into iTunes, you need to make sure you have a few things ready:
Have a CD you want to rip – This process allows you to import tracks from a physical CD into iTunes as digital files. So first, locate the CD you want to transfer to your computer.
Have iTunes installed on your computer – iTunes is the app we will use to actually import the CD. So make sure you have the latest version of iTunes installed and set up on your Mac or Windows computer before starting.
That’s it! As long as you have a CD ready to import and iTunes downloaded on your computer, you are ready to move on to ripping.
Launch iTunes
To begin ripping a CD into iTunes, you first need to open the iTunes app on your computer. iTunes is available for both Mac and Windows operating systems. On a Mac, you can find iTunes in the Applications folder. On Windows, it’s usually accessible from the Start Menu. Once you’ve located the iTunes app icon, double click it to launch the program.
When iTunes opens, it will show your music library containing any existing songs, albums or playlists. This is where the CD tracks will be imported to shortly. Make sure iTunes is fully launched and available before inserting your CD to rip.
Insert CD
The first step in ripping a CD is to insert the disc you want to import into your computer’s CD or DVD drive. Locate the disc drive slot or tray on your laptop or desktop and gently slide the CD into the tray label-side up. Push the tray closed or if your computer has a slot loading drive, insert the CD into the thin slot and allow the computer to pull it in automatically. Make sure the disc is fully inserted before proceeding.
Many modern laptops no longer come with built-in optical disc drives. If this is the case, you will need an external USB CD/DVD drive. Connect the external drive to your computer and insert the disc before following the rest of the ripping process.
According to the Recording Industry Association of America (RIAA), CD sales rose in 2021 for the first time in almost two decades, with 46.6 million discs shipped compared to 31.6 million in 2020 (Source). However, overall CD sales and shipments have been declining steadily since 1999 (Source). Once you’ve inserted the CD, the computer should recognize it and you can move on to the next step of ripping it to iTunes.
Import CD
iTunes should automatically prompt you to import the CD when you insert it. If it does not, go to the File menu and select Import CD. This will initiate the import process and add the CD tracks to your iTunes library.
As per Apple’s iTunes support guide, when you insert a CD, a dialog should automatically appear asking if you want to import the disc. If for some reason it does not, you can manually start the import by going to File > Import CD.
Adjust Import Settings
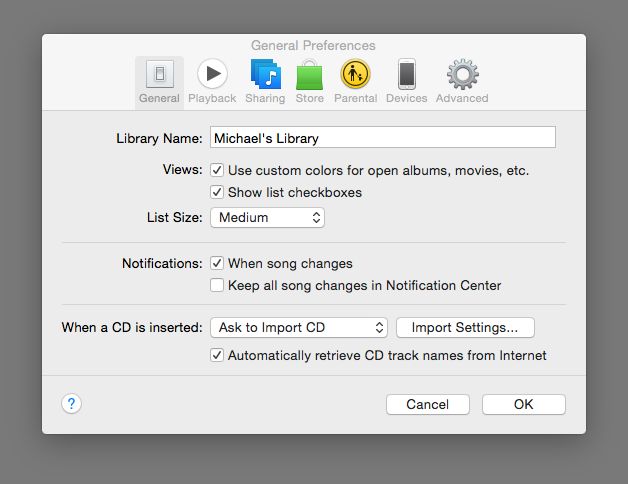
Before importing the CD, you can adjust settings like audio format, quality, and file naming in the iTunes Preferences. Go to Edit > Preferences on Windows or iTunes > Preferences on Mac. Then click on the Import Settings button.
For the best audio quality, choose the AAC Encoder and set it to 256 kbps. See this Apple support article for more details on import settings.
You can also adjust settings like file naming and organization here. For example, you may want to organize files into subfolders named after the album.
Adjust these import settings before starting the import process. This will ensure all tracks from the CD get imported at the desired settings.
Start Import
Once you have configured the import settings to your preferences, you are ready to start ripping the CD. Simply click the Import CD button at the bottom of the iTunes window. iTunes will begin converting the tracks on the CD to digital audio files. According to Apple Support, iTunes can import most songs in just a few minutes, with an entire CD taking around 10 minutes.
Click OK to begin ripping the CD. The import progress will be displayed at the top of the iTunes window. Do not eject the CD until the import is fully complete, as this can interrupt the ripping process.
Import Completes
Once the import process finishes, you will see a message in iTunes stating “Imported CD”. This indicates that all of the tracks from the CD have been successfully imported into your iTunes library. The new tracks from the CD should now appear in your library alongside any existing music you already had.
The average iTunes library contains around 7,000 songs according to reports. Importing a CD will add to your overall library size. A standard CD contains around 10-15 tracks. Audio files encoded using 128kbps AAC are approximately 1MB per minute according to Apple forums. So importing a full CD may add around 100-150MB to your iTunes library size.
You can now eject the CD from your computer. The tracks will remain safely in your iTunes library for listening and syncing to devices. You can play the imported tracks to confirm they ripped properly.
Eject CD
Once the import process is complete and iTunes has finished ripping all of the tracks from the CD, you will want to eject the CD from your computer’s disc drive. This helps ensure that the disc does not get accidentally damaged if left in the drive.
To eject the CD, simply press the Eject button next to the disc drive on your computer. On Macs, this is typically an icon that looks like a triangle pointing upward. On Windows PCs, it may just say “Eject.” You can also right-click on the disc icon on your desktop and select “Eject.”
If you have trouble getting the disc to eject, try holding down the Eject button for several seconds to force it. If that does not work, you can use the Eject command in iTunes by going to Controls > Eject Disc. As a last resort, carefully insert the end of a large straightened paperclip into the tiny pinhole next to the disc drive to manually eject the CD tray.
Once the disc is ejected, be sure to store it safely in a case to prevent scratches. You can now play the ripped tracks in iTunes and no longer need the physical CD unless you want to rip it again at a later point. Just be sure not to lose the CD or throw it away if you think you may want access to it again down the road.
Source: https://www.lifewire.com/fix-dvd-bd-cd-drive-that-wont-open-or-eject-2626113
Play Ripped Tracks
Now that you’ve successfully imported the CD into iTunes, you can play the ripped tracks just like any other song in your music library. The tracks will appear in your library under the “Albums” tab, sorted by artist and album name [1].
To play a ripped track, simply double-click on the song or highlight it and press enter. You can also add the songs to playlists or shuffle them into rotation just as you would any other iTunes track. With 88 million subscribers as of 2022, Apple Music’s vast library now includes your newly ripped CD [2].
Additionally, you can customize the sound quality of your ripped tracks using the iTunes equalizer. Under View > Show Equalizer, drag the frequency sliders like 32, 64, 125, 250 Hz to adjust the sound spectrum [3]. This allows you to tweak the listening experience to best suit the genre or your preferences.