Disk Cleanup is a utility that frees up hard drive space by deleting unnecessary and temporary files. It helps improve system performance by removing files that accumulate over time and take up storage space (https://www.ferris.edu/it/howto/diskcleanup.htm). Disk Cleanup scans your hard drive for downloaded program files, temporary internet files, offline web pages, and other items that are safe to delete.
The Disk Cleanup utility in Windows has some limitations. It can only clean up certain file types and locations predefined by Microsoft. PowerShell provides more control and allows you to fully customize and automate the disk cleanup process.
This guide will cover how to use PowerShell to run an efficient disk cleanup. PowerShell enables you to target exactly which files and folders you want to remove. It also allows you to schedule and automate disk cleanups.
Prerequisites
To run Disk Cleanup in PowerShell, there are a couple prerequisites:
First, you’ll need Windows 10 or later. Disk Cleanup is a built-in tool in Windows, so you’ll need to be running Windows 10 or newer. Older versions of Windows have a similar System Cleanup tool.
Second, you’ll need Administrator privileges on your computer. Disk Cleanup deletes files on your hard drive, so you need admin access to run it. Standard user accounts won’t be able to access Disk Cleanup.
As long as you’re using Windows 10 or later and have an admin account, you’ll be able to use Disk Cleanup in PowerShell.
Find Size of Recycle Bin
To find the size of the Recycle Bin in PowerShell, we can use the Get-PSDrive cmdlet. The Recycle Bin is essentially a virtual drive, so Get-PSDrive allows us to see information about it.
Here is an example to get the size of the Recycle Bin on the C: drive:
Get-PSDrive C | Select-Object Used
This will display the used space of the C: drive Recycle Bin in bytes. We can pipe it to Format-Table for readability:
Get-PSDrive C | Select-Object Used | Format-Table
To get the size in a more readable format like MB, we can use some additional calculations:
(Get-PSDrive C).Used/1MB
This divides the Used space by 1MB to convert it. So Get-PSDrive provides an easy way to check the Recycle Bin size in PowerShell.
Sources:
https://superuser.com/questions/1682632/powershell-recycling-bin-size-get-childitem-issues
Empty Recycle Bin
The easiest way to empty the Recycle Bin in PowerShell is by using the Clear-RecycleBin cmdlet. This cmdlet deletes the contents of the current user’s Recycle Bin, similar to using the “Empty Recycle Bin” option in Windows.
To empty the Recycle Bin, simply run the following command in PowerShell:
Clear-RecycleBin
This will permanently delete all items in the Recycle Bin for the current user (Source: Microsoft Docs).
Alternatively, you can empty the Recycle Bin for all users by specifying the -AllUsers parameter:
Clear-RecycleBin -AllUsers
This will empty the Recycle Bin for all user profiles on the computer (Source: Byte In The Sky).
The Clear-RecycleBin cmdlet provides a quick and easy way to purge the Recycle Bin directly from PowerShell.
Remove Temporary Files
Temporary files can build up over time and take up valuable disk space. We can use PowerShell to find and delete these temporary files.
The main PowerShell cmdlet for deleting files and folders is Remove-Item. We can use it to target temporary folders specifically.
For example, to delete the contents of the Windows temporary folder for the current user, we can run:
Remove-Item $env:TEMP\* -Recurse -ForceThe $env:TEMP variable contains the path to the current user’s Temp folder, usually something like C:\Users\Username\AppData\Local\Temp. We use the -Recurse flag to delete all contents recursively, and -Force to delete without prompting.
To target the Temp folder for all users, use the common path C:\Windows\Temp instead:
Remove-Item C:\Windows\Temp\* -Recurse -ForceWe can delete the contents of other common temporary folders in a similar way. The key is using Remove-Item to recursively delete the contents with the -Recurse and -Force parameters.
Source: How to delete all temp files using PowerShell
Clear System Logs
System logs in Windows contain diagnostic and troubleshooting information logged by the operating system and various applications. These logs can accumulate over time and take up disk space. To clear system logs in PowerShell, we can use the wevtutil command.
Here is an example to clear all logs using wevtutil:
wevtutil el | Foreach-Object {wevtutil cl "$_"}This pipes the list of log names to Foreach-Object, and clears each log. To clear a specific log, specify the log name:
wevtutil cl SystemWe can also clear logs older than a certain number of days. This command clears logs older than 7 days:
wevtutil el | ForEach-Object {wevtutil cl "$_" /bu:7}Overall, wevtutil provides a simple way to clear system logs through PowerShell. For more examples, see Clear-EventLog.
Remove Update Files
One effective way to clean up disk space is by removing old Windows update files that are no longer needed. Windows downloads update files to a hidden folder called Windows Update Cleanup. Over time, these files can take up significant storage space.
We can leverage the Dism.exe tool in PowerShell to clean up the Windows Update Cleanup folder. Dism is a command-line tool that handles various Windows image servicing commands. One of its capabilities is removing unnecessary Windows update files.
To use Dism to remove Windows Update Cleanup files, run the following command in an elevated PowerShell prompt:
Dism.exe /online /Cleanup-Image /StartComponentCleanup
This will initiate the Component Store Cleanup task and free up space by removing unnecessary Windows update files. The /StartComponentCleanup parameter tells Dism to run a maintenance job to eliminate superseded and unused Windows update files.
After the command completes, you should regain a decent amount of storage space on your system drive from deleting outdated update components. Running this Dism command periodically helps maintain a clean Windows installation over time.
For more details on using Dism to manage Windows image components, refer to Microsoft’s documentation: Dism operating system package servicing command-line options
Clear Thumbnail Cache
The thumbnail cache stores thumbnail images of files and folders on your system. Over time, this cache can grow quite large and take up unnecessary disk space. You can clear the thumbnail cache in PowerShell using the Remove-Item cmdlet.
To clear the thumbnail cache, run the following command in an elevated PowerShell window:
Remove-Item -Path "$env:USERPROFILE\AppData\Local\Microsoft\Windows\Explorer\*" -Include Thumbs.db -Recurse -Force
This will recursively delete all files named Thumbs.db in the Explorer folder under your user profile. The Thumbs.db files contain the cached thumbnail images.
You can also delete the central thumbnail cache database for the system drive under C:\Users\Public\ using:
Remove-Item -Path "C:\Users\Public\Thumbnails\*" -Recurse -Force
Running these two commands will completely clear the thumbnail cache and free up disk space taken up by cached image thumbnails.
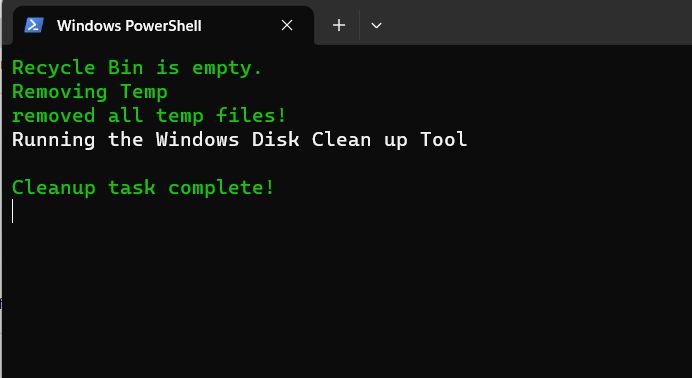
Run Disk Cleanup
The easiest way to run Disk Cleanup in PowerShell is by using the Cleanmgr utility with parameters. Cleanmgr is a built-in Windows tool that allows you to free up disk space by deleting unnecessary files. We can access Cleanmgr from PowerShell by running the command Cleanmgr /sagerun:1.
This will start the Disk Cleanup tool and run the Sagerun analysis, identifying files that can be safely deleted. The /sagerun parameter runs the disk cleanup in unattended mode, meaning it won’t prompt the user for confirmation before deleting files. After the analysis finishes, Disk Cleanup will automatically clean up all the identified files.
Some other useful parameters for Cleanmgr include:
/VERYLOWDISK– Runs cleanup when disk space is dangerously low./LOWDISK– Runs cleanup on low disk space./autoclean– Cleans up system files and other items without user interaction./d %systemdrive%– Specifies the drive letter to clean up.
So in summary, Cleanmgr provides an easy way to run Disk Cleanup from PowerShell by automating the analysis and cleanup process. The different parameters give flexibility to customize when and how it runs.
Automate Disk Cleanup
To fully automate the disk cleanup process, you can create a PowerShell script that runs through all the necessary steps and then schedule it to run automatically with Task Scheduler.
Here is an example PowerShell script that will clear the recycle bin, remove temporary files, clear logs, remove update files, and clear the thumbnail cache:
# Clear Recycle Bin
Clear-RecycleBin -Force

# Remove temporary files
CleanMgr /sageset:65535 /sagerun:65535

# Clear System Logs
wevtutil cl system

# Remove Update Files
DISM /Online /Cleanup-Image /StartComponentCleanup /ResetBase

# Clear Thumbnail Cache
Remove-Item C:\Users\*\AppData\Local\Microsoft\Windows\Explorer -recurse -Force
To schedule this script to run automatically, open Task Scheduler and create a new basic task. Specify when you want the task to run and set the action to “Start a program”. Then choose “Powershell.exe” as the program, and enter the path to your PowerShell script as an argument.
With Task Scheduler, you can have the disk cleanup run daily, weekly, or whatever interval you want. This ensures your disk space stays optimized without any manual intervention.
For more details on automating disk cleanup in PowerShell, check out this StackOverflow thread.