Running check disk, also known as chkdsk, is an important way to diagnose and fix certain hard drive errors in Windows. Check disk scans the drive for file system errors and bad sectors, then attempts to repair them. Here’s a step-by-step guide to running check disk and using it to fix common drive errors.
What Does Check Disk Do?
Check disk, or chkdsk, is a built-in Windows utility that scans your hard drive for errors and attempts to repair them. Specifically, running check disk does the following:
- Scans the file system structure and checks for issues like bad sectors, cross-linked files, directory errors, invalid filenames, etc.
- Identifies and attempts to repair logical file system errors, like bad file links or directory issues.
- Marks bad sectors as defective so they won’t be used again.
- Recovers readable data from bad sectors when possible.
- Reclaims unused space from deleted files.
- Updates NTFS logs to improve future error checking.
So in summary, check disk examines the logical file system structure, runs various checks for errors, then tries to repair any problems found. This can help fix issues like drive corruption, missing files, and problems booting.
When Should You Run Check Disk?
Check disk is an important maintenance tool and should be run regularly to keep your drives in good health. Here are some common situations when you should run a check disk scan:
- You suspect drive errors or corruption: If you’ve noticed signs of hard drive problems like frequent crashes, missing files, or strange behavior, running check disk can help diagnose and repair underlying file system errors.
- Before formatting a drive: Check disk sometimes has the ability to fix errors enough to avoid formatting entirely. So try it before reformatting a corrupted or problem drive.
- Periodic maintenance: Schedule check disk scans about once a month as preventative maintenance. This may catch minor errors before they become bigger problems.
- You can’t boot into Windows: If Windows won’t start, running check disk from a Windows installation media can check and repair the system drive.
- External drive errors: Check disk works on external hard drives too. Run it if an external drive acts up or its file system gets corrupted.
Checking your system periodically with check disk is a quick and easy way to keep your hard drives healthy, identify emerging problems, and avoid major headaches down the road.
How to Run Check Disk in Windows
The process for initiating a check disk scan is straightforward. Here are the steps to run a manual check on your drive in Windows:
- Open This PC or File Explorer. Click the start button and open the This PC shortcut, or open File Explorer from the taskbar.
- Right click the drive you want to scan. In the drives list, right-click on the hard drive, SSD, external drive or other volume you want to check. Select “Properties” from the pop-up menu.
- Click the Tools tab. In the drive’s Properties window, click on the Tools tab.
- Click Check. Under Error checking, click Check. This will prompt check disk to run at your next restart.
- Restart your computer. The check will not run until you restart. Make sure to save your work before restarting.
- Wait for the scan to complete. Check disk will run automatically on the next reboot. Let the scan complete, which could take 10 minutes to over an hour depending on drive size.
Once your computer reboots, you’ll see a black DOS-like screen showing the check disk report. This will display any errors found and repaired. The computer will then restart back into Windows when finished.
Alternative Methods to Run Check Disk
Aside from the standard instructions above, there are a couple other ways you can initiate a check disk scan in Windows:
- Command prompt: Open the Command Prompt as admin and run: chkdsk C: /f. Replace C: with the letter of the drive you want to check.
- System File Checker: From an admin Command Prompt, run sfc /scannow. This scans system files instead of the whole drive.
- Windows installation media: Boot from a Windows DVD or USB, open the Command Prompt, then run chkdsk C: /f to check the system drive.
So in summary, you have a few different options to run check disk scans. But the most straightforward is the right-click properties menu method described above.
Reading the Check Disk Report
After check disk completes, it will display a report summarizing any problems found and actions taken. Here’s how to interpret some key sections of the chkdsk report:
- File record segment X is unreadable: This indicates a bad sector that check disk couldn’t read. It has marked the sector as defective.
- Deleted corrupt attribute list entry X: The file system’s internal attribute data was corrupted. Check disk fixed it.
- The volume bitmap is incorrect: The record keeping internal file allocation table (FAT) had errors. It was repaired.
- File XXX is cross-linked starting at clusters: Files chains were fragmented. Check disk consolidated them.
- Deleted X unused index entries: Leftover file metadata was removed. This tidies up the file structure.
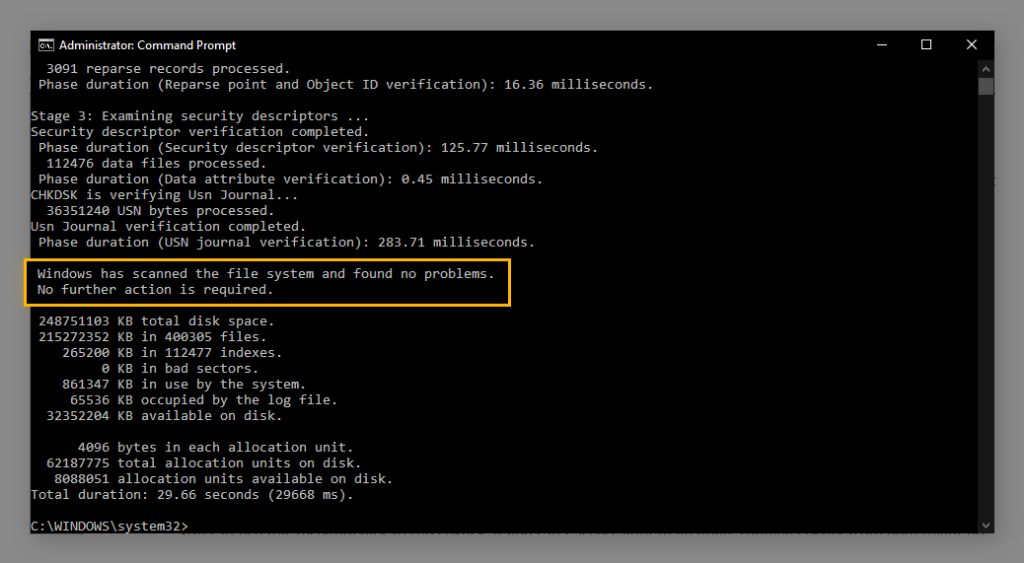
In most cases, you can verify check disk completed successfully if the final report says “Windows has checked the file system and found no problems.” Otherwise use the details to understand what errors were found and fixed.
Using Check Disk Commands and Switches
You have a few options to modify check disk’s behavior using various command switches:
| Command | Description |
|---|---|
| chkdsk /f | Fixes errors on the disk. Used automatically if you just run chkdsk. |
| chkdsk /r | Locates bad sectors and recovers readable data. |
| chkdsk /x | Forces dismount of the drive before check. Use if chkdsk won’t run. |
| chkdsk /b | NTFS-only. Clears filesystem metadata like the boot sector. |
| chkdsk /i | NTFS-only. Performs less intensive check, skipping checking cycles. |
| chkdsk /c | NTFS-only. Skips checking cycles if disk errors are found. |
| chkdsk /l[:size] | NTFS-only. Saves log file to name chkdsk.log in the root folder. |
The most common switches are /f to fix errors, /r for bad sector checks, and /x if chkdsk won’t run on its own. Refer to the table for an explanation of each command.
How to Use Check Disk to Fix Errors
The main reason to run check disk is to repair logical file system errors or drive corruption. Here are some tips for using chkdsk to fix problems:
- Always run check disk from an admin Command Prompt, or use the /f and /r switches, so it can fully fix errors.
- If Windows won’t boot, run check disk from a Windows installation disc or bootable USB.
- After fixing errors, run SFC /scannow to check system files as well.
- For recurrent issues like blue screens or frequent crashes, schedule chkdsk weekly or monthly.
- Also check Disk Management for hard disk health indicators like reallocated sectors.
- If chkdsk cannot repair volume corruption, you may need to reformat and repartition the drive.
Performing periodic check disk scans along with SFC system file checks can find and fix minor problems before they balloon into major corruption issues. Just be sure to run chkdsk from an admin command prompt or boot disc whenever possible.
Advanced Check Disk Scenarios
Check disk is a versatile tool that can help diagnose and fix several complex drive error scenarios. Here are some examples:
Fix Corrupted System Drive
If Windows won’t boot and you suspect drive errors, boot from Windows installation media. At the Command Prompt run chkdsk C: /f /r. This scans and repairs the system drive from outside Windows.
Remove Stuck Files After a Crash
An abrupt power loss while writing files can result in stuck files that cause crashes or freezes on next boot. Chkdsk can often delete or consolidate these stuck fragments.
Identify and Quarantine Bad Sectors
Over time, physical bad sectors can develop on a hard disk. Check disk finds these sectors and marks them as bad so they won’t be reused, preventing data loss.
Fix Drive Letter Assignment Conflicts
If a drive letter is assigned to multiple volumes, files may not show properly in Explorer. Chkdsk often resolves improper drive letter assignments.
Resolve MFT File Table Corruption
Damaged entries in NTFS’s master file table can lead to missing files or folders. Scan with chkdsk /f to rebuild the MFT.
These examples illustrate chkdsk’s importance as a data recovery and repair utility. When facing complex drive issues, check disk should be part of your troubleshooting routine.
Safety Tips When Using Check Disk
Check disk rewrites critical drive metadata as part of repairs. Follow these precautions to avoid potential issues:
- Close all open files/programs on the drive before starting. Check disk may not run otherwise.
- Backup important data in case repairs cause unexpected data loss.
- Do not interrupt chkdsk once it starts or you may corrupt the drive.
- If errors persist after chkdsk fixes, consider reformatting or replacing the hard disk.
- Use check disk on SSDs only when absolutely needed, as it reduces their lifespan.
- Be prepared to restore from backup if a critical system file gets corrupted.
While check disk repairs most errors without issue, extensive drive damage can occasionally make things worse. So back up first and follow proper precautions.
Should You Use Check Disk Regularly?
Check disk remains one of the most effective ways to keep your drives healthy and error-free. Here are some good reasons to incorporate periodic chkdsk scans into your regular system maintenance routine:
- Finds and fixes small problems before they grow: Catching minor file system issues early prevents bigger headaches later.
- Less disruptive than disk formatting: Repairing early saves you from having to wipe and reformat corrupted drives.
- Proactively monitors drive health: Regular scanning reveals emerging bad sectors before they cause failure.
- Its free built-in protection: Take advantage of the native chkdsk tool already in Windows.
- Improves performance: A corruption-free drive runs faster and more smoothly.
There really aren’t downsides to periodic check disk scans. The small time investment helps optimize your drives’ health and minimize your risk of lost files or data.
Conclusion
Check disk remains one of the best ways to detect and repair file system problems, bad sectors, and corruption on hard drives. Running chkdsk regularly prevents minor errors from escalating into major crashes or data loss. Next time you notice odd behavior like slow performance or missing files, don’t forget to try the handy chkdsk tool to get your drives running smoothly again.
