The Disk Cleanup tool is a useful utility included in Windows that helps free up disk space by deleting unnecessary and temporary files. Running Disk Cleanup manually through the graphical user interface can be time consuming, requiring several clicks to scan the drive and select which files to remove.
Using the command line to run Disk Cleanup provides a quicker, more efficient way to clean up disk space. The command line options give you precise control, allowing you to target specific file types to delete without having to sift through long lists in the GUI. Command line switches can also be scripted to automate the cleanup process on a schedule.
Overall, running the Disk Cleanup tool via the command line interface provides benefits like saving time, customizing exactly which files are deleted, and setting up automated cleanup – advantages over the point-and-click graphical method.
Prerequisites
To run Disk Cleanup from the command line, you need to meet the following prerequisites:
Windows OS requirements – Disk Cleanup can be run on Windows 7, 8, 8.1, and 10. It requires administrative privileges, so you need an admin account on the computer.
Administrative privileges – Since Disk Cleanup modifies sensitive parts of the operating system, you need elevated admin access. Open Command Prompt as administrator before running the Disk Cleanup commands.
Open Command Prompt
To open the command prompt window in Windows, click on the Start button and type “cmd” in the search bar. Select “Command Prompt” from the search results.
To open command prompt with admin privileges, right-click on Command Prompt in the search results and select “Run as Administrator” (Source). This will open the command prompt window with elevated permissions, allowing you to run Disk Cleanup and other admin commands.
Alternatively, you can create a desktop shortcut to launch command prompt as admin. Right-click on your desktop, select New > Shortcut, type “cmd” as the location, and click Next. Right-click the new shortcut, select Properties, and under the Shortcut tab, click “Advanced”. Check the box for “Run as administrator” and click OK (Source).
Now when you double-click the shortcut, command prompt will automatically open with admin access, ready for commands like Disk Cleanup.
Disk Cleanup Command
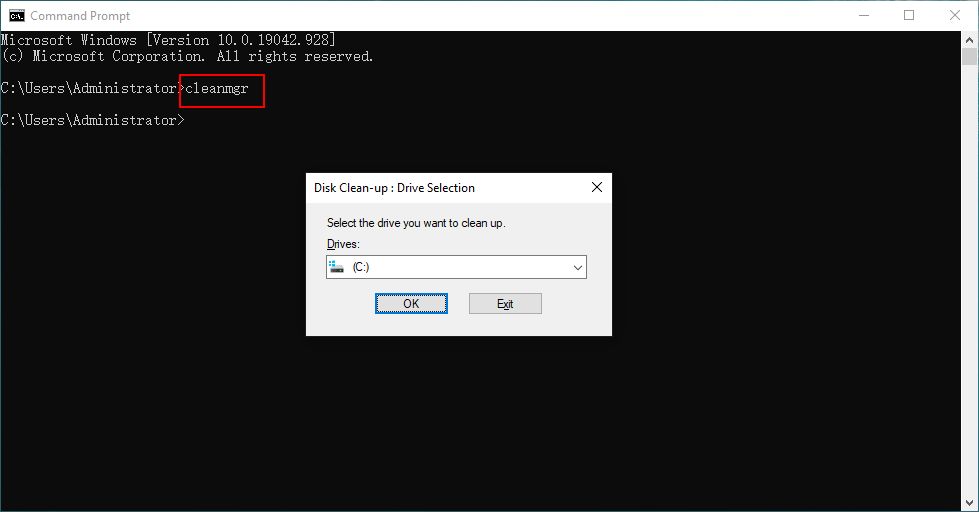
The Disk Cleanup utility can be run from the command line using the cleanmgr.exe command. The basic syntax is:
cleanmgr /sagerun:{Value}
The main parameters for cleanmgr are:
/sagerun:1– Runs Disk Cleanup in normal mode allowing you to select which files to delete./sagerun:2– Runs Disk Cleanup in silent mode, deleting preselected system files without prompting./sagerun:3– Runs Disk Cleanup in silent mode, deleting all system files without prompting./sagerun:4– Cleans up system files and applications./sagerun:5– Cleans up system files, applications, and drive./sagerun:6– Allows custom cleanup options to be specified.
So for example, to run Disk Cleanup normally you would use:
cleanmgr /sagerun:1
And to do a silent cleanup of system files:
cleanmgr /sagerun:2
The cleanmgr command provides a simple way to automate cleaning up disk space from the command line.
Clean System Files
The /sagerun parameter is used to clean up system files on your drive. This cleans out files like temporary internet files, downloaded program files, temporary files, and other system files that are no longer needed.
For example, to clean the system files on drive C: you would use the command:
cleanmgr /sagerun:C
This will run the disk cleanup tool on drive C: targeting only system files. It goes through and clears out the Temporary Internet Files folder, empties the Recycle Bin, removes temporary Windows installation files, clears system error logs, and other unneeded system files.
Cleaning system files helps free up disk space by removing junk files that accumulate over time and are generally safe to delete. It’s a good maintenance task to run periodically to ensure your system stays running fast and efficiently.
Clean Drive
To clean your entire drive, you can use the cleanmgr command with the /sagerun parameter. This will run all of the disk cleanup options on the selected drive. For example, to clean your C drive:
cleanmgr /sagerun:1
The /sagerun parameter tells Disk Cleanup to run all available cleanup options on the drive. The number after /sagerun specifies the drive to clean. 1 indicates the C drive, 2 would be the D drive, etc.
Running Disk Cleanup this way cleans a variety of system files and temporary folders on the selected drive. This includes compressing old files, emptying the recycle bin, removing temporary internet files, clearing system error memory dumps, and more. It performs a deep clean to free up disk space.
The advantage of using /sagerun is that it cleans the entire drive without having to manually select each option in the GUI. It automates running all available cleanups on the drive.
Custom Cleanup
The Disk Cleanup tool allows you to target specific file types to delete through the use of command line options. This allows you to customize the cleanup process to focus on the file types you want to remove.
For example, to target temporary internet files and cookies, you can use the /sageset:1 option (cite url1 here). This will delete browser cache files and cookies from Internet Explorer, Mozilla Firefox, Google Chrome, and Microsoft Edge.
To target downloaded program files, you can use the /sageset:2 option (cite url2 here). This will remove any leftover setup files from application installations.
Other custom options include targeting temporary Windows files (/sageset:4), temporary files from Microsoft Office (/sageset:7), and Windows update files (/sageset:35) among others (cite url3 here). By combining various /sageset options, you can craft a custom cleanup command to target the specific types of files you want to delete.
Custom cleanups give you more control over the disk space you are clearing on your drive. Rather than just running a broad cleanup, you can zero in on the file categories that are taking up the most space.
Automate Cleanup
There are a few ways to automate running Disk Cleanup on a regular schedule:
You can use Windows Task Scheduler to schedule Disk Cleanup. Open Task Scheduler, create a new basic task, and configure it to run “cleanmgr.exe” on a recurring schedule. You can also run “cleanmgr /sageset:1” first to select which disk cleanup options you want it to perform automatically.
Alternatively, you can create a batch script that runs cleanmgr with your desired parameters, and schedule that script to run on a recurring basis with Task Scheduler. For example:
cleanmgr /sagerun:1
Will run Disk Cleanup with whatever options were previously selected with /sageset. The /sagerun parameter runs Disk Cleanup in unattended mode.
For more advanced scripting, you can use the DiskCleanup COM object in PowerShell. This allows querying disk usage and programmatically configuring cleanup options.
Automating disk cleanup helps free up disk space on a regular cadence without needing manual intervention. Just be careful not to make the cleanup too aggressive, as you may end up deleting useful files or temporary data that applications need.
Troubleshooting
If you encounter issues running Disk Cleanup from the command line, here are some common errors and fixes:
Permission issues – Make sure to open Command Prompt as an administrator. Right click on Command Prompt and select “Run as administrator”.
Disk Cleanup not opening – Sometimes Disk Cleanup may not launch properly. Try deleting temporary files, running Windows Update troubleshooter, or using the System File Checker tool (DISM /Online /Cleanup-Image /RestoreHealth) to fix system file errors.[1]
Disk Cleanup not finding files – The utility may fail to find system files to clean up after a Windows Update. Boot into Safe Mode and try running Disk Cleanup again to fully clean up system files.[2]
Incorrect syntax – Double check the Disk Cleanup command syntax and arguments being passed. Make sure to use the /sagerun parameter for automated cleanups.
Missing executable – Verify that cleanmgr.exe exists in the system32 folder. Reinstall or restore Disk Cleanup if the executable is missing.
If Disk Cleanup continues to fail even after trying these troubleshooting steps, you may need to repair your Windows installation or contact Microsoft Support.
Conclusions
Running the Disk Cleanup utility from the command line provides a quick and easy way to free up valuable disk space on your Windows computer. By eliminating unnecessary system files, temporary files, and other disk clutter, Disk Cleanup helps optimize storage capacity and system performance.
The main benefits of using the Disk Cleanup command line versus the graphical utility are the added automation and customization options. You can create scripts to schedule cleanups on a regular basis, targeting specific folders or file types each time. The command line provides more control over exactly what gets deleted from your system.
For users looking to take their Disk Cleanup skills even further, the Microsoft Docs pages offer additional examples and syntax details for the CLI utility. There are also commands to Empty Recycle Bin, Clean Up System Restore Points and more. Mastering disk maintenance through the command line can save considerable time for power users.
With the basic Disk Cleanup commands provided here, you should now have the essential knowledge to start reclaiming wasted hard drive space using the command prompt. Just remember to be cautious in previewing what will be deleted, and keep backups of any files you may need later.