Bad sectors are physical areas on a hard drive that can no longer reliably store data due to damage or corruption. When a sector goes bad, any information stored on that sector is lost and becomes inaccessible. Bad sectors gradually form over time as a hard drive ages and can indicate potential hard drive failure. It’s important to periodically scan hard drives for bad sectors so you can identify damaged areas, preventing potential data loss. Scanning also helps monitor drive health and determine when a hard drive needs replacing.
On Windows 10, you can scan for bad sectors using the built-in Error-checking tool, chkdsk, as well as third-party tools for more detailed scans. Knowing how to scan drives and read the results helps you proactively manage hard drive errors.
When to Scan for Bad Sectors
Scanning for bad sectors is crucial when you notice signs of hard drive issues. Some common symptoms of bad sectors include:
Computer freezing or crashing frequently, especially during start up or when accessing certain files or programs (Datanumen). This is due to bad sectors preventing access to data needed for normal function.
Strange noises from the hard drive, such as loud clicking, grinding or buzzing (Techchef). Bad sectors can cause the drive heads to get stuck, producing these sounds.
Data corruption or loss, like missing files or folders, errors opening files, or programs crashing (AVG). Bad sectors can make data unreadable.
Failing to boot properly, getting stuck during start up, or experiencing the blue screen of death (Datanumen). Bad sectors can cause critical system files to be inaccessible.
Major slowdowns during normal use, file transfers, installations, etc. (AVG). This happens as the drive takes longer to read data with bad sectors.
Checking Hard Drive Health
The built-in Windows tool CHKDSK can help check the health of your hard drive and scan for bad sectors. CHKDSK examines the file system and disk space usage on a drive and can detect and repair logical file system errors.
To run CHKDSK in Windows 10:
- Open File Explorer and right-click on the drive you want to scan.
- Select Properties > Tools > Check.
- In the Check Disk window, check the “Scan for and attempt recovery of bad sectors” box.
- Click Start. CHKDSK will run at the next reboot.
CHKDSK can also be run from the Command Prompt. Open an elevated Command Prompt and type:
chkdsk C: /f /r /x
This command will scan drive C: and fix errors, locate bad sectors, and force a dismount if needed (Microsoft).
Checking a drive’s S.M.A.R.T. (Self-Monitoring, Analysis and Reporting Technology) status can also indicate drive health issues like bad sectors. Use a third-party tool like CrystalDiskInfo to read S.M.A.R.T. data and check for warning signs like reallocated sectors.
Running CHKDSK
One of the built-in tools in Windows 10 for scanning for bad sectors is CHKDSK. CHKDSK checks the file system and metadata of drives for logical and physical errors. To run a CHKDSK scan, there are a couple options:
Command Prompt: Open the Command Prompt as an administrator. Type “chkdsk C: /f” (without quotes), replacing C: with the letter of the drive you want to scan. This will scan drive C: and fix any errors found. To add other scan options, use “/r” for locating bad sectors, “/x” for dismounting the drive first, or “/i” for a less intensive scan.
File Explorer: Open File Explorer and right click on the drive you want to scan. Select “Properties” then click the “Tools” tab. Under Error checking, click “Check” to scan the drive. You can also click “Scan drive” to schedule a scan on the next restart.
Running CHKDSK regularly helps identify potential bad sectors before they cause data loss or corruption. Make sure to close any open files and applications on a drive before scanning it (cite: https://www.avast.com/c-chkdsk-windows). The intensive “/f” and “/r” scans can take several hours to complete.
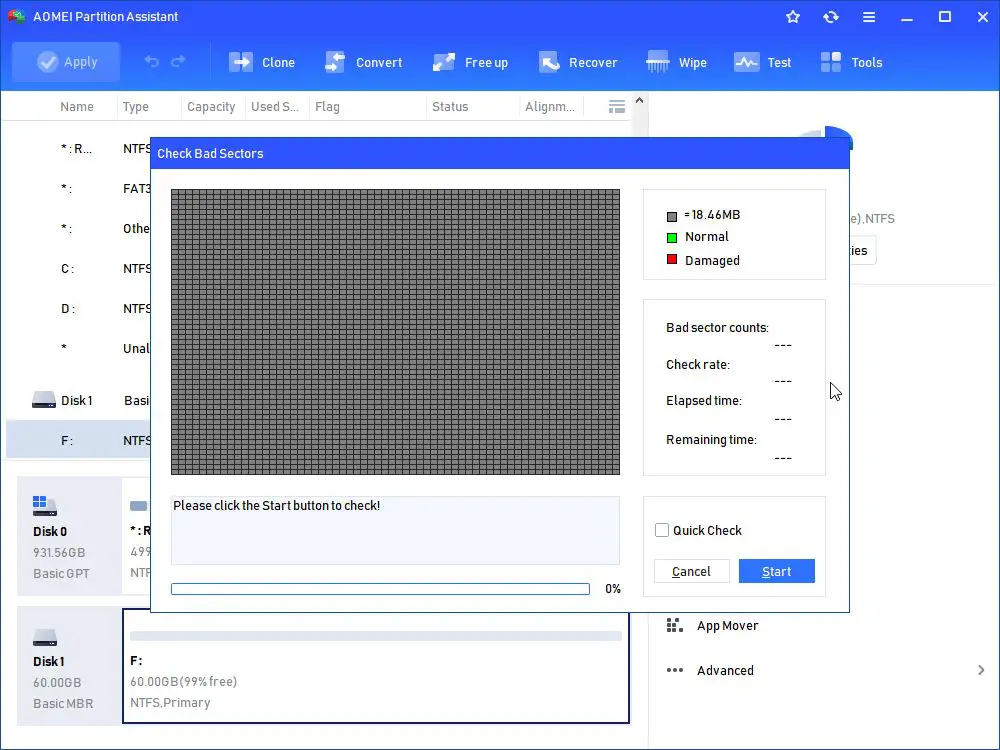
Using Third-Party Tools
In addition to CHKDSK, there are several highly recommended third party tools for scanning and repairing bad sectors on Windows 10:
HDD Regenerator (https://www.dposoft.net/hdd.html) is a popular bad sector repair tool for Windows. It can scan drives for bad sectors and attempt to regenerate and repair them. HDD Regenerator claims to repair physical bad sectors rather than just marking them as reserved space.
Victoria (https://www.r-studio.com/free-download.html) is another free option focused on data recovery. It has built-in tools for testing drives and repairing bad sectors. Victoria can be used to attempt recovery of data in inaccessible areas before marking them as bad sectors.
Spinrite (https://www.grc.com/spinrite.htm) is a sector editor and hard drive maintenance utility designed to repair damaged hard drives. It works at the physical level to repair bad sectors and magnetic errors. Spinrite can help restore data access and fix read/write issues caused by bad sectors.
These third party tools provide advanced diagnostics and repair methods beyond what is built into Windows CHKDSK. They are worth trying before replacing a potentially failing hard drive.
Scanning Specific Drives
If your computer has multiple drives, you can scan specific drives instead of scanning the entire system. This allows you to target individual drives you suspect may have bad sectors.
To scan a specific drive in Windows 10:
- Open File Explorer and locate the drive you want to scan. Right-click on the drive and select “Properties.”
- In the Properties window, switch to the “Tools” tab.
- Under Error checking, click “Check” to begin scanning the drive.
- In the Check Disk window, check the “Scan for and attempt recovery of bad sectors” box.
- Click “Start” to begin the scan.
The scan will run on the selected drive only. Be patient as scanning for bad sectors can take some time depending on the size of the drive and the scan settings.
You can also scan a specific drive from the command line using the chkdsk command followed by the drive letter. For example: chkdsk C: /r will scan drive C:. See this SuperUser post for more details.
Scan Speed and Intensity
CHKDSK offers different levels of scan intensity, allowing you to choose between a quicker scan or a more in-depth one. The main options are:
Quick scan (/F): This scans the volume and fixes only logical file system errors. It does not scan the disk surface for bad sectors. This is the fastest option.
Normal scan (/R): This locates bad sectors and recovers readable information. It then repairs soft bad sectors by restoring the data contents and marking the sectors as bad. This provides a balance between speed and thoroughness.
Deep scan (/X): This forces CHKDSK to search for bad sectors and attempts to repair all identified errors. All clusters are scanned regardless of whether they are currently in use. This is the slowest but most comprehensive option.
The deep scan (/X) takes significantly longer but will detect more subtle errors. The quick scan is faster but may miss problematic sectors. Selecting normal scan (/R) offers a compromise between the two.
Reading the Scan Results
Once the scan is complete, you can view the results to check for bad sectors. The easiest way is to open Event Viewer, expand Windows Logs, and select System. Look for events from the source “Wininit” or “CHKDSK” to see details from the scan.
The results will indicate if any bad sectors were found. For example, you may see a message like “Correcting errors in file system on drive C: The master file table (MFT) has a bad allocation.” This means CHKDSK detected and repaired bad sectors in the master file table.
Errors marked “recovered” or “fixed” indicate bad sectors were present but have been repaired. “Failed to recover” messages mean unrepairable bad sectors exist. The log will specify the cluster location and sectors affected. Severe errors may advise backing up data and replacing the drive.
To confirm bad sectors, you need to see warnings about:
- “X bad clusters” – X number of bad sectors found
- “Y could not be read” – Y number of unreadable sectors
- “Z could not be recovered” – Z number of unrepairable sectors
For details on physical damages, look for “blocks/sectors” that are marked “damaged”. The number of bad sectors indicates the drive’s condition. While a few may be normal, large numbers likely mean the drive is failing.
Overall, inspect the system log closely after a scan to check for bad sector warnings. This will reveal if problems exist and whether CHKDSK was able to repair them.
Repairing Bad Sectors
Windows 10 has a built-in disk scanning and repair tool called CHKDSK that can detect and fix bad sectors. To use CHKDSK to repair bad sectors, follow these steps:
1. Open the Command Prompt as an administrator. To do this, type “cmd” in the Windows search box, right-click on Command Prompt, and select “Run as administrator”.
2. In the Command Prompt, type the following command and press Enter:
chkdsk C: /f /r /x
Replace C: with the drive letter of the drive you want to scan and repair. The /f parameter tells CHKDSK to fix any errors found. /r tells it to locate bad sectors and recover readable information. /x forces the drive to dismount before the scan.
3. CHKDSK will scan the drive and display the status. Repairing bad sectors can take a while depending on the size of the drive and number of bad sectors.
4. When the scan is 100% complete, restart your computer for the repairs to take effect. Then run CHKDSK again to verify the bad sectors have been repaired.
If the built-in Windows tools are unable to repair the bad sectors, you can try third-party tools like Victoria for more advanced sector repair and recovery options.
Preventing Bad Sectors
While bad sectors usually can’t be avoided entirely, there are some steps you can take to reduce the chances of them developing on your hard drive:
- Defragment your hard drive regularly. Defragmentation arranges data so it’s stored contiguously on the drive, reducing strain on the hard drive’s mechanical parts over time (Source: https://superuser.com/questions/1441306/how-to-prevent-bad-sectors).
- Don’t let your hard drive fill up. Keep at least 10-15% of your drive free to reduce excessive wear on the same sectors (Source: https://www.diskpart.com/articles/how-to-block-bad-sectors-on-hard-drive-1881.html).
- For SSDs, enable overprovisioning if your drive supports it. This reserves extra storage capacity to allow wear leveling to work effectively (Source: https://www.seagate.com/support/kb/what-do-i-do-if-my-drive-reports-bad-sectors-196351en/).
While these tips may help, there are no guarantees for completely preventing bad sectors. But following best practices for drive maintenance can extend the healthy lifespan of your hard drive.