What is a Flash Drive?
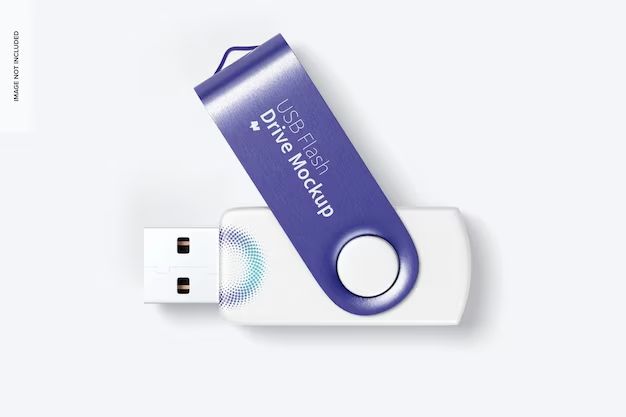
A flash drive, also known as a USB drive, USB stick, or thumb drive, is a small, lightweight, portable data storage device that consists of flash memory with an integrated USB interface (Wikipedia, 2022). Flash drives connect to computers and other devices via a built-in USB plug and do not require batteries or an external power source.
Flash drives were first introduced in late 2000, providing an easy and convenient way to store and transfer data. They quickly became popular among consumers and businesses due to their compact size, large storage capacity, lack of moving parts, and general ease of use (Delkin, 2018).
The most common uses of flash drives today include transferring files between devices, backing up and storing files, sharing documents, and running portable apps. Their portability and plug-and-play functionality make them handy for quickly accessing and transporting data on the go.
Inserting the Flash Drive
Inserting a flash drive into your computer is the first step to access and view the files stored on it. Here’s how to properly insert a flash drive into a USB port:
Locate an available USB port on your computer. USB ports are typically found on the front, back, or sides of a desktop computer. On a laptop, the USB ports are usually located on the sides or back. USB ports may have a USB symbol next to them to help identify the port.
Orient the flash drive so the metal contacts are facing down and match the port’s orientation. USB ports have a standardized design, so the flash drive’s connector will only fit one way.
Gently insert the flash drive into the USB port. Don’t force it; if it’s not inserting smoothly, flip the drive over and try again. Push the flash drive in until it clicks into place and is seated firmly in the port. This indicates it’s inserted correctly.
Give your computer a few seconds to recognize the flash drive and install any necessary drivers. You may get a notification that new hardware has been detected. Avoid removing the flash drive until it has fully loaded.
If your flash drive does not insert smoothly or your computer does not detect it, try another USB port. If issues persist, the drive itself may be damaged or incompatible with your computer. Most flash drives today use standard USB connections and work across Windows, Mac, and other operating systems.
Once properly inserted, your flash drive will appear as a new drive on your computer. You can then access and manage the files stored on it. Be sure to eject the flash drive safely before removing it to avoid data loss.
Viewing Files on Windows
To view files on a flash drive on a Windows computer, first insert the flash drive into an available USB port on your computer. Windows will automatically recognize the flash drive and install any required drivers.
Next, open File Explorer, which can usually be accessed by clicking the folder icon in your taskbar or typing “File Explorer” in the Windows search bar. In the left pane of File Explorer, you should see your flash drive listed under “This PC” or “My Computer.” It will likely be labeled with the flash drive name or manufacturer.
Double click on the flash drive icon to open it and view the files and folders stored on the drive. The contents of the flash drive will display in the right pane of File Explorer. You can now access, open, copy, move or delete files as needed.
If your flash drive does not show up automatically, try rebooting your computer or checking your USB connections. You may also need to initialize the disk in Disk Management before it will show up in File Explorer.
Overall, accessing a flash drive on Windows is very simple – just plug it in, open File Explorer, and double click the flash drive icon to view the contents. With the drive open in File Explorer, you have full access to manage the files as needed.
Sources:
https://edu.gcfglobal.org/en/windowsbasics/working-with-flash-drives/1/
Viewing Files on Mac
To view the files on a flash drive on a Mac, first open Finder. Finder can be opened by clicking on the Finder icon in the Dock or by pressing Command + Spacebar to launch Spotlight and typing “Finder”, then pressing Return 1. In the Finder sidebar under Devices, the flash drive will appear with its name and capacity. Click on the flash drive to view its contents in the Finder window 2.
If the flash drive does not appear in the Finder sidebar, make sure it is properly inserted in the USB port. Try unplugging it and plugging it back in. If it still does not show up, the drive may need to be formatted for Mac OS. To check the flash drive’s format, open Disk Utility (located in Applications > Utilities) and see if the drive appears in the left side list. If not, the drive will need to be reformatted before it can be accessed on a Mac.
Once the flash drive appears in Finder, you can access files and folders on the drive like you would with folders on the Mac. Double click to open folders and files. To copy files on or off the drive, simply drag and drop them. When finished, it’s important to properly eject the flash drive to avoid corruption.
Folder Structure
When you insert a flash drive, it will contain a certain folder structure by default that helps organize files. On Windows machines, the flash drive will open to show folders like System Volume Information and Recycler, which are system-created folders. Any user-saved files and folders will sit alongside these system folders.
It’s recommended to create your own folder structure to organize files rather than saving them all to the root folder. For example, you could create folders like Documents, Photos, Videos, etc. and sort files appropriately. This makes it easier to navigate when you have many files on a flash drive.
You can create a folder by right clicking in an empty space within the flash drive window, selecting New > Folder, and naming it. Then you can drag and drop files into their respective folders. Folders can also contain sub-folders for further organization if desired.
On a Mac, the process is similar – the flash drive will mount and show any system files and folders. You can right click and create your own folders, or use the Finder menu to create a new folder. Drag files into place to sort.
Overall, utilizing folders on a flash drive leads to a more organized structure so you can easily access your files. Just be sure to eject the flash drive properly before removing it.
Copying Files
Transferring files on and off your flash drive is easy on both Windows and Mac computers. Here’s how to copy files to and from a flash drive:
On Windows:
- Insert the flash drive into an open USB port on your computer.
- Open File Explorer by pressing Windows key + E.
- Locate the flash drive under “This PC” or “My Computer”. It will be labeled with the drive letter and name (e.g. “E: CRUZERGLIDE”).
- Double click to open the flash drive.
- Open the location on your computer containing the files you want to copy.
- Select the files and folders you want to copy.
- Right-click on the selected items and choose “Copy”.
- Navigate back to the flash drive window.
- Right-click inside the window and choose “Paste” to copy the files.
On Mac:
- Insert the flash drive into an open USB port on your Mac.
- The flash drive icon will appear on your desktop.
- Double click to open the flash drive.
- Open the Finder window and navigate to the files you want to copy.
- Select the files/folders and drag them onto the flash drive icon on your desktop.
- Alternatively, you can right-click on the items, choose “Copy”, navigate to the flash drive, and select “Paste”.
Files can be copied back and forth between your computer and flash drive. Just follow these same steps, but copy files from the flash drive and paste them to your computer instead.[1]
Deleting Files
When you no longer need files stored on your flash drive, you can delete them to free up storage space. However, simply dragging files to the Recycle Bin or Trash may not permanently erase them. For more secure deletion, use the following methods:
On Windows, you can permanently delete files by right-clicking them, selecting “Delete”, and then enabling “Permanently delete files” in the confirmation dialog box. This will bypass the Recycle Bin. You can also use the Shift + Delete keyboard shortcut to permanently erase files (Source).
On Mac, hold down the Command key and press Delete to immediately erase files without placing them in the Trash. You can also click and drag files directly to the Trash icon in the Dock, then choose “Empty Trash” to permanently remove all contents (Source).
For maximum security, use third-party file deletion software to overwrite the data multiple times, making it unrecoverable. This helps prevent sensitive information from being restored if the drive falls into the wrong hands.
Ejecting the Flash Drive
It’s important to always safely eject your flash drive before physically removing it from the computer. Simply pulling out the flash drive before it has been properly ejected can lead to file corruption or data loss. This is because when a flash drive is in use, files may still be transferring between it and your computer. Forcing removal interrupts this process and can damage files.
On Windows, you can safely eject a flash drive by clicking the “Safely Remove Hardware” icon in the system tray and selecting the flash drive (Microsoft). This ensures all transfers are complete before disconnecting the drive.
On Mac, right-click on the flash drive icon on the desktop and select “Eject”. You can also drag the drive icon from the desktop to the Trash, which will eject it. Or use the File Explorer to right-click on the drive and select “Eject” (Computer Hope).
Safely ejecting the flash drive before disconnecting it helps prevent potential file corruption and data loss.
Troubleshooting
Flash drives can sometimes run into issues that prevent them from working properly. Here are some common problems and potential fixes:
Drive Not Detected
If your computer is not detecting the flash drive, first check to make sure the drive is properly inserted. Try unplugging and reinserting the drive. Also try using a different USB port on your computer. There could be an issue with the specific port.
You may also need to update the USB controller drivers on your computer. Go to Device Manager, find the USB controller device, right-click it and select Update Driver. Try rebooting your PC as well.
As a last resort, you can attempt to repair the flash drive. There are many free USB repair tools such as USB Flash Drive Repair that can fix common problems.
Corrupted Files
If you are unable to open files on the flash drive, the files may have become corrupted. Try scanning the drive for errors using the CHKDSK command on Windows or Disk Utility on Mac.
You can also try reformatting the flash drive to fix file system errors. This will erase all data on the drive, so be sure to back up your files first.
Some files may be recoverable using data recovery software like Recuva or Disk Drill even after reformatting the drive.
Flash Drive Tips
Here are some best practices for using flash drives:
- Be gentle – Avoid bending the connector or exposing flash drives to liquids or extreme temperatures which can damage them.
- Eject properly – Always use the “Safely Remove Hardware” option before unplugging the flash drive to avoid data loss or corruption.
- Back up data – Keep a backup copy of important files stored on the flash drive to avoid losing data if the drive fails. Cloud backup services like Dropbox or external hard drives work well.
- Password protection – Enable password protection or encryption on your flash drive for secure storage of private files. Many flash drives come with built-in encryption software.
- Buy quality – Purchase flash drives from reputable brands and check reviews to avoid getting low-quality drives that fail quickly.
- Storage – Keep the flash drive in a protective case or storage box when not in use to prevent physical damage or loss.
- Avoid overfilling – Leave at least 15% of a flash drive’s storage capacity free to allow the drive to run efficiently.
Following these simple tips will help you get the most out of your flash drive while avoiding common problems.
