Time Machine is an easy-to-use backup utility built into macOS that works by automatically making hourly backups of your Mac to an external drive or Time Capsule. It allows you to go “back in time” to restore a file or your entire system from a previous state in case of data loss or corruption. Setting up Time Machine to back up to an external hard drive is straightforward and can provide peace of mind that you have a reliable backup system in place.
What You Need Before Starting
Before setting up Time Machine on an external hard drive, you will need the following:
- An external hard drive. This can be a hard drive specifically designed for Time Machine backups, or any regular external hard drive such as a USB or Thunderbolt drive. It should have at least the same amount of storage as your Mac’s internal drive, or preferably more.
- A Mac running OS X 10.5 “Leopard” or later. Time Machine is built into the Mac operating system and does not require any additional software.
- A power source for the external hard drive. For desktop drives this will be a power cable, for portable drives the USB or Thunderbolt cable provides power.
It is best practice to use a drive that is dedicated solely for Time Machine backups. The backup drive should have ample capacity to grow as your Mac’s drive fills up over time.
How to Choose an External Hard Drive for Time Machine
When choosing an external hard drive for Time Machine, keep the following criteria in mind:
- Storage capacity – Choose a drive that is at least as large as the internal drive on your Mac, or ideally 2-4 times larger to allow for growth over time.
- Connectivity – USB 3.0, Thunderbolt, or USB-C are the fastest options. USB 2.0 will work but backups may be slower.
- Portability – If you want to store the drive offsite for protection against physical disasters, consider a portable drive. Desktop drives typically require a power adapter.
- Reliability – Look for a drive designed for constant operation and with a long mean time between failures rating.
Popular hard drive manufacturers like Western Digital and Seagate make drives specifically designed for Time Machine. These include extra features like backup software, encryption, and hardware durability.
Desktop hard drives in the 3-5TB range typically offer the best value for performance and capacity. But if you want a portable drive, 1-2TB bus-powered USB drives provide a good balance of portability and capacity.
Always check the manufacturer’s compatibility specifications to make sure the drive you choose will work with Time Machine on your Mac.
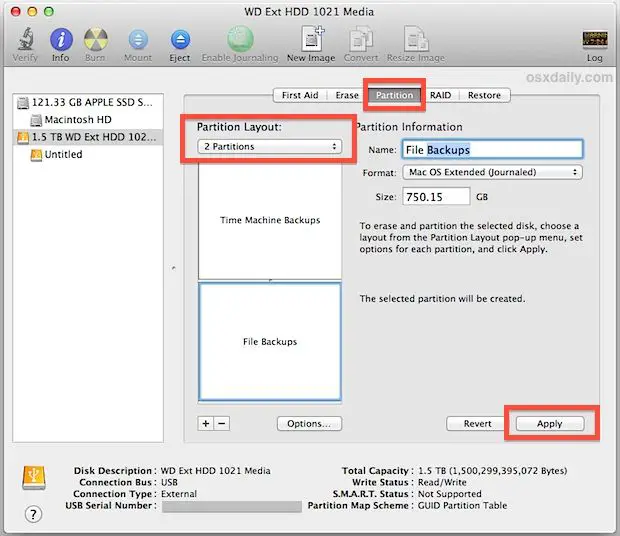
How to Format Your External Hard Drive for Time Machine
Before Time Machine can be used with your external drive, the drive must be formatted properly. Follow these steps to format your drive:
- Connect the external hard drive to your Mac using the appropriate cable.
- Open Disk Utility (located in Applications > Utilities).
- Select your external hard drive from the left sidebar.
- Click Erase at the top of the Disk Utility window.
- For Name, enter “Time Machine Backup” or another name of your choice.
- For Format, select “Mac OS Extended (Journaled).”
- Click Erase to format the drive.
This formats the drive in the Mac OS Extended format and prepares it for use as a Time Machine backup drive.
Setting up Time Machine to Back Up to an External Drive
With your external hard drive properly formatted for Time Machine, you can now set up Time Machine in System Preferences:
- Open System Preferences > Time Machine.
- Click Select Backup Disk.
- Select your newly formatted external hard drive from the list and click Use Disk.
- Enable the switch at the top labeled “Back Up Automatically.”
- By default, Time Machine will back up your entire Mac. To exclude data, click Options and add folders to “Exclude these items from backups.”
- Close System Preferences. Time Machine will initiate a full backup to the external drive and enter an hourly backup schedule.
The first backup may take hours depending on how much data you have. Your Mac will need to remain powered on during this time. After the initial backup, incremental hourly backups are quick and in the background.
Your drive will now:
- Back up hourly increments of your data.
- Show a progress bar in the menu bar when backups are in progress.
- Notify you if the backup drive is disconnected.
- Add local snapshots of your drive so you can restore previous versions of files.
Time Machine will automatically back up the data on your Mac’s internal drive to the selected external drive. Each hourly backup is a snapshot of changed data since the prior backup. This allows you to revisit the state of your data at any given point in time.
How Time Machine Backups Work
Time Machine maintains a set of hourly backups for 24 hours, daily backups for the past month, and weekly backups for all previous months.
This allows you to restore your data from many previous backup states, while efficiently consolidating older backups to save disk space. Here is how the backup history is structured:
- Hourly backups: Time Machine stores hourly backups for the past 24 hours.
- Daily backups: It keeps daily backups for the most recent month.
- Weekly backups: After a month, Time Machine retains weekly backups for all previous months.
- Sparse bundles: Old backups are consolidated to save space. This creates a sparse bundle with blocks of data shared between backup times.
So your backup drive always contains hourly backups for a day, dailies for a month, and weekly backups prior to that. This sliding window gives you the ability to restore from different points in time.
Local Snapshots with Time Machine
In addition to backups to your external drive, Time Machine also maintains local snapshots of your drive’s data. This allows you to browse and restore previous versions of files directly in the Finder. No external drive is required.
These local snapshots provide a secondary backup of your most recent changes. You can access them by entering Time Machine via the menu bar icon or by right-clicking a file and choosing Browse Versions.
How to Restore Files from Time Machine Backup
If you ever need to retrieve an older version of a file, or restore your entire Mac from a Time Machine backup, here is how to enter Time Machine and choose a backup state to restore from:
- Ensure your Time Machine drive is connected.
- Open Time Machine from the Dock or Applications folder.
- Either navigate through the timeline on the right to find a specific file version to restore, or click Enter Time Machine to browse your Mac’s file system in the state it was in during that backup.
- Navigate to the file version you want to restore and click the Restore button.
- To restore the entire Mac from a backup, restart your computer while holding Command-R to boot into Recovery Mode.
- Choose Restore From Time Machine Backup and select a backup state to restore from.
This will retrieve your files or system state from the selected Time Machine backup. You can restore from hourly, daily or weekly backups made at different points in time.
How to Restore an Entire Mac from Time Machine
To restore your entire Mac from a Time Machine backup:
- Restart your Mac and hold down the Command and R keys until you see the Apple logo.
- Select “Restore from Time Machine backup” in macOS Utilities.
- Choose your Time Machine disk and the specific backup date to restore from.
- After selecting the backup, the restore process begins automatically.
- Your Mac will be completely overwritten by the Time Machine backup state you selected.
This will roll your Mac’s operating system, apps, and data back to the state saved in the Time Machine backup you choose. It’s an easy way to get your system up and running again in case of catastrophic data loss or a corrupted drive.
Time Machine Best Practices
To get the most out of Time Machine backups, follow these best practices:
- Perform occasional manual backups before major system changes like software updates. The hourly schedule can sometimes miss key transitional states.
- Use a dedicated drive just for Time Machine. Don’t store other files on the backup volume or you could risk data loss.
- Consider an additional layer of offsite backup in case of theft or destruction of your backup drive. Consider cloud storage or rotating to an offsite drive.
- Check your backup drive’s health periodically using Disk Utility’s First Aid feature. Replace failing drives immediately.
- Maintain at least 10-15% free space on your Time Machine drive to allow room for growth.
Following these tips will help ensure you have a healthy and reliable Time Machine backup strategy.
Troubleshooting Time Machine Issues
If Time Machine is not backing up properly or restores seem faulty, try the following troubleshooting steps:
Backups Not Starting
- Check power and cable connections for the drive.
- Ensure the backup drive has sufficient free space.
- Restart your Mac and external drive if necessary.
- Open Time Machine preferences to verify automatic backups are enabled.
Corrupted Backups
- Use Disk Utility First Aid to check the backup drive for errors.
- Reformat drive if errors cannot be repaired.
- Restart Time Machine backups from scratch.
Restore Issues
- Try restoring again from a different backup time.
- Check your account permissions if some files don’t restore properly.
- Use Disk Utility to verify and repair any drive errors.
Slow Performance
- Ensure Time Machine drive is fast enough with USB 3.0, Thunderbolt, etc.
- Disable automatic backups temporarily before heavy computer use.
- Check backup drive for fragmentation or nearly full capacity.
Following general troubleshooting steps can typically get Time Machine working properly again. But if problems persist, you may need to erase the drive entirely and start fresh backups. Contact Apple support if you cannot resolve issues.
Conclusion
Setting up Time Machine to back up your Mac to an external hard drive is simple and provides added peace of mind. Just connect an external drive, format it correctly, and enable Time Machine automatic backups.
Time Machine will quietly keep hourly backups of your files so you can easily restore precious data in case of loss or disaster. Following best practices like periodic maintenance and an offline copy of your backup will ensure your data stays protected.
With an external hard drive and Time Machine’s automatic backup system, you have a complete solution to prevent data loss and keep your system backed up on macOS.
