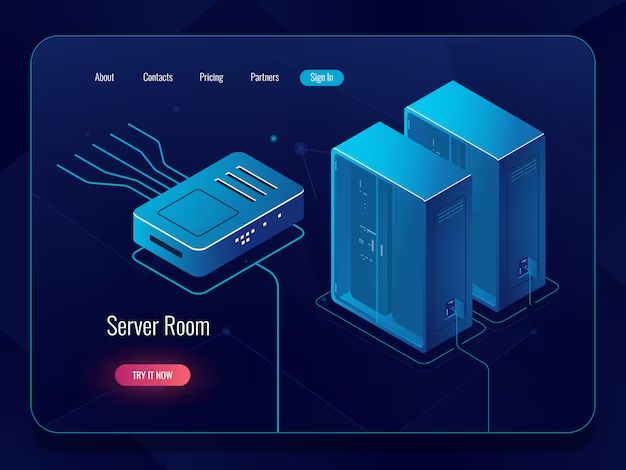
Network-attached storage (NAS) allows you to create storage that is accessible by other devices on your local network. Setting up a NAS gives you a centralized place to store and share files between multiple users and devices. NAS can provide redundant storage, backup capabilities, media streaming, and more. Follow these steps to set up your NAS.
What is NAS?
NAS, or network-attached storage, is a dedicated file storage device that connects to your local area network (LAN). Unlike external USB hard drives that connect directly to a single computer, NAS integrates with the network so any authorized device on the network can access the files. NAS devices contain one or more internal hard drives that provide a large centralized storage capacity.
Benefits of NAS
- Centralized network storage – Store files in one place and access from anywhere on the network
- Shared storage – Allow multiple users and devices to access and share files
- Flexibility – Access files from any networked device like computers, media players, smartphones
- Redundancy – Set up RAID to protect against drive failure
- Backups – Automate backing up of networked devices to the NAS
- Performance – Get faster file access across a LAN compared to external USB drives
- Scalability – Increase storage capacity by adding more hard drives
- Media streaming – Stream videos, music and photos to media players
Types of NAS Systems
There are a few main types of NAS devices:
Consumer/Prosumer NAS
Consumer NAS devices are designed for home users. They offer easy setup, administration, and integration. Most consumer NAS systems run Linux or a NAS-optimized operating system. Many feature intuitive web-based control panels for configuration. Consumer NAS models include:
- Synology DiskStation
- QNAP Turbo NAS
- Asustor NAS
- Western Digital My Cloud
Enterprise NAS
Enterprise NAS models are designed for businesses. They offer advanced features like higher performance, data protection, scalability, virtualization support, and cloud integration. Enterprise NAS runs full-featured operating systems like Windows Storage Server or enterprise Linux distributions. Some examples include:
- Dell EMC Isilon
- NetApp ONTAP
- HP Enterprise StoreEasy
- Oracle ZFS
DIY NAS
Some home users opt to build their own DIY NAS with an old computer or server and free NAS software like FreeNAS or OpenMediaVault. This provides more customization and expandability. However, it requires more technical knowledge versus pre-built consumer NAS options.
NAS vs DAS
How does NAS compare to direct-attached storage (DAS)? DAS refers to external USB drives that directly connect to a computer. Both provide expanded storage, but there are some key differences:
| NAS | DAS |
|---|---|
| Network-accessible storage | Direct attachment to single computer |
| Centralized storage for many users/devices | Accessible only to the attached computer |
| File-level access | Block-level access |
| Accessible simultaneously by multiple clients | Accessible by only one computer at a time |
| Flexible access from anywhere on network | Limited accessibility |
In summary, NAS provides shared network storage that is more flexible and accessible but also more complex. DAS offers a simple plug-and-play storage extension for a single computer.
Choosing a NAS Device
There are countless NAS options available from both consumer and enterprise vendors. Consider the following when choosing a NAS:
Storage Capacity
Determine how much storage space you need, both now and in the future. Many NAS enclosures support multiple drive bays to allow expanding capacity over time.
Drive Types
NAS supports traditional hard disk drives (HDDs) and solid-state drives (SSDs). HDDs offer more affordable capacity while SSDs are more expensive but much faster.
Processor and RAM
More powerful CPUs and more RAM provide better performance when simultaneously accessing the NAS. Look for multicore processors and at least 2GB RAM if possible.
Network Connectivity
NAS devices connect via Ethernet or WiFi. Wired Ethernet provides faster and more reliable connectivity. Ensure the NAS supports gigabit Ethernet for best performance.
Security
The NAS should provide user access controls, permissions, and encryption to secure your data.
Availability Features
Look for RAID support, redundant networking, hot swappable drives, and remote replication for higher availability.
Operating System
The NAS OS determines available protocols, management tools, add-on apps, and ease of use. Pick an OS that matches your needs and technical expertise.
Budget
NAS systems range widely in price from around $100 to over $5000. Set a budget and find models with the necessary features and capacity to meet your needs.
Do your research and choose the right balance of budget, capabilities, and ease of use for your requirements. Buying a 2-bay NAS with room to upgrade capacity later is a common starting approach.
Setting Up NAS Hardware
Once you have selected a NAS enclosure, set up the physical hardware:
- Unpack the NAS and drive bays. Some NAS systems include pre-installed hard drives.
- Install any drives into empty drive bays if needed. Always use vendor-recommended drive models for compatibility.
- Connect the NAS to your router or switch via Ethernet cable.
- Connect the power cable and turn on the NAS. Consult documentation for indicator light meanings.
With the physical NAS connected to your network and powered on, you are ready to configure the software and storage.
Configuring Network Settings
To make your NAS accessible on the network, you will need to configure basic TCP/IP network settings:
- Check the NAS documentation to find its default IP address on the network.
- Type the IP address into a browser to access the NAS web interface.
- Enter any default administrator credentials if prompted.
- Navigate to network settings and configure a static or dynamic IP address as desired.
- Set the subnet mask, gateway, DNS servers and any other network settings.
Be sure to set an IP address and network settings compatible with your network topology. The NAS needs to be accessible from client devices to serve files.
Creating Storage Volumes
Now it’s time to configure your storage pools and volumes on the NAS. This involves decisions like:
- Grouping disks into storage pools
- Selecting a RAID level for redundancy
- Determining volume sizes
- Choosing file system formats (like EXT4, Btrfs, ZFS)
Navigate to the storage or volume management area of the NAS operating system. Here you can:
- Create storage pools from the available drives
- Allocate storage pools to volumes
- Select RAID levels and filesystem formats
- Specify volume sizes
- Customize additional volume settings
- Initialize the volumes to start storing data
Consult your NAS documentation to determine optimum storage pool, volume, and RAID configurations. For redundancy, RAID 1, 5, 6, or 10 are good options.
Volume Access Permissions
You can set access restrictions on NAS storage volumes. Typical permission options include:
- Read/write – Allows full access to read, modify, delete and create files
- Read only – Allows viewing and copying files only
- Deny access – Blocks access to the volume
- Custom – Specialized permission combinations
Set up at least one volume with read/write access to store files. Additional volumes can have more restrictive permissions as needed.
Adding Shared Folders
Within your writable NAS volumes, you can create shared folders. These folders make it easy to group and share files in logical categories. For example, you could create folders like:
- Documents
- Photos
- Music
- Movies
- Backups
To add a folder, right click on the volume name and select “Create Folder” or a similar option. Then give the folder a descriptive name and select any access permissions to apply.
Folder Permissions
You can set the same read/write/deny permissions on individual folders as well. Specific users and groups can also be granted or denied access to folders. Set up folder permissions according to your needs.
Connecting NAS Storage
Once your NAS volumes and folders are configured, connect to them from client devices to start using the storage:
From Windows
- Open File Explorer and click “Map network drive” under Computer.
- Choose a drive letter and enter the NAS server name or IP address.
- Select the folder path to mount and click Finish. Enter credentials if prompted.
The NAS will appear as a new mapped network drive accessible like any other drive.
From Mac
- Open Finder and select Go > Connect to Server.
- Enter the NAS IP address or name using SMB or AFP protocol.
- Click Connect and enter your username and password.
The NAS volume will mount on your desktop or in Finder sidebar for easy access.
From Mobile Apps
NAS vendors provide mobile apps to connect from iOS and Android devices. Install the app, enter your NAS IP or name, and login to create a connection.
Configuring Access Protocols
NAS supports connection via different network file sharing protocols. The primary protocols to enable include:
- SMB – For Windows clients
- AFP – For Mac clients
- NFS – For Linux clients
In your NAS settings, ensure the appropriate protocols are enabled and configured for user access authentication as needed.
Backing up to NAS
A great benefit of NAS is the ability to centrally back up files from other devices on the network. Backup options include:
Cloud Sync
Many NAS operating systems allow syncing folders to public cloud services like Google Drive, Dropbox, and OneDrive. Configure two-way sync for real-time cloud backup.
External Drives
Sync or copy local folders and external USB drives to your NAS periodically for backups. Use built-in backup tools.
Version Snapshots
Leverage NAS native versioning capabilities to take hourly, daily, weekly or monthly snapshots of shared folders.
PC/Mac Backup
Use NAS vendor backup software for Windows and Mac to automate computer backups over the network.
Mobile Backups
Back up photos and videos from mobile devices to your NAS over WiFi using the NAS mobile app.
A scheduled and automated backup strategy prevents data loss and provides easy disaster recovery.
Media Streaming and Serving
Many NAS systems let you stream music, photos and videos to smart TVs, media players, and mobile devices around your home. Features may include:
- Media server to stream content to UPnP and DLNA devices.
- Integrated audio server for music playback.
- Photo gallery to view pictures and albums.
- Video streaming app support like Plex.
- HDMI output to directly connect the NAS to a TV.
Check your NAS user manual for details on enabling its media server capabilities.
Remote Access
Access and manage your NAS from anywhere over the internet with remote connectivity features:
Port Forwarding
Forward ports on your router to connect to NAS services like file sharing and web access over the internet.
Dynamic DNS
Create a persistent domain name that points to your changing public IP address for easy remote NAS access.
VPN Access
Connect remotely via VPN to access your full home or office network including the NAS.
Web Access
Use the NAS device discovery tool or web login to access NAS admin controls and file shares.
Enabling some or all these options allows managing and streaming from your NAS anywhere.
Adding NAS Applications
Many NAS operating systems offer add-on apps and services extending functionality:
- Web Server – Host websites and web apps.
- Surveillance – Connect IP cameras to store and view footage.
- Virtual Machine – Run virtual machines with hypervisor.
- Databases – Host MySQL, PostgreSQL databases.
- DNS Server – Provide local DNS services.
- Source control – Host Git-based code repositories.
- And more…
Browse your NAS application catalog or app store to discover available apps and services to install.
Tips for NAS Care
Follow these tips for maintaining and caring for your NAS:
- Restart the NAS regularly to clear memory, maintain stability.
- Check for and install NAS firmware updates for new features and fixes.
- Monitor disk health via storage utilities. Replace failed drives promptly.
- Clean dust from the NAS enclosure and ventilation fans periodically.
- Ensure the NAS has a dedicated power source and reliable network connection.
- Provide a UPS battery backup to protect the NAS from power loss.
Taking care of your NAS will maximize lifespan, stability and help prevent data loss.
Conclusion
Setting up network-attached storage provides centralized file sharing and backup for your devices. Carefully consider your use case and requirements when choosing a NAS system. Plan out your storage pools, volumes, folders and permissions in advance. Connect to your NAS from Mac, Windows and mobile apps to start enjoying the benefits of network storage!
