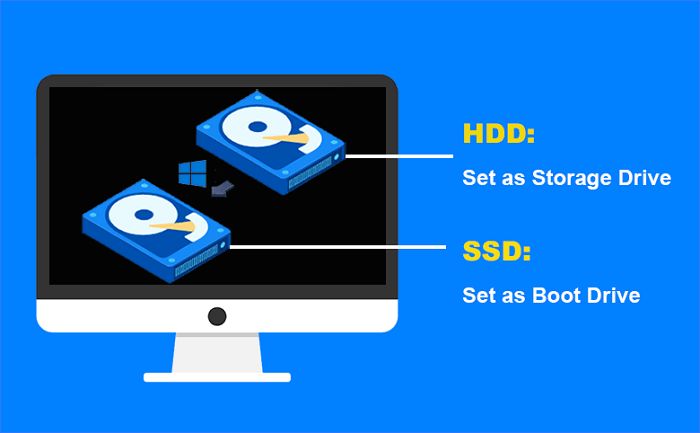
Using a solid state drive (SSD) as your operating system drive and a traditional hard disk drive (HDD) as storage is a common and effective way to get the benefits of both technologies. The SSD provides faster boot and load times for your operating system and applications, while the larger capacity HDD offers abundant and affordable storage space for your files and media.
Benefits of Using an SSD for OS and HDD for Storage
There are a few key advantages to using this type of setup:
- Faster system boot and application launch times – SSDs have much faster read/write speeds compared to HDDs, which improves boot up speed and reduces application load times.
- Faster operating system and software – With the OS installed on the SSD, everything from system boot to opening files and programs will be much snappier.
- HDD provides more storage capacity – HDDs are available in larger capacities than SSDs for less money. So you can store all your media files, documents, photos, videos, etc. on the HDD.
- Cost effective – HDDs are cheaper per gigabyte compared to SSDs. So you get speed where you need it (OS) and capacity for less (HDD for storage).
- Easy to implement – Setting up a system with a smaller SSD for OS and apps and a larger HDD for storage is straightforward.
The combination of the performance of an SSD with the storage capacity of a HDD gives you the best of both worlds at a reasonable cost.
How to Set Up an SSD as Your Operating System Drive
If you have a desktop computer, setting up your SSD as your primary OS drive is a fairly simple process. Here are the basic steps involved:
- Install the SSD – Open up your computer case and mount the SSD in an open drive bay using the necessary cabling/brackets. Make sure it’s securely installed.
- Install your operating system – With the SSD installed, you can proceed with installing your operating system (Windows, MacOS, Linux distro, etc.) directly onto the SSD.
- Configure the SSD as the boot drive in BIOS – Boot into your computer’s BIOS and locate the boot order section. Move the SSD to the top of the boot order so it becomes the primary boot drive.
- Transfer applications to SSD – With your OS fully updated on the SSD, you can begin transferring any applications you want to run faster to the SSD as well.
- Reboot and verify SSD boot – Reboot your computer and verify everything boots from the SSD correctly.
For laptops, the process is largely similar but will likely involve either adding the SSD in place of your existing hard drive or into an open expansion slot like the M.2 slot if available. The laptop manual should provide specific instructions on physical installation.
On some newer systems you may also have the option of using cloning software to mirror your old hard drive contents onto your new SSD for seamless migration. Popular cloning utilities include Samsung Magician, Macrium Reflect and Acronis True Image.
Setting up the HDD for Storage
Once your operating system is up and running on the new SSD, it’s time to configure your HDD for general storage duty:
- Install HDD – Physically install the hard drive with the necessary cabling/brackets just like with the SSD.
- Initialize and format HDD – Boot into Windows/MacOS with the SSD and use Disk Management (Windows) or Disk Utility (Mac) to initialize the new HDD if needed and format it.
- Assign drive letter (Windows) – In Disk Management, assign the next available drive letter to your storage drive.
- Create partitions if desired – Optionally, you can partition the HDD into separate volumes for better organization (for example, partitions for photos, media, documents, etc)
- Migrate data to HDD – You can now begin transferring over your data libraries, files, media etc. to the HDD for storage.
On Macs, this process is very similar although drive letters are not used. Once formatted and mounted, the HDD will appear as standard storage volume you can use Time Machine or direct file transfers to move data over to.
Optimizing SSD Performance
To get the most out of your new SSD setup, there are some additional optimizations you should consider for your OS drive:
- Enable TRIM – TRIM is a system that helps maintain SSD performance by clearing out invalid data blocks. Make sure it’s enabled in your OS.
- Disable hibernation – Hibernation files can take up space and slow down SSDs, so consider disabling this feature.
- Limit programs saving to APPDATA – Limit anything unnecessary writing data to the AppData folder on the SSD.
- Disable pagefile/swapfiles – Move your OS pagefile or swap partition to the HDD instead for less wear on the SSD.
- Align partitions – Make sure any partitions on the SSD are aligned properly to optimize read/write speeds.
- Update SSD firmware – Check for any firmware updates from your SSD manufacturer and update if available.
Follow these tips and your SSD will provide maximum reliability and speed as your new OS drive.
Potential Migration Issues and Solutions
When transitioning your system over to an SSD OS/HDD storage setup, there are a few common issues that may come up:
1. Cloning failures
If you are unable to successfully clone your OS to the new SSD, you may need to perform a clean OS install instead. Be sure to properly back up all your data first.
2. Boot issues after migration
If your system has trouble booting from the new SSD, you may need to reconfigure it as the primary boot device in BIOS. The boot order may need to be reset.
3. Software no longer works
A fresh OS install may cause licensing issues with some software. You may need to reactivate or reinstall programs if they fail to work properly on the new SSD setup.
4. Can’t transfer files from old HDD
An old HDD may have bad sectors or corruption issues preventing file transfers. Attempt data recovery software or reformat the HDD to resolve file transfer problems.
5. OS feels sluggish on SSD
If your OS still feels slow after migrating to the SSD, troubleshoot programs running at startup, enable TRIM, and check for SSD firmware updates to help optimize performance.
Tips for Maintaining Your New Setup
Here are some tips for keeping your SSD and HDD running smoothly after migration:
- Monitor SSD health – Use tools like SSDLife to watch for health indicators like write amplification.
- Keep 25%+ free space on SSD – Having breathing room keeps the SSD operating efficiently.
- Periodically clean install OS – Do a fresh OS install every year or so to clear out accumulated clutter.
- Securely erase old HDDs – If repurposing or disposing of old HDDs, use disk wiping software to erase data.
- Optimize HDD storage – Use selective sync, compression, and disk cleanup tools to optimize HDD space.
- Isolate page, hibernation, and swap files – Keep these files on the HDD for minimal SSD wear.
Following best practices for SSD and HDD health, performance, and security will ensure your setup continues humming along smoothly for years to come.
Frequently Asked Questions
Is an SSD or HDD better for gaming?
An SSD is better for gaming due to much faster load times. Installing games on the SSD will improve level load times and reduce in-game texture pop-in. The HDD can still handle game storage due to large capacity needs.
How do I clone Windows to my new SSD?
Popular drive cloning software like Macrium Reflect and Samsung Magician can clone your Windows installation to a new SSD. This provides a quick and easy migration path to the new drive.
What steps should I take before swapping my OS drive?
Before beginning the migration, be sure to backup all important data, uninstall unnecessary programs, acquire any drive mounting brackets needed, and have OS installation media ready in case the cloning process fails.
Can I use a single SSD for both OS and storage?
It is possible to use a single SSD for both your OS and storage. But this will provide less overall capacity for files and increase wear on the drive. A dedicated OS SSD and storage HDD is generally preferred.
How often should I defragment my HDD?
Modern Windows systems automatically defragment the HDD on a regular basis, so no manual defragmenting is necessary for general storage drives. But more frequent defrags can help optimize high activity drives.
Conclusion
Setting up an SSD to run your operating system and applications, paired with an HDD for ample storage capacity, is one of the most popular and cost-effective PC configurations. By following the steps outlined above for installing each drive properly, migrating your OS, apps, and data over, and optimizing each drive, you can have a high-performance system running smoothly in no time. Keeping up with routine maintenance and optimization best practices will ensure your SSD and HDD tandem provides a responsive, reliable, and spacious storage solution for years to come.