What causes speaker crackling?
One of the most common causes of crackling from speakers is a buildup of dust or dirt on the speaker components. Over time, dust can accumulate on the speaker cones, surrounds, and voice coils. This dust interferes with the proper movement of the speaker driver, causing the voice coil to rub or scrape against other components. The result is a crackling or popping noise as the speaker tries to reproduce audio. Dirty potentiometers or audio jacks can also cause crackling for similar reasons. Dust buildup causes uneven electrical resistance, which leads to small audio dropouts that are heard as annoying crackles.
To remedy dust issues, use a vacuum with a brush attachment to gently remove dust from accessible speaker components. For potentiometers and jacks, use electrical contact cleaner to dissolve grime. In severe cases, speakers may need to be disassembled for a deeper clean. Prevent future dust buildup by placing speakers in a dust-free environment, or using dust covers.
Check the Speaker Connections
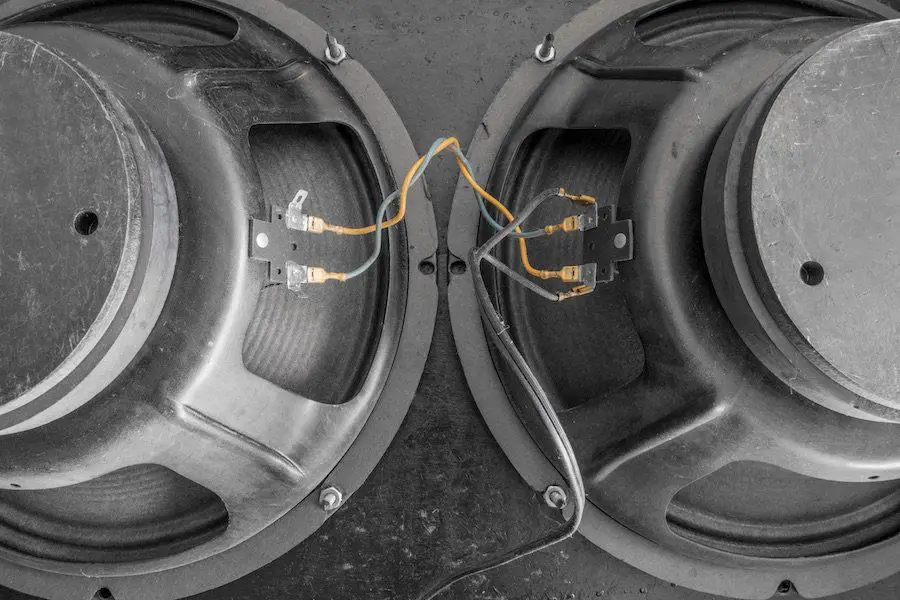
One of the most common causes of speaker crackling is a loose wire or cable connection. Over time, speaker cables can become loose due to vibration, movement, or simply from being plugged and unplugged repeatedly. Loose connections create intermittent contacts, which can cause the audio signal to cut out briefly, resulting in a crackling or popping noise.
Carefully inspect all the speaker connections, both at the speaker end and at the amplifier/receiver. Make sure the speaker cables are securely inserted all the way into the terminals and fastened tightly. Give each cable a gentle tug to confirm it is locked in place and not loose. Also check any connection points between speakers and subwoofers. If your speakers use spring clip or binding post terminals, tighten them down firmly with your fingers or a small wrench to ensure a solid contact.
For speakers with RCA connections, examine the plugs to make sure the center pin is not bent or pushed back. A damaged or improperly seated RCA plug can cause crackling. Push the plugs in securely until they click and lock into place. If the connections are loose, damaged, or corroded, replace the faulty cables.
By systematically checking every speaker cable and connection point in your system, you can rule out a bad contact as the cause of crackling and move on to other troubleshooting steps if needed.
(Source: https://www.selby.com.au/blog/why-your-speakers-crackle-and-how-to-fix-it)
Inspect the speaker components
One of the most common causes of crackling speakers is damage to the physical components. Carefully inspect the speaker drivers and enclosures for any issues. Look for tears, punctures, or wrinkling in the cones and surrounds. The spider and voice coil can also become damaged over time and cause distortion. Examine the terminals, wires, and connections as well for corrosion or looseness. If you find any physical damage, the speaker components will likely need to be repaired or replaced to stop the crackling (Source).
Surround damage like tears or deterioration can allow the cone and voice coil to move irregularly and make scratching or buzzing noises. Pushing the cone gently can help identify any looseness, stiffness, or scraping that indicates a problem. Look inside the cabinet for detached bracing or insulation as well. Any internal component coming loose can vibrate against others and cause annoying distorted sounds. Carefully inspecting each element of the drivers and enclosure can reveal what needs to be fixed or replaced (Source).
Clean the speaker drivers
Dust, dirt, and debris accumulation on the speaker drivers can cause the sound to crackle or pop. Carefully clean the speaker drivers using compressed air or a soft brush to remove any particles that may be interfering with the speaker cone movement or vibration.
Use a can of compressed air (the kind used for cleaning computer keyboards) and hold it about 6 inches away from the driver. Give it a few quick blasts to dislodge any dust or debris from the cone, basket, and magnet structure. Avoid blowing the dust further inside the speaker cabinet.
You can also use a very soft brush or lint-free cloth to gently wipe the surface of the speaker cone, being careful not to push on it or damage it. Brush in a circular, outward motion from the center dust cap to the outer edge. This will pick up any stuck-on particles without pressing down on the delicate speaker cone.
Inspect the driver surround (the flexible rim around the cone) for any tears, cracks, or rotting. Clean around the speaker surround gently using a cotton swab. Damaged surrounds can lead to poor cone control and cause distortion.
Be careful not to get any liquids on the speaker components while cleaning. Allow any damp surfaces to fully dry before reconnecting power.
Cleaning your speakers regularly with compressed air and a soft brush will help reduce future dust buildup that contributes to crackling.
Replace worn speaker parts
Over time, certain speaker components can degrade and cause crackling. The surrounds, voice coil, spider, and tinsel leads are common culprits.
Surrounds are the flexible rings that suspend the speaker cone and allow it to move freely. As surrounds age, they can become brittle or warped. This restricts cone movement and causes distortion. Replacing old surrounds is an affordable repair that can restore performance. Select surrounds made specifically for your speaker’s make and model.
The voice coil is a small wire winding attached to the rear of the speaker cone. It moves within the speaker’s magnetic gap to drive the cone back and forth. If the voice coil wire is damaged or detaching from the cone, it will crackle. Replacing a blown voice coil requires soldering and special alignment tools.
The spider holds the voice coil in position yet allows it to move. Spider cracking is another common cause of speaker crackling. Installing a new spider matched to the speaker requires special adhesive and centering techniques.
Lastly, degraded tinsel leads that connect the voice coil to the speaker terminals can cause crackling. Carefully soldering new tinsel leads without damaging the delicate voice coil is recommended.
For best results, replace worn speaker components as a full repair kit specific to your make and model. Kits include the properly matched surrounds, voice coil, spider, and tinsel leads for a complete fix.
Consider an amplifier issue
Sometimes speaker crackling can be caused by a problem with the amplifier rather than the speakers themselves. Check all connections going into and out of the amplifier, including RCA cables, speaker wire connections, and power cords. Make sure all connections are secure and not damaged. Wiggling cables and connections could expose a faulty wire.
Check the amplifier settings as well. If there are EQ or gain settings turned too high it could introduce distortion and crackling sounds. Try resetting the amp to default settings and gradually testing with increased volume and boosts. If possible, try connecting another set of speakers to the amplifier. If the new speakers crackle and pop, then the amp is likely the root cause.
As amplifiers age, they can begin to wear out and degrade audio performance. An overly dusty or hot amp can also start to crackle. Consider inspecting the amp chassis and internal components for any signs of damage or excess wear. If it’s an older unit, it may need to be serviced or replaced.
See this article for more tips on diagnosing amplifier issues that cause speaker crackling.
Try a ground loop isolator
A ground loop isolator can help filter out noise caused by a ground loop, which occurs when there are multiple paths to ground in an audio system (Source). This can introduce hums, buzzes, or crackling into the audio signal. A ground loop isolator breaks the connection between the audio ground and the system ground, eliminating the alternate path and filtering the noise.
Ground loop isolators are inexpensive and easy to use. Simply connect the isolator between the audio source and speakers or amplifier. This inserts the ground loop isolator in the signal path to filter interference before it reaches the speakers. A high quality isolatorcan filter noise without degrading the audio quality. This makes it an easy first step to try for diagnosing mysterious crackling or buzzing sounds.
Use ferrite chokes
Ferrite chokes (also called ferrite beads or ferrite cores) can help eliminate speaker crackling caused by electromagnetic interference (EMI) or radio frequency interference (RFI). Ferrite chokes work by absorbing EMI/RFI that can travel along speaker cables and induce noise in the speaker signal.
Look for ferrite chokes designed for suppressing EMI/RFI in audio applications. These typically contain manganese-zinc or nickel-zinc ferrite cores that are effective from tens of kHz up to a few hundred MHz. Snap several chokes over each speaker cable, as close to the speaker as possible.
Ferrite chokes are particularly helpful for speakers placed near potential sources of interference like power cables, fluorescent lights, motors, TVs, and other electronics. They allow the audio signal to pass through the cable unaffected while damping down electromagnetic noise.
Check audio forums like Reddit for specific ferrite choke recommendations from other users who have eliminated speaker crackling. Using the right chokes for your setup is key.
While ferrite chokes are an affordable and easy solution, note that they may not resolve all causes of speaker crackling. Still, they are a worthwhile first step before exploring more involved troubleshooting.
Isolate the crackling speaker
To determine if the issue is with an individual speaker or if multiple speakers are affected, try isolating the problematic speaker. Disconnect all other speakers and test the crackling speaker by itself, connected to the amplifier or receiver. If the crackling persists through that one speaker alone, the issue is likely with that speaker’s components or wiring. Check the connections and wires for any looseness, corrosion, or damage. Inspect the speaker components like the woofer and tweeter. If the speaker crackles on its own but not when connected with other speakers, it points to a problem with that individual speaker.
If you have multiple speakers crackling, the issue may be with your amplifier, receiver, or source input. However, isolating speakers is still a useful troubleshooting step to determine which ones are affected and rule out any problems with individual speaker connections or components. This can help narrow down where the root of the issue lies.
Sources:
https://www.gear4music.com/blog/speakers-popping/
https://www.selby.com.au/blog/why-your-speakers-crackle-and-how-to-fix-it
When to call a professional
There comes a point when crackling speakers require a professional diagnosis and repair. If you’ve exhausted the DIY troubleshooting steps of checking connections, cleaning drivers, replacing parts, and isolating issues without resolving the problem, it’s best to call in an expert.
Professionals have the specialized tools and experience to properly diagnose the root cause of persistent crackling. This can range from faulty components and bad solder joints to more complex amplifier, crossover, or grounding problems. They also have access to manufacturer service manuals and schematics.
A technician can methodically isolate the issue through signal tracing and testing. Components like drivers, crossovers, and capacitors can be checked or replaced as needed. Proper repairs can be made to degraded solder joints or corroded terminals. Grounding problems and interference can be addressed.
The right repairs by a qualified professional can restore your speakers to factory performance, with clear, crackle-free sound. Costs vary depending on specific issues, but are often reasonable compared to the benefits of properly functioning speakers.