Windows 11 includes a built-in system file checker that can scan for and repair corrupted system files. This process runs automatically during certain events like booting up or recovering from an unexpected shutdown. The system file checker reviews important Windows files against a known good backup copy. If any discrepancies are found, the system file checker will replace the corrupted files with the correct version from the backup.
While this scanning and repairing process helps maintain the integrity of system files, some users may want to disable or skip it in certain situations. This article will examine when and why Windows performs these automatic scans, and provide instructions on how to prevent scans from occurring.
When Does Windows 11 Scan Drives?
Windows 11 will automatically scan and repair drives in two main scenarios:
On boot up – Windows includes a feature called Disk Check that runs every time your PC boots up. Disk Check scans the hard drive for any errors or issues. If any are found, it will attempt to repair them automatically. This helps ensure your drive stays in good health. Scans on startup typically don’t take very long.
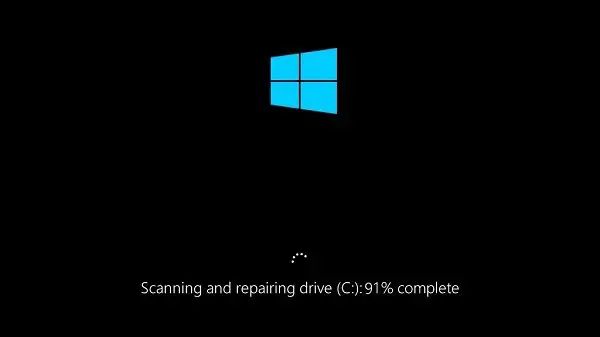
After unexpected shutdowns – If Windows does not shut down properly, such as after a power outage, crash, or force restart, it was not able to run its usual shut down procedures. This includes flushing cached file system writes and updating drive metadata. Upon the next boot up, Windows 11 will run an extensive scan to check for any potential file system corruption or disk errors caused by the improper shutdown. This is the “Scanning and repairing drive” process you may see, which can take much longer than a normal startup scan.
Understanding the Scanning and Repairing Process
The scanning and repairing process that Windows 11 runs on boot or after an unexpected shutdown is designed to check for errors in system files and attempt to fix any problems it finds. It utilizes a tool called the System File Checker (SFC).
When started, SFC will scan critical operating system files for any errors or corruption. According to TechRepublic, SFC specifically checks the following:
- Windows system files
- File system structure
- Boot files
- Critical operating system files
If any corrupted files are detected during the scan, SFC will try to replace them with a cached, unmodified version of the file from %WinDir%\System32\dllcache. This helps restore original system files that may have become altered or damaged in some way.
Overall, the scan helps identify and repair errors to core system files, preventing potential stability or performance issues on a Windows 11 computer.
Why Scanning Occurs and Is It Necessary?
Windows automatically scans and repairs drives to ensure their integrity and prevent potential data loss. The scanning process looks for logical errors in the file system structure as well as bad sectors on the physical disk (Source). Scanning occurs on startup after an improper shutdown, which could potentially cause file corruption or disk errors. By proactively checking the drives, Windows can detect and repair issues before they result in serious problems.
While the scanning process may seem inconvenient, especially when it slows down boot time, it serves an important preventative purpose. Ensuring the logical integrity of the file system helps avoid situations where files go missing or become corrupted down the line. Checking for physical errors also prevents read/write issues that could render data inaccessible. Overall, periodic scanning helps maintain optimal drive health and reduces the chances of catastrophic data loss (Source). So even though scanning may be annoying, it’s a beneficial maintenance task that identifies and resolves problems early.
Stopping Automatic Scans on Boot
One of the main triggers for the automatic scanning and repairing process in Windows 11 is fast startup. With fast startup enabled, your PC doesn’t fully shut down – instead, it hibernates the kernel session to allow booting faster.
According to this Microsoft forum post, this hybrid shutdown state can sometimes cause issues that lead Windows to run a scan on the next boot. Disabling fast startup prevents this hybrid state, which should stop automatic scans on regular boot.
To disable fast startup:
- Go to Control Panel > Hardware and Sound > Power Options
- Click “Choose what the power buttons do”
- Click “Change settings that are currently unavailable”
- Uncheck “Turn on fast startup”
You can also access these options by searching for “Power & sleep settings” in the Start menu and clicking “Additional power settings” – “Choose what the power buttons do” – “Change settings that are currently unavailable”.
Disabling fast startup means your PC will do a full shutdown and cold boot each time, avoiding the hybrid state that triggers scans. Just keep in mind boot times will be slower.
Preventing Scans After Unexpected Shutdown
One of the most common triggers for Windows 11 to scan and repair drives is after an unexpected shutdown or crash. This can occur if your PC loses power suddenly, encounters a blue screen of death, or freezes and requires a hard reboot. To help prevent these situations:
Configure autosave and recovery settings in Windows 11 to automatically save your work frequently. This will reduce the chance of data loss when a crash occurs. Go to Settings > System > Recovery and enable “Save clipboard content and refresh apps when signing back in after a restart.” You can also adjust the frequency of backups under “Advanced startup.”
Always shut down your computer properly through the Start menu, rather than holding down the power button for a hard shutdown. Allow Windows time to close any open programs and processes cleanly. This will minimize file corruption that can trigger scanning and repairs.
Check for and install the latest Windows updates, GPU drivers, and other system software. Keeping your machine up-to-date can increase stability and reduce instances of crashing.
If crashes persist, you may need to troubleshoot hardware issues, overheating, malware infections, or buggy software that is causing the problems. Addressing the root cause will be more effective than just preventing the resulting drive scans.
Skipping Scans When They Occur
If a disk check starts scanning while Windows 11 is booting up, there is a way to skip the scan process so you can boot directly into Windows.
When the “Scanning and repairing drive” message appears, you will see a timer counting down from 10 seconds. During this time, you can press any key to stop the scan so that Windows boots normally.
If you miss the 10 second window, you can open Task Manager by pressing Ctrl + Shift + Esc. In Task Manager, find the process called “Windows Explorer” and end the task. This will stop the scan and allow you to continue booting into Windows.
Another method is to modify some registry settings to disable the auto-scanning behavior. You can navigate to HKEY_LOCAL_MACHINE\SYSTEM\CurrentControlSet\Control\Session Manager in the registry. Change the “BootExecute” value from “autocheck autochk *” to just “autocheck autochk”. This will prevent the automatic scan trigger on reboot.
Just keep in mind that skipping scans repeatedly may allow disk errors to accumulate. It’s generally recommended to let occasional scans run to completion when possible. But in a pinch, you can use these methods to boot directly into Windows and avoid waiting for the scan.
Source: https://www.howtogeek.com/363321/how-to-skip-a-windows-10-automatic-repair-at-startup/
Disabling Scans Entirely
If you want to fully disable drive scans in Windows 11, there are a couple methods you can use:
Edit Group Policy settings: You can use Group Policy Editor to set the “Turn off automatic restart on system failure” policy to disabled. This prevents chkdsk from running on reboot. Refer to this Reddit discussion for step-by-step instructions.
Change EnableAutoChk registry value: You can edit the Registry and set the value for EnableAutoChk to 0 to disable automatic chkdsk scans. As explained in this Microsoft forum post, this prevents scans on restart but does not disable chkdsk entirely.
Fully disabling drive scans is not recommended, as you lose the benefits of preventing and fixing disk errors. Use these methods cautiously.
Considerations Before Disabling Scans
Before deciding to disable drive scanning entirely, it’s important to consider the potential downsides. Disabling scanning can leave your system more vulnerable to data corruption and make troubleshooting problems more difficult.
One key risk is an increased chance of data loss or corruption. Regular scanning helps catch errors and file system problems early before they have a chance to spread and cause major issues. Without scanning, corrupted data could go undetected, potentially leading to crashes, lost files, or the inability to access drives.
Scanning also makes it easier to troubleshoot computer problems related to storage. Logs from scanning and repair provide key clues that can help diagnose crashes or data access issues. With scanning disabled, you lose this insight into potential drive failures or file system problems.
Overall, fully disabling drive scanning is not recommended for most users. The benefits of regular scanning in preventing problems typically outweigh the minor inconvenience. If you do choose to disable scanning, make sure to closely monitor your system and watch for any signs of data corruption or access issues. Maintaining backups is also critical in case files need to be restored after corruption.
Conclusion
Windows automatically scans and repairs drives to check for and fix errors that could lead to data corruption or system instability. While this process usually runs smoothly in the background, it can be inconvenient when the scans and repairs cause long delays during startup or after an unexpected shutdown.
Before considering disabling drive scans entirely, try adjusting settings to skip scans when possible or prevent scans from running at inconvenient times. Scans are generally beneficial for protecting your data and system health, so weigh the risks and benefits before turning them off completely.
If you do decide to disable scans, be sure to periodically back up your data and run manual scans when convenient. Skipping too many automatic scans could allow errors to build up over time. Overall, adjust settings thoughtfully to optimize system scans and repairs for performance without compromising reliability and data integrity.