Quick Answer
Transferring photos directly from your computer or device to an external hard drive is a straightforward process that can be done through your operating system’s file manager. The key steps are:
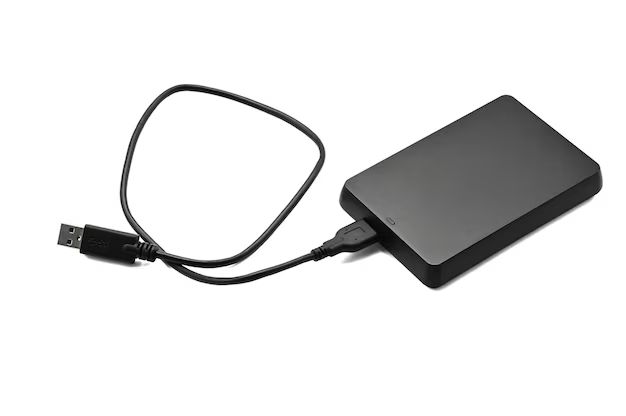
- Connect the external hard drive to your computer via USB cable.
- Open the folder containing the photos you want to transfer.
- Select the photos and copy or cut them.
- Open the external hard drive in the file manager.
- Paste the photos into the external hard drive.
This will copy the photo files so they exist in both locations. To move the photos so they only exist on the external hard drive, select “Move” instead of copy/paste. Be sure to eject the hard drive safely when finished transferring to prevent data loss.
Connecting the External Hard Drive
The first step to transfer photos to an external hard drive is to connect it to your computer. Most external hard drives connect via USB cable. Here’s how to connect:
- Plug the USB cable that came with your hard drive into the external hard drive.
- Plug the other end of the USB cable into an open USB port on your computer.
- If your external hard drive requires external power, plug the power cord into the hard drive and a power outlet.
- Allow your computer a few seconds to recognize the new connection.
- You may get a notification that the drive has been connected and is ready to use.
USB ports are typically located on the sides or back of a desktop computer. For laptops, check the sides or edges. Most hard drives will light up or make a sound when connected and powered on properly.
Once connected, the external hard drive should appear as a new drive letter in File Explorer on Windows or Finder on Mac. This means it’s ready for transferring photos.
Locating the Photos to Transfer
Before you can transfer photos to the external hard drive, you need to locate the specific photos you want to move. Here’s how:
- Open the folder where the photos are currently saved on your computer.
- This is often your Pictures folder or Photos app, but may be saved elsewhere.
- You can browse all folders and storage drives from File Explorer or Finder to find them.
- Once you’ve opened the folder with the photos, select the ones you want to transfer.
To select multiple photos on Windows:
- Press Ctrl on your keyboard and click each photo you want to transfer.
- Or, click the first photo, hold Shift, and click the last photo to select a range.
On Mac:
- Press Command on your keyboard and click each photo to select.
- Or, click the first photo, hold Shift, and click the last photo to select a range.
Once selected, the photos will appear highlighted. They are now ready for copying.
Copying Photos to the External Drive
With the external hard drive connected and photos selected, you can now copy or cut and paste the photos to the drive:
- Select Copy from the top menu (or press Ctrl/Command+C).
- Open the external hard drive in a new File Explorer/Finder window.
- Select a target folder on the external hard drive or select Paste to save directly to the drive.
- Choose Paste from the top menu (or press Ctrl/Command+V).
The photos will now copy from your computer to the external hard drive. You can view the transfer progress in the notification area. Copying large folders with many photos will take longer.
Instead of copying, you can choose Cut to move the photos so the originals are removed from your computer after pasting to the external drive. Just be sure you have backups in case the transfer fails.
Safely Ejecting the External Hard Drive
After successfully transferring photos to the external hard drive, it’s important to safely eject the drive before unplugging it. This ensures all writes have finished.
- On Windows, click the “Safely Remove Hardware” icon in the system tray and select the drive.
- On Mac, click the eject icon next to the drive in Finder.
- Wait for the confirmation that it’s safe to remove the hardware.
- Unplug the USB cable from your computer.
If you don’t eject the drive properly, you risk corrupting data on the drive or losing photos. Once ejected, it’s safe to disconnect the cables and store the drive.
How to Transfer Photos Faster
If you are transferring a lot of photos or large files to the external drive, there are tips to speed up the transfer:
- Use a USB 3.0 or USB-C cable and port for faster data speeds.
- Connect the drive directly to the computer instead of through a hub.
- Copy large batches of photos at once instead of individually.
- Close any other programs using bandwidth during the transfer.
- If hard drive has option for quicker disk write speeds, enable that in settings.
Upgrading to a high speed solid state external drive can also greatly improve transfer speeds compared to traditional hard disk models.
Backing Up Photos to the Cloud
While external hard drives provide physical backups, also consider backing photos up to cloud storage for offsite protection:
- Google Photos – Provides unlimited compressed storage for free.
- Microsoft OneDrive – Integrates with Windows and includes 5GB free.
- Apple iCloud – Easy auto-backup for iPhone photos and 5GB free.
- Amazon Photos – Free storage for Prime members.
- Dropbox – Popular cloud storage with 2GB free.
Cloud backups help protect photos from local disasters like drive failures, fires, or theft. Just sync photos to cloud storage and access them anywhere.
Troubleshooting Photo Transfers
In some cases, you may encounter issues trying to transfer photos to the external hard drive. Try these troubleshooting tips:
| Issue | Solution |
|---|---|
| External drive not detected | Reconnect drive and cables. Try a different USB port. Ensure drive is powered on. |
| Photos won’t copy | Check for errors and try again. Verify there is enough free space on drive. |
| Transfer stalled or frozen | Restart computer and retry transfer. Move photos in smaller batches. |
| Photos missing after transfer | Eject drive properly after transfer finishes. Check source folder for photos. |
| Slow transfer speeds | Use USB 3.0, close other programs, disable USB hubs. |
If issues continue, search for your specific error message online for solutions. Contact the external hard drive manufacturer for technical support if needed.
Conclusion
Transferring photos to an external hard drive is a quick and easy way to back them up for safekeeping and free up primary computer storage space. Just remember to use proper eject methods for the drive and consider an additional cloud backup for offsite protection. With a little care, external drives are great long-term homes for your precious photo memories.